
HSG60 and HSG80 Controller and HSx80 Cache Module Replacement Procedures for Array Controller Software V8.7x-x Release Notes

Replacing HSx80 Cache Modules in Single and Dual-Redundant Controller Configurations
41HP StorageWorks HSG60 and HSG80 Controller and HSx80 Cache Module Replacement
Procedures for Array Controller Software V8.7x-x Release Notes
Replacing HS
x
80 Cache Modules in Dual-Redundant Controller
Configurations
To remove or replace an HSx80 cache module in a dual-redundant controller
configuration, perform the instructions below.
Caution: ESD can easily damage the cache module or a DIMM. Wear a
snug-fitting, grounded ESD wrist strap when completing controller cache
module removal and installation procedures.
Note: Refer to Table 2 on page 20 for information on symbols used throughout these
instructions.
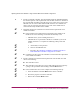
Removing an HS
x
80 Cache Module from Dual-Redundant Controller Configurations
Perform the following steps to remove an HSx80 cache module in a
dual-redundant controller configuration.
1. For the controller associated with the cache module to be replaced, complete
the following substeps:
a. Connect a PC or terminal to the maintenance port.
b. Run VTDPY by entering the following command:
RUN VTDPY
c. Record which units have I/O activity.
d. Exit VTPY by pressing Ctrl+Y.
Note: In Transparent Failover mode, units that failed over due to a RESTART
command will revert back to preferred controller after about 1 minute. The next step
may not show that the units have failed over.
e. Restart the controller by entering the following command:
RESTART THIS_CONTROLLER
f. Disconnect the PC or terminal from the maintenance port of the controller
having its cache module replaced.