
HP Software File Migration Agent Installation and Administration Guide (September 2009)

72 | Best Practices
Create a new managed volume
To create a new managed volume:
1. Start FMA MMC Snap-In from Windows Start menu. (Start → Programs → HP StorageWorks File
Migration Agent
→ FMA Configuration)
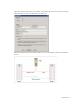
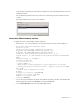
2. Select the Managed Volumes item. All NTFS volumes are displayed.
3. Right-click the corresponding volume entry to display the context menu.
4. Select the New item in the context menu.
5. Reboot the FMA system now.
6. The creation of a new managed volume is finished.
Note For further information about managing volumes, see Managed Volumes on page 45.
Create file policies
To create and schedule migration rules on a managed volume:
1. Start FMA MMC Snap-In from Windows Start menu. (Start → Programs → HP StorageWorks File
Migration Agent
→ FMA Configuration)
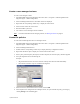
2. Select the Managed Volumes item.
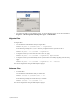
3. Double-click the corresponding volume entry to display the Policy Configuration window.
4. Right-click the Policies pane to display the context menu and select New.
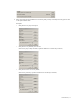
5. Enter a policy name and policy description, and select the path, for which the policy should be applied.
6. Set up the migration rules on the Filtering tab.
Example:
• Migrate all files that have not been accessed for 180 days and release the files immediately.
• Files with the extension *.tmp are excluded from migration.
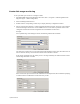
7. Select the archives, where data needs to be stored, and click OK.
8. After all policies are configured for the managed volume, set up the schedule for policy processing by
clicking Change in the Scheduling pane.