
Brocade Fabric OS Encryption Administrator's Guide v6.3.0 (53-1001341-02, July 2009)


Encryption Administrator’s Guide 225
53-1001341-02
The HP Secure Key Manager
D
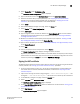
15. Copy the key contents, beginning with ---BEGIN CERTIFICATE REQUEST--- and ending with
---END CERTIFICATE REQUEST---
. Be careful not to include any extra characters.
16. From the Security tab, Certificates and CAs, select Certificates. From the certificate list, select
the name of the certificate being signed.
17. Select Install Certificate.
18. Paste the certificate data from step 15, and select Save. The certificate status is now Active.
Downloading the local CA certificate file
This procedure requires selection of the local certificate authority name (CA name) created using
the “Setting up the local certificate authority” procedure. Have the CA name available so you will be
able to select the correct name from the Local Certificate Authority List. This procedure also
requires you to enter the server certificate name created using the “Adding a server certificate for
the SKM appliance” procedure. Be sure to have the server certificate name available.
1. Select the Security tab on the SKM key manager.
2. Select Local CAs under Certificates and CAs.
The Certificate and CA Configuration page is displayed.
3. Select the local certificate name from the CA Name column in the Local Certificate Authority
List.
4. Select Download.
5. After the download completes, save the file locally, and rename the file to change the file
extension from .cert to .pem (e.g., from hpskm_cal.cert to hpskm_cal.pem).
6. Select the Device tab on the SKM key manager.
7. Se le ct KMS Server under Device Configuration.
The Key Management Services Configuration page is displayed.
8. Select Edit under KMS Server Settings.
9. Click the check boxes for the following:
- Use SSL
- Allow Key and Policy Configuration Operations
- Allow Key Export
10. Type in the server certificate name in the Server Certificate field.
11. Select Save to save these settings.
12. Select Edit under KMS Server Authentication Settings.
13. Select Required for Password Authentication.
14. Select Save to save these settings.