
HP StorageWorks EML E-Series Ultrium 1840 tape drive moduleupgrade or replacement service guide (AH682-96001, October 2007)

5 Replacing an LTO2 or LTO3 tape drive
in a library that already has an LTO4
tape drive
5.1 Record library set t ings
Replacing an LT
O2 or LTO3 tape drive with an LTO4 tape drive requires
all host mappi
ng, partitioning, access control, and FC speed settings to
be cleared out and manually re-entered at the end of the replacement
procedure. In preparation for this, use Command View TL or the
Interface Manager CLI to write down all these set t ings before beginning
the drive replacement. Because the hardware and device paths will
change, ETLA’s save/restore features can not be used to re-enter old
settings.
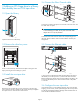
5.2 Open the library
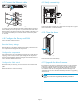
Open the back doors of the library.
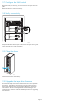
5.3 Remove the old tape drive
Unload any tape cartridges in the drive to be removed using your
application software or the library operator control panel (OCP). Use
your backup software to stop librar y activity.
10546
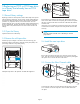
Identifythetapedrivetobereplaced.ThefaultLEDmightbelit.
10547
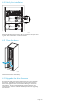
DisconnecttheFCcablefromthedrivetobereplacedbypressing
down on the cable connector tab and pulling the connector away from
the drive. Disconnect the other end of the FC cable from the interface
controller card.
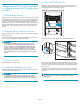
If necessary, use a screwdriver to loosen the captive screw at the right
side of the drive module. Grasp the drive and pull the drive from the
drive bay.
NOTE:
Leave the interface controller card in the library to maintain
pr oper airflow.
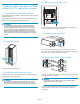
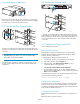
5.4 Install the new tape drive
11551
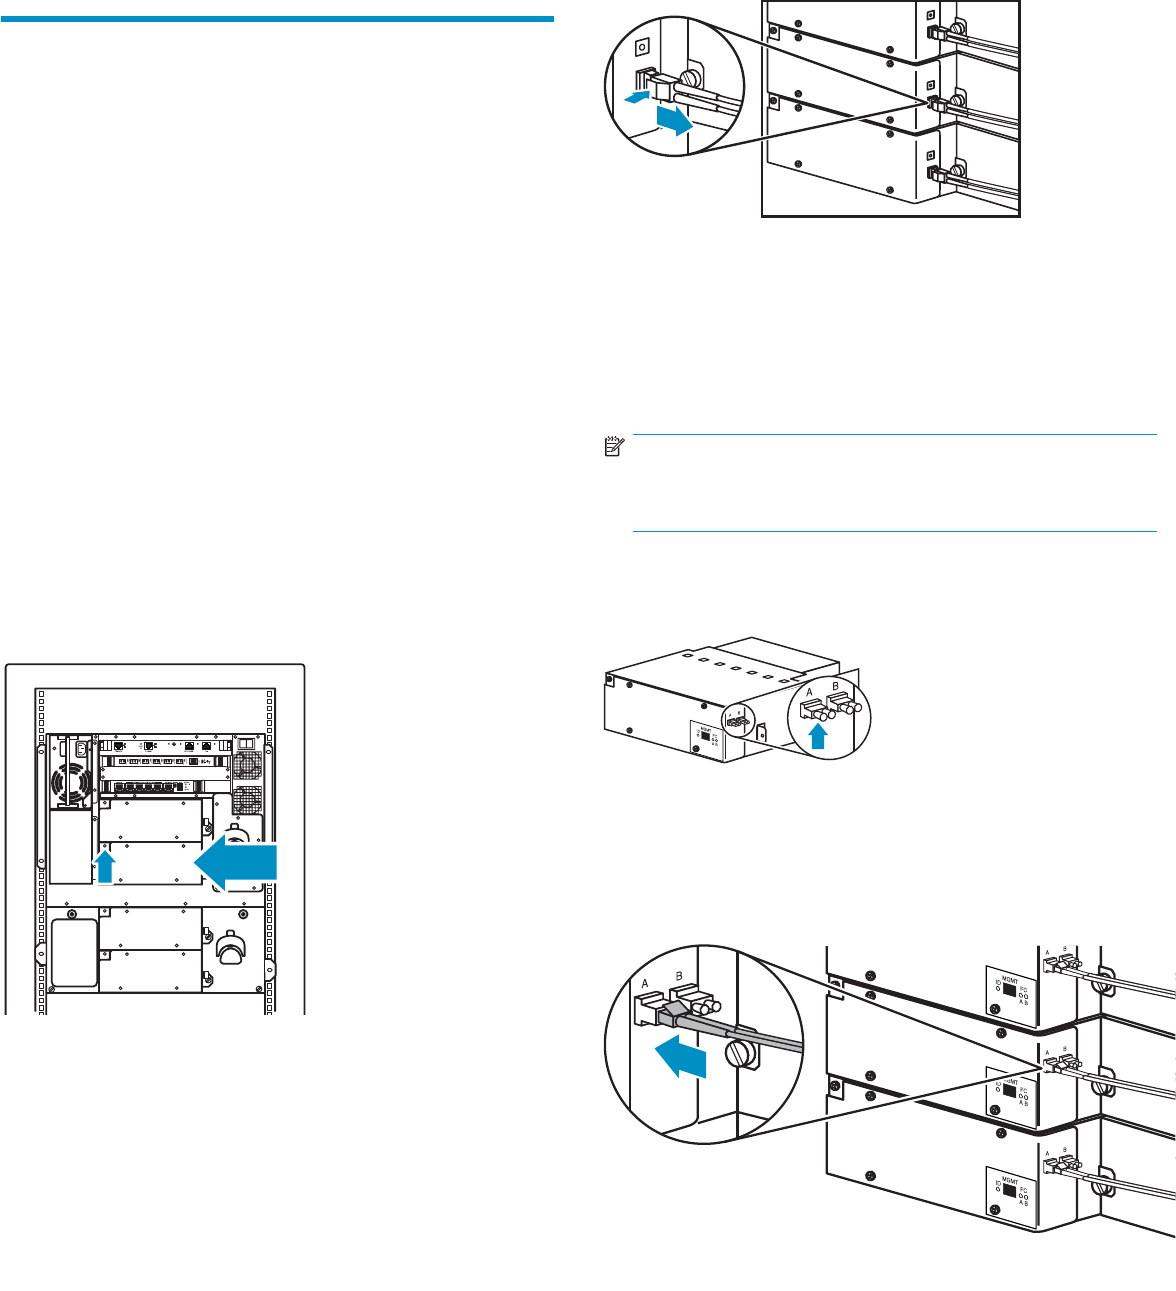
Remove the end cap from the port A FC connector on the new tape
drive.Insertthenewdrivemoduleintothevacantdrivebayandtighten
the captive screw to secure the drive to the chassis.
5.5 Co
nnect the Fibre Channel cable
11552
Connect the F C cable you removed from the old tape drive to the port
A FC connector on the new tape drive. The FC cable should click
into place.
Page 6