
HP Enterprise EML E-Series LTO4 or Later Tape Drive Replacement Instructions


3. Install the switch for the internal network using the
installation instructions included in the Internal
Network Kit.
IMPORTANT: Do not connect the switch
to the public/external LAN. The switch is
used for internal library communication on
the internal library network. Connecting it
to a public/external LAN can cause library
components to perform incorrectly or report
failures.
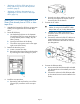
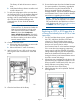
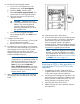
4. Remove the drive bay cover.
a. Locate a vacant drive bay.
b. Remove the face plate covering the drive bay
by removing the screw holding it in place.
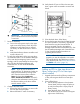
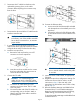
5. Install the new tape drive.
a. Remove the end cap from the port A Fibre
Channel (FC) connector on the new tape
drive.
b. Insert the new drive module into the vacant
drive bay and tighten the captive screw to
secure the drive to the chassis.
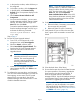
6. Connect the FC cable.
CAUTION: To avoid damaging FC
cables, do not pinch or bend the cables
sharper than a 5 cm (2 inch) diameter loop.
a. Connect an FC cable to the port A FC
connector on the new drive. The FC cable
clicks into place.
b. Connect the other end of the FC cable to its
corresponding port on the SAN. Attach a
label to each end of the cable to mark the
port designations.
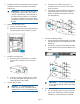
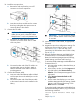
7. Connect the Ethernet cable.
a. Insert one end of the Ethernet cable included
with the tape drive to the MGMT port on the
tape drive.
b. Connect the other end of the Ethernet cable
to the internal network switch installed in the
library.
IMPORTANT: Do not connect the MGMT
port or internal network switch to the public
or site LAN.
8. Power on the library.
a. Turn on the main power switch in the upper
right corner of the library. Check all power
indicators to verify that power is restored.
Page 4