Technical white paper HP Device Manager 4.6 Imaging Guide Table of contents Overview .......................................................................................................................................................................................... 2 Imaging support matrix ............................................................................................................................................................... 2 Capturing an image without PXE ....................
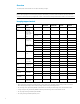
Overview This white paper demonstrates how to capture and deploy images. Note Before capturing images from and deploying images to thin clients, you need to make sure that the repository has been configured. See the “Repository management” chapter of the HP Device Manager Administrator Guide for more information. Imaging support matrix Operating system Thin client models Image formats Capture Image without PXE Deploy Image without PXE WES 8 t610 .
• For WES 2009 devices, you can capture images with either the .ibr or .dd.gz format. To use the captured image to update a crashed device, HP recommends the .dd.gz format because it can be deployed with PXE. Otherwise, HP recommends the .ibr format because the file size is usually smaller than .dd.gz. • If the WES 2009 device flash size is more than 4 GB, HP recommends that you capture an .ibr image from the device.
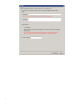
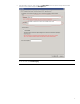
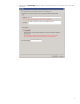
2. In the Task Editor dialog box, enter a name in the Image Name field for the captured image, and then enter a description of the captured image in the Description field. Note Do not select the option Cached Imaging.
3. In the Save result as template field, enter a name for the resulting template. 4. Click OK to apply the task to the device immediately. The task pane in the HPDM Console will indicate that the task is processing. The captured image is being compressed. When the task is sent, a new template will appear in the task pane with the name you specified for the resulting template. It appears disabled with a status of transferring. If the task fails to finish, the status will change to failed.
1. Select the Task Templates tab in the Task pane, and then drag the _Capture Image template onto the device in the Device pane whose image you wish to capture. The Task Editor dialog will appear.
2. 8 In the Task Editor dialog box, enter a name in the Image Name field, and then enter a description for the captured image in the Description field.
3. Select the option Cached Imaging. If the thin client uses an advanced network, such as wireless or 802.1x, this option is necessary.
4. In the Save result as template field, enter a name for the resulting template. 5. Click OK to apply the task to the device immediately. The task pane in the HPDM Console will indicate that the task is processing. The captured image is being compressed. When the task is sent, a new template will appear in the task pane with the name you specified for the resulting template. It appears disabled with a status of transferring. If the task fails to finish, the status will change to failed.
Capturing an image with PXE HPDM supports capturing images with PXE on WES 2009, XPe, HP ThinPro 3, and HP ThinPro 4. The captured image will be in the .dd.gz format. 1. Verify that the PXE server is running. If not, start it. The PXE server is a service. You can view its status and start it using the Windows Task Manager (A), the Windows Services window (B), or the HPDM Gateway Configuration window (C). A. Windows Task Manager B.
C. HPDM Gateway Configuration window Right-click the HPDM Gateway tray icon Management Gateway. ii. In the HPDM Gateway Configuration window, select Start PXE service when Gateway is started, and then click OK. Right-click the HPDM Gateway tray icon, and then click Restart Device Management Gateway. The PXE server will start. Send a _PXE Capture task from the HPDM Console. A. Select the _PXE Capture template under the Task Templates tab, and drag it onto a device. A Task Editor dialog will appear. iii.
3. B. Enter values in the Image Name, Description, and Save result as template fields. C. Click OK, and the _PXE Capture task will be sent to the device. When the task is sent, a PXE Deploy template will be generated in the Task Templates tab using the name you specified. (The following example uses pxe_demo.) It appears disabled with a status of transferring. If the task fails to finish, the status will change to failed. If the task finishes successfully, the status will change to be enabled.
Deploying an image There is no “Deploy Image” or “PXE Deploy Image” base template. However, you can create a Deploy Image or PXE Deploy Image template by capturing and importing an image. Importing an image file for deployment without PXE 1. In the Template menu of the HPDM Console, select Import > Image Files > to deploy without PXE. The Import Image File dialog box will appear. Note This step is used only to import an image file to generate a Deploy Image template.
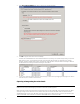
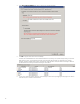
3. After selecting the desired image file, click Import. 4. In the Package Description Editor, enter the necessary information about this image file. A. Enter a title for this package in the Title field. B. Enter the Installation Space in bytes. This is the minimum disk size required to install this image. For example, if installing image flex_wes7p.ibr on a device requires at least 4 GB of free space, you would enter 4000000000.
C. Select the Architecture. D. Select the OS Type. This is the image file’s operating system. You can select the operating system using the following steps. i. Click the OS Type field, and the OS Type dialog will appear. ii. 16 Select the desired operating system in the left pane, such as WES 7.
iii. Click Select. iv. Click OK, and you will return to the Package Description Editor.
E. 18 Select the Thin Client Models that the image supports. You can select the thin client models using the following steps. i. Click the Thin Client Models field, and the Thin Client Models dialog will appear. ii. Select the desired thin client model from the left pane, such as t610. iii. Click Select.
iv. Click OK, and you will return to the Package Description Editor. 5. Click Generate to begin uploading the image file to the repository. 6. After the upload is complete, a confirmation message will appear. Click OK to finish this operation. If the image file imported successfully, a new Deploy Image template will appear in the task pane.
Deploying an image without PXE HPDM supports two modes to deploy an image: non-cached mode and cached mode. If the thin client uses an advanced network, such as wireless or 802.1x, use the cached mode to capture an image. The following table shows which formats are supported when deploying images to thin clients. Operating system Image format (non-cached mode) Image format (cached mode) WES 8 .ibr .ibr WES 7 .ibr, .img, .dd, .dd.gz, .hpimg .ibr WES 2009 . ibr, .img, .dd, .dd.gz, .hpimg .
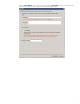
3. Drag and drop the template onto the devices to which you want to deploy the image. The Task Editor dialog box will appear and display detailed information about the image. Note Do not select Cached Imaging. 4. To deploy the image to a device with a different hardware platform than the source device, select Allow CrossPlatform Imaging. This option takes effect only when deploying an image to a device with a WES operating system.
5. 22 Click OK to apply the Deploy Image task to the devices.
Deploying an image using the cached mode Note HPDM does not support Cached Imaging on the XPe or Win CE 6.0 operating systems. When deploying an image to a WES device, the free disk space must be greater than the image file size. When deploying an image to an HP ThinPro device, the free disk space must be greater than the image file zie and the available RAM needs to be at least 1 GB.
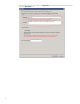
3. 24 Drag and drop the template onto the devices to which you want to deploy the image. The Task Editor dialog box will appear and display detailed information about the image.
4. Select Cached Imaging. If the thin client uses an advanced network, such as wireless or 802.1x, this option is necessary. 5. To deploy the image to a device with a different hardware platform than the source device, select Allow CrossPlatform Imaging. This option takes effect only when deploying an image to a device with a WES operating system. Note For example, if you captured a WES image from a t510 and want to deploy it to a t610, you need to select this option.
6. Click OK to apply the Deploy Image task to the devices. Deploying an image with PXE HPDM supports deploying images with PXE on WES 2009, XPe, HP ThinPro 3, and HP ThinPro 4. The deployed image format can be .dd.gz, .img, .hpimg, or .dd. 1. 26 Verify that the PXE server is running. If not, start it. The PXE server is a service. You can view its status and start it using the Windows Task Manager (A), the Windows Services window (B), or the HPDM Gateway Configuration window (C). A.
B. Windows Services window C. HPDM Gateway Configuration window i. Right-click the HPDM Gateway tray icon Management Gateway. , and the following menu will appear.
ii. In the HPDM Gateway Configuration window, select Start PXE service when Gateway is started, and then click OK. Right-click the HPDM Gateway tray icon, and then click Restart Device Management Gateway. The PXE server will then be started. From the HPDM Console, click the Task Templates tab, and then drag a PXE Deploy template onto a device. A PXE Deploy template can be created in one of the following ways. A. A PXE Deploy template can be generated using a _PXE Capture task.
Note For more information, see Importing an image file. After importing the image, a PXE Deploy template will appear in the Task Templates tab.
3. The Task Editor will appear. Click OK, and the PXE Deploy task will be sent to the device. Note The following settings are preserved on the target device: —WES 2009 and XPe: Hostname, Network, and Write Filter status —HP ThinPro 3 and HP ThinPro 4: Hostname and Network When deploying an image to a shutdown device, the device must support Network boot first so that it can be woken up.
Appendix Preserved settings during imaging • Source device—The device from which the image will be captured. • Target device—The device to which the captured image will be deployed. Settings preserved when capturing an image WES 8: All settings from the source device are preserved on both the source device and the captured image, except the hostname, network settings, domain settings, and Write Filter status.
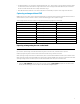
Imaging task performance This section introduces the time spent on imaging tasks. HP gathered this data from the HP test environment for reference only. The time spent on imaging tasks depends on the network environment, protocol, and hardware. The HP data was retrieved using the following environment: • Network bandwidth: 100 MB bandwidth • File Transfer Protocol: FTP and Shared Folder Table 1.
Noncached t510 4 22 24 31 t610 16 16 19 23 t5570 2 18 26 26 t5740 4 16 20 24 t5400 2 18 21 28 6360t 4 16 21 23 Table 3. HP ThinPro imaging task performance Operating system Connection type Mode Device model Disk size (GB) File system size (GB) Image clone-zero duration (minutes) Image clone-clone duration (minutes) Image deploydeploy duration (minutes) Image deployresize duration (minutes) HP ThinPro Wired Noncached t610 4 1 0.33 3 4 1 4 4 2 4 15 0.
For more information To read more about HP Device Manager, go to hp.com/go/hpdm. Sign up for updates hp.com/go/getupdated © Copyright 2014 Hewlett-Packard Development Company, L.P. Microsoft and Windows are U.S. registered trademarks of the Microsoft group of companies. Confidential computer software. Valid license from HP required for possession, use or copying. Consistent with FAR 12.211 and 12.