
HP Data Protector A.06.11 Support for VMware vStorage

43
Using the Data Protector CLI
1. Log in to the backup host, open the command-line interface, and change to the following
directory:
Data_Protector_home\bin
2. Run:
vepa_util.exe command
--configvm
--virtual-environment vmware
--host HostName
--instance Datacenter
–-vm VirtualMachinePath
--snapshots { 0 | 1 |2 }
--transportation-mode Mode
--quiescence { 0 | 1 }
--quiescenceErrLvl { 0 | 1 }
-–optimize-disks { 0 | 1 }
--uuid UUID_of_VM
For snapshots, the values { 0 | 1 | 2 } represent Disabled, Single, and Mixed snapshot
handling modes respectively. To change virtual machine specific settings back to common
virtual machine settings, run:
vepa_util.exe command
--configvm
--virtual-environment Vmware
--host HostName
--instance Datacenter
–-vm VirtualMachinePath
--uuid UUID_of_VM
--default
The message *RETVAL*0 indicates successful configuration.
For option descriptions, see the util_vmware.exe description at the end of this document.
Checking the configuration of VMware management clients
To verify the connection, use the Data Protector GUI or CLI.
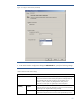
Using the Data Protector GUI
You can verify the connection to the VMware management client after you have created at least
one backup specification.
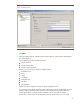
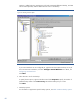
1. In the Context List, select Backup.
2. In the Scoping Pane, expand Backup Specifications and then Virtual Environment.
Click the backup specification for the VMware management client to be checked.
3. Right-click the VMware management client and click Check configuration.
Using the Data Protector CLI
1. Log in to the backup host, open the command-line interface, and change to the following
directory:
Data_Protector_home\bin
2. Run: