
HP Data Protector 6.1 software VMware Integration Installation Best Practice


12
Installation Method C – Data copied on the ESX Server
C1: With the DVD
1. Prepare the ESX Server to get access. See step1 of B1: Using a local DVD drive.
2. Firewall configuration. See step 2 of B1: Using a local DVD drive.
3. Mount the DVD. See step 3 of B1: Using a local DVD drive.
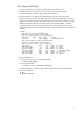
4. Copy the HP-UX and the LOCAL INSTALL directory on the ESX server
# cp -r /dvdrom/platform_dir/DP_DEPOT directory
# cp -r /dvdrom/platform_dir/LOCAL_INSTALL directory
For further details see the HP Data Protector A.06.10 Installation and licensing guide “Local
installation of UNIX clients” “Running the installation from the hard disk”.
5. Proceed with the installation as described in steps 4-8 of B1: Using a local DVD drive.
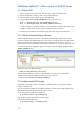
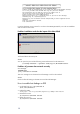
C2: With the VMware Datastore Browser
With the VMware Infrastructure Client, every Datastore that belongs to the ESX server can be
browsed. A feature of the Datastore Browser is that it allows exchange of data in both directions,
between the system running the Infrastructure Client and the ESX server. You can use this to
upload the Data Protector installation bits directly on the ESX server, without any UNIX command.
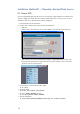
To install the DP VMware integration agent, it is enough to upload the hpux_pa depot and the
LOCAL_INSTALL directory.
The directory where the data is stored is:
/vmfs/volumes/datastore directory
The procedure is identical to section C1: With the DVD, except for step 4. Note that the
omnisetup.sh file may have a different location in this case, such as:
</vmfs/volumes/<datastore>/LOCAL_INSTALL>.
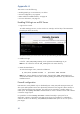
C3: Locally mounted ISO image
Under ESX, an ISO-Image can be mounted like a CD-ROM. For this, you must place the ISO
image on the ESX server.
You can copy the ISO image with the VMware Datastore browser (see C2: Data copied on the
ESX server with the VMware Datastore browser) or with FTP.
To use FTP, open the firewall on the ESX server:
# esxcfg-firewall –-allowOutgoing
then use ftp to fetch the ISO file from a remote system.
Close the firewall afterwards with:
# esxcfg-firewall –-blockOutgoing