HP D3000 Chassis Install Instructions Abstract This guide describes the D3600/D3700 12Gb SAS disk enclosure. Installation, cabling, configuration, and troubleshooting procedures are included.
© Copyright 2009, 2014 Hewlett-Packard Development Company, L.P. The information contained herein is subject to change without notice. The only warranties for HP products and services are set forth in the express warranty statements accompanying such products and services. Nothing herein should be construed as constituting an additional warranty. HP shall not be liable for technical or editorial errors or omissions contained herein.
Contents 1 Installing the enclosure ...............................................................................5 Safety precautions....................................................................................................................5 General precautions.............................................................................................................5 Symbols on equipment..........................................................................................................
Class A equipment.............................................................................................................23 Taiwanese notices...................................................................................................................23 BSMI Class A notice...........................................................................................................23 Chinese notice.........................................................................................................
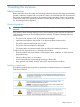
1 Installing the enclosure Safety precautions Retain and follow all product safety and operating instructions. Always refer to the documentation (printed or electronic) supplied with your product. If there is a conflict between this document and the product documentation, the product documentation takes precedence. Observe all warnings on the product and in the operating instructions to reduce the risk of bodily injury, electric shock, fire, and damage to the equipment.
Precautions for maintaining and servicing products To reduce the risk of electric shock or damage to the equipment when installing, maintaining, or servicing products, observe the following precautions: • Some products contain power supplies that are capable of producing hazardous energy levels. Refer to the documentation included with your product to determine whether it contains these power supplies.
Power cords To reduce the risk of electric shock or damage to the equipment: • Use an approved power cord. If you have questions about the type of power cord to use, contact your HP authorized service provider. • If you have not been provided with a power cord for your product or for any AC-powered option intended for your product, purchase a power cord that is approved for use in your country.
• Power cables • Access to a workstation on the server • Access to the Internet Preliminary tasks Planning tasks include: Determining who will install and configure the disk enclosure Storage management experience is required to successfully install and configure this product. If you are not familiar with installing and configuring storage array systems, HP can install this product for you. For more information, see the Business & IT Services website: http://www.hp.
Confirming warranty support and finding out about related services The standard warranty protects against product defects and some causes of downtime. You can extend your warranty with HP Care Pack Services. This portfolio of predefined packages is flexible, allowing you to extend coverage to the exact level of support required. You choose the support level that meets your business requirement, from basic to mission-critical.
Striping methods There are two methods for configuring the physical layout of the disk arrays: • Vertical striping—the RAID array uses one physical drive from each disk enclosure. • Horizontal striping—the RAID array uses multiple drives contained within one or more disk enclosures. RAID levels Controllers use RAID technology to group multiple disk drives together in larger logical units (LUNs). Key RAID methods include the use of data striping, data mirroring, and parity error checking.
Disk drive sizes and types RAID arrays should be composed of disk drives of the same size and performance capability. When drives are mixed within a disk enclosure, the usable capacity and the processing ability of the entire storage subsystem is affected. For example, when a RAID array is composed of different sized drives, the RAID array defaults to the smallest individual drive size, and capacity in the larger drives goes unused.
For protection against a power-source failure, obtain and include two uninterruptible power supplies in your installation. For power consumption specifications, see the QuickSpecs for your disk enclosure model. Consider using the HP Simple Configurator Evironment (SCE) to help plan and configure racks and rack-mountable devices. The SCE is available on the HP website: http://h22174.www2.hp.
NOTE: Rails are marked L and R with an arrow indicating the direction in which the rail should be installed. 2. 3. Use guide pins to align the shelf mount kit to the RETMA column holes. To engage the rear, push the rail toward the back of the rack until the spring hook (1) snaps into place. 4. To engage the front, pull the rail towards the front of the rack to engage the spring hook with the RETMA column in the same manner as the rear spring hook.
8. 14 Attach rear hold down brackets by sliding the tab with the arrow pointed forward (1) into the corresponding slot on the left and right side of the rear of the chassis. Use the black headed thumb screw to secure tightly to the rail (2).
2 Installing hard drives in the enclosure Depending on the types of hard disk drives (HDDs) you are using, the following numbers of drives can be installed in a single enclosure: • Large form factor (LFF): 12 HDDs • Small form factor (SFF): 25 HDDs A variety of disk drive models are supported for use, including dual-ported and single-ported models. For more information about supported disk drives, see the QuickSpecs for the disk enclosure, available on the D3000 website.
IMPORTANT: When a drive is inserted in an operational enclosure, the drive LEDs flash to indicate that the drive is seated properly and receiving power. 3. Determine the status of the hard drive. IMPORTANT: drive bays.
3 Cabling the HP D3000 For more information on cabling, see the User Guide.
4 Powering up After disk enclosures are physically installed and cabled, power up all devices and verify that they are operating properly. Before powering on Observe the following best practices before powering on the enclosure for the first time: • Complete the server, controller, or controller enclosure installation. For more information, see the server, controller, or controller enclosure user documents. • Install the disk enclosures.
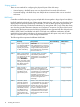
Verifying the operating status of the disk enclosures To verify that the disk enclosures and disk drives are operating properly, view the enclosure and disk drive LEDs and compare them with the patterns described in the following table. If LED patterns are not as expected, check cable connections between the devices, check the availability of your power source, review the installation procedures, and remove and reinsert the module. Location Indicator Startup condition 1.
Verifying the status of the disk drives Both the HP G8 LFF and SFF drive carrier system uses I2C communication for drive authentication, failure and configuration info, activity animation and enhanced LEDs. Location Indicator Status Definition 1 Locate Solid blue The drive is being identified by a host application. 2. Activity ring Rotating green Drive activity 3. Do not remove 4. Drive status Off No drive activity Solid white Do not remove the drive.
5 Regulatory compliance notices This section contains regulatory notices for the HP StorageWorks D3600/3700 12Gb SAS disk enclosures. Regulatory compliance identification numbers For the purpose of regulatory compliance certifications and identification, this product has been assigned a unique regulatory model number (RMN). The regulatory model number can be found on the product nameplate label, along with all required approval markings and information.
For questions regarding this product, contact HP by mail or telephone: Hewlett-Packard Company P. O. Box 692000, Mail Stop 530113 Houston, Texas 77269-2000 1-800-HP-INVENT (1-800-474-6836) For questions regarding this FCC declaration, contact us by mail or telephone: Hewlett-Packard Company P. O. Box 692000, Mail Stop 510101 Houston, Texas 77269-2000 1-281-514-3333 To identify the product, refer to the part, series, or model number found on the product.
Japanese notices VCCI-A notice Japanese power cord statement Korean notices Class A equipment Taiwanese notices BSMI Class A notice Chinese notice Japanese notices 23
EAC: Belarus, Kazakhastan, Russia Compliance with the safety and Electromagnetic Compatibility (EMC) requirements of the EuroAsian Economic Commission (EAC, formerly the Customs Union) is indicated by the EAC logo. Manufacturer’s information Hewlett-Packard Company, 3000 Hanover Street, Palo Alto, California 94304, U.S. Local representative information, Russian HP Russia: ЗАО “Хьюлетт-Паккард А.О.”, 125171, Россия, г. Москва, Ленинградское шоссе, 16А, стр.
Czech notice Danish notice Dutch notice Estonian notice Finnish notice Recycling notices 25
French notice German notice Greek notice Hungarian notice Italian notice 26 Regulatory compliance notices
Latvian notice Lithuanian notice Polish notice Portuguese notice Romanian notice Recycling notices 27
Slovak notice Spanish notice Swedish notice Turkish notice Türkiye Cumhuriyeti: EEE Yönetmeliğine Uygundur 28 Regulatory compliance notices
Index C Canadian notice, 22 Chinese notices, 23 D document revision history, 2 E European Union notice, 22 F Federal Communications Commission notice, 21 J Japanese notices, 23 K Korean notices, 23 P planning confirming warranty support, 9 R regulatory compliance Canadian notice, 22 Chinese notices, 23 European Union notice, 22 identification numbers, 21 Japanese notices, 23 Korean notices, 23 Taiwanese notices, 23 revision table, 2 T Taiwanese notices, 23 29