
HP StoreOnce Conversion from 2.x.x software to 3.4.x (or later) Software Guide (BB852-90949, November 2013)


3 Firmware component update
Before starting the conversion process you must ensure that all system hardware components have
up-to-date firmware. Go to www.hp.com/go/support/downloads and type the name of your
existing HP StoreOnce D2D Backup System product into the search box to locate the component
firmware bundle for your product and the system BIOS.
You will need to power off the HP StoreOnce D2D Backup System. In order to prevent any backup
application failures or warning messages, it is advised that before commencing the firmware update
the following actions are taken:
1. Make sure that there are no backup jobs scheduled to run to any devices on the HP StoreOnce
D2D Backup System in the next 30 minutes.
2. Pause replication on the HP StoreOnce D2D Backup System that is being updated.
Hardware components firmware upgrade
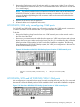
Use the Firmware quick jump to locate the D2D Component Firmware bundle for your product.
The same ISO image is used for all products.
The firmware update can be carried out locally at the StoreOnce Backup system or remotely via
iLO. To update locally, a 1GB or larger memory key is required for the ISO image download.
NOTE: Download the HP USB Creation tool from the HP Insight Foundation website; this is used
to copy the content of the firmware image to a 1GB Flash stick using a Windows PC. The website
is at: http://www.hp.com/go/foundation.
The upgrade process uses the HPSUM utility. Please read the release notes for the firmware upgrade
and follow the instructions carefully.
BIOS upgrade
The BIOS is less likely to need upgrading, but the process is described here for completeness.
Use the BIOS quick jump to locate the System ROMPaq Firmware Upgrade. There are two Systems
ROMPag firmware upgrades available:
• Systems ROMPaq Firmware Upgrade for HP D2D 41xx/25xx G2 Backup System
• Systems ROMPaq Firmware Upgrade for HP D2D 43xx G2 Backup System
1. Obtain a formatted USB Key media.
2. Download the SoftPaq to a directory on a system running Microsoft Windows 2000, Microsoft
Windows XP, Microsoft Windows Vista, Microsoft Windows 7, Microsoft Windows Server
2003, Microsoft Windows Server 2008, or Microsoft Windows Server 2008 R2 and change
to that directory.
3. From that drive and directory, execute the downloaded SoftPaq file. Simply double click on
the SPxxxxx.exe file and follow the installation wizard to complete the SoftPaq installation
process. At the end of a successful installation of the SoftPaq a web page will automatically
appear to provide you with the different methods for restoring and/or upgrading the firmware
on the system.
4. After the USB Key is created, you may delete the downloaded file if you wish.
5. Insert this USB Key into the USB Key port of the system to be updated and power the system
on to boot to the USB Key.
12 Firmware component update