
HP StorageWorks D2200sb PCIe Storage Blade Maintenance and Service Guide

Removal and replacement procedures 37
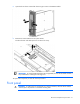
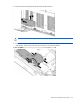
10.
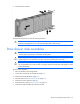
Install the storage blade.
11. Power up the partner server blade.
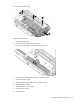
After you replace the system board, you must re-enter the product identification and serial number in the
Onboard Administrator using the command line. The Onboard Administrator CLI can be accessed locally
from a laptop connected to a serial port connector on the rear of the Onboard Administrator module or
remotely through a Telnet or SSH session.
To enter the product information:
1. Obtain the serial number from the product information tag.
2. Access the Onboard Administrator CLI.
3. Issue the following command in the CLI:
SET DEVICE SERIAL_NUMBER BLADE <bay number> <serial number>
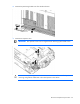
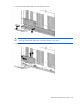
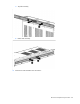
Drive drawer
WARNING: To reduce the risk of personal injury from hot surfaces, allow the drives and the
internal system components to cool before touching them.
CAUTION: To prevent damage to electrical components, properly ground the storage blade
before beginning any installation procedure. Improper grounding can cause ESD.
CAUTION:
Do not operate the storage blade with the access panel open or removed. Operating
the storage blade
in this manner results in improper airflow and improper cooling that can lead
to thermal damage.
CAUTION: If the pass-through board and cable are not removed before removing the drive
drawer, then damage could occur to the drive drawer, cable, and controller board.
To remove the component:
1. Back up all data on the storage blade.
2. Power down the partner server blade (on page 22).
3. Remove the storage blade (on page 22).
4. Remove all drives ("Remove the drives" on page 24).
5. Remove the access panel (on page 26).