
HP Creative Scrapbook Assistant - User's Guide


34
35
Creating new shapes
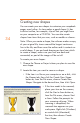
You can create your own shapes to customize your scrapbook
pages even further. An item makes a good shape if it has
a distinct outline, for example, clip art that you might have
on your computer or a CD-ROM. You can also create
shapes from items that you scan, such as medals or charms.
Note: When you create a shape, the software makes a copy
of your original le, traces around the longest continuous
line in the le, and then saves the outline and its contents as
a solid shape. If you are hand drawing an item from which
to create a shape, make sure your lines are dark and
connected, or part of the image will be cut off.
To create your own shapes:
1. Choose the Theme or Project where you plan to save the
new shape.
2. Locate the item you want to save as a shape.
• If the item is a le on your computer or on a disk, click
the Shapes tab, then click the Create New Shape
button or, from the File menu, choose Create New
Shape. Navigate to the desired item, then click Open.
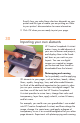
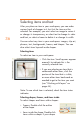
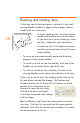
• If the item needs to be scanned,
place your item on the scanner,
click the Start a Scan button or,
from the File menu, choose Start
a Scan. Follow the prompts for
your scanning software. When
scanning is completed, the
scanned item appears on your
workspace. Right-click (Windows)
or control-click (Macintosh)
the item, then choose Create
New Shape.