
HP Creative Scrapbook Assistant - User's Guide


20
21
while maintaining the original proportions. If the item does
not t the exact shape, it can appear “cropped.” You can
adjust this by moving or resizing the item within the shape.
Tip: When you move your cursor over the border of a shape,
it becomes highlighted to show that the item will ll the
shape and resize (or “snap”) to t. If you want to place an
item near a shape but not inside it, don’t release the mouse
button if the shape is highlighted. If you’ve already placed
the item inside the shape, you can select Undo from the Edit
menu, or double-click to select the item and drag it outside
the shape.
Note: If you have applied a frame to a shape or lled a
shape with an image, the software treats these as layered
items. To make adjustments to any of the layers, you must
rst select it. (See “Selecting items” and “Selecting shapes”
on page 36 and also “Working with layers” on page 44.)
You can also save a shape as a new image, clip art, frame,
or background, or save images and clip art as new shapes.
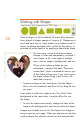
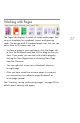
Working with Images
Images are generally drawings, illustrations, or photographs.
You can resize and rotate images, change their color to black
and white or sepia, and change their transparency to simulate
a vellum cover. You can also import your own images, save
a single image as a new shape, clip art, frame, or back-
ground, or save other items as new images.