
HP Creative Scrapbook Assistant - User's Guide


20
21
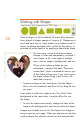
Working with Shapes
Think of shapes as the foundation for many other elements.
Items placed in shapes appear to “snap to t.” Shapes are a
quick and easy way to “crop” photos, or to create custom-t
mattes for photos and other items—either by themselves, to
print and cut out by hand, or by applying a frame to the shape.
You can move, resize, and rotate a shape,
change its color and transparency, surround it
with a frame, or ll it with single or multiple
items, such as images, backgrounds, and text.
When you rst place a shape on your
workspace, it contains the label: “Place your
content here” which is removed as soon as you
ll the shape with an item. If you want to print
the shape without lling it, don’t worry; the
label does not print.
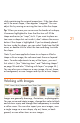
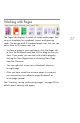
• To place a shape in your workspace, click the Shapes
tab to view the thumbnails and then click or drag the one
you want.
If you place a solid color shape on an “Any Solid Color”
background of the same color, it may be difcult to see
the shape.
• To view the shape more clearly, change the color of the
shape or the background as soon as you place the shape.
Shapes are a handy way to limit the shape of an image or
text you want on your page. When you place text or an item
inside a shape, the software resizes the item automatically