
HP XP7 Command View Advanced Edition Installation and Configuration Guide (TK981-96001, May 2014)
1. In your web browser, specify the URL:
https://IP-address-or-host-name-of-SVP/
2. Log in to Remote Web Console.
3. Display the Install Licenses window in one of the following ways:
• From General Tasks, select Install Licenses.
• From the Administration tree, select License Keys. In the License Keys window, click Install Li-
censes.
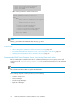
4. Select whether to enter a key code or specify a license key file.
• Key Code: Enter a key code to install the software. In Key Code, enter the license key code
for the software.
• File: Specify a license key file to install the software. Click Browse and specify the license
key file. You can use a file name of up to 200 alphanumeric characters (ASCII codes) excluding
several symbols (", \, ; , : , *, ?, <, >, |, /, ,). The file extension is "plk".
5. Click Add.
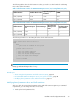
6. In the Selected License Keys table, set the status of license keys for each software application.
• Enable Licenses: Installs license keys in enabled status. You can select more than one software
application to install licenses for.
• Disable Licenses: Installs license keys in disabled status. You can select more than one software
application to install licenses for.
• Clear All: Delete all license keys from the Selected License Keys table.
7. Click Finish. The Confirm window opens.
8. In the Confirm window, check the settings and enter a task name in Task Name.
9. Click Apply. The task is registered. If the Go to tasks window for status check box is checked,
the Task window opens.
If there is any software cannot be installed, the Error Message window opens. To display the
cause of error, from the Error Message window, select the software and click Detail.
Creating user accounts in Remote Web Console
Log in to Remote Web Console to create user accounts that are required to register storage systems
in Device Manager.
1. In your web browser, specify the URL:
https://IP-address-or-host-name-of-SVP/
2. Log in to Remote Web Console.
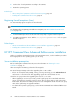
3. In the Administration tree, select User Groups.
4. In the User Groups tab, select a user group to which to add a user. This is dependent on which
permissions you want to give to the user.
For HP XP7 or P9500 storage systems, select the Administrator user group (a default user group).
5. In the Roles tab, confirm that the displayed permissions are appropriate for the user.
6. Open the Create User window in one of the following ways:
• On the User tab, click Create User.
• From Settings, click User Management > Create User.
7. Enter a name.
HP XP7 Command View Advanced Edition server installation38