
HP StorageWorks XP Provisioning Manager Installation and Configuration Guide (December 2005)


• Number of hosts: 20
• Average number of disks per host: 50
• Number of LDEVs: 1,000
• Number of histories: 1,500
• Number of plans: 50
• Large configuration example:
• In the following configuration, the estimate of the capacity used by Provisioning Manager is 1 GB.
• Number of hosts: 300
• Average number of disks per host: 100
• Number of LDEVs: 30,000
• Number of histories: 45,000
• Number of plans: 1,000
• Installing Provisioning Manager temporarily requires about 50 MB of free hard disk space.
• Make sure that no other applications are currently running.
IMPORTANT: In an update installation, the existing property file is backed up and saved. If the existing
property file contains information that has been modified by a user, such information will be inherited in a
new property file.
To upgrade the Provisioning Manager server:
1. Log on to as an administrator.
2. Stop the service applications for other Command View XP AE Suite products (this step is required only if
you are using other Command View XP AE products). For details about how to stop them, see the
manual for each product.
3. Insert the Provisioning Manager CD-ROM. The installer should start automatically. If not, use Explorer to
view the contents of the CD-ROM, and execute the
Setup.exe file.
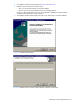
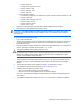
4. The Upgrade Installation window displays (see
Figure 3-10).
CAUTION: If Device Manager has not been installed on that machine, a warning panel displays and
the installation stops. If a newer version of Provisioning Manager than the one you attempt to install has
already been installed, a window appears, informing you that the version you attempted to install is
incorrect, and the installation stops. Select
Next.
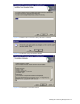
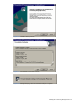
5. The Pre-installation Confirmation window displays (see Figure 3-11), showing the installation directory.
Select Next to continue. Provisioning Manager will be installed in the existing Provisioning Manager
directory.
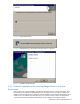
6. The User Information Setup window displays (see
Figure 3-12). Select Next to continue.
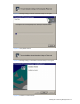
7. The Installation Progress windows display (see
Figure 3-13 and Figure 3-14).
8. Installation will be canceled in the following cases:
• When you click the
Cancel button to cancel the installation.
• When an error occurs during installation and an error message displays.
If this occurs, use the Windows
®
Add/Remove Programs Utility to uninstall Provisioning Manager, and
then reinstall it.
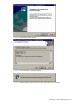
9. The Installation Finished window displays (see
Figure 3-15). Select Finish to complete the installation.
Installing the Provisioning Manager Server 25