
HP StorageWorks XP Command View Advanced Edition Software 6.4 Server Administrator Guide for Device Manager and Provisioning Manager (web) (T1780-96341, July 2010)
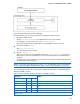
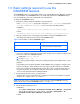
Table Of Contents
- Overview
- 1-1 System configuration
- 1-2 Network configuration
- 1-2-1 Common security risks
- 1-2-2 Most secure configuration: separate management LAN plus firewall
- 1-2-3 Second-most secure configuration: separate management LAN plus firewalled devices under management
- 1-2-4 Third-most secure configuration: dual-homed management servers plus separate management LAN
- 1-2-5 Least secure configuration: flat network
- 1-3 Management server requirements
- 1-4 System requirements for storage subsystems
- 1-5 Host requirements
- 1-6 Products related to Device Manager
- 1-7 System requirement for managing copy pairs
- Settings for various network configurations
- 2-1 Port settings
- 2-2 Settings required to use a management server that has multiple NICs
- 2-3 Settings required to operate in an IPv6 environment
- 2-4 Changing the IP address or host name of the management server
- 2-5 Changing the URLs for accessing XP Command View AE Suite products
- 2-6 Settings required when disconnecting the management server network
- Settings required for managing user accounts
- Security settings for Device Manager
- Settings required for linking with related products
- Setting up logs and alerts
- Settings for CIM/WBEM (SMI-S CIMOM)
- 7-1 Device Manager and CIM/WBEM
- 7-2 CIM/WBEM features of Device Manager
- 7-3 Basic settings required to use the CIM/WBEM features
- 7-4 Settings for ports used by CIM/WBEM features
- 7-5 Properties file settings for executing CIM
- 7-6 Settings for the service discovery feature
- 7-7 The performance information acquisition feature
- 7-8 User permissions for using CIM/WBEM features
- Starting and stopping the Device Manager server
- 8-1 Before controlling the Device Manager server
- 8-2 Starting the Device Manager server
- 8-3 Stopping the Device Manager server
- 8-4 Checking the operating status of the Device Manager server
- 8-5 Starting the Device Manager server and Common Component
- 8-6 Stopping the Device Manager server and Common Component
- 8-7 Checking the operating status of Device Manager server and Common Component
- Managing the database
- Troubleshooting
- Support and other resources
- Appendix A Specifying properties
- A-1 Properties overview
- A-2 Device Manager server configuration properties
- A-2-1 server.http.host
- A-2-2 server.http.port
- A-2-3 server.https.port
- A-2-4 server.http.default
- A-2-5 server.http.request.timeout
- A-2-6 server.http.connection.priority
- A-2-7 server.http.connection.bufSize
- A-2-8 server.http.socket.backlog
- A-2-9 server.http.socket.maxThreads
- A-2-10 server.http.socket.linger
- A-2-11 server.http.socket.noDelay
- A-2-12 server.http.headers.maxNumber
- A-2-13 server.http.headers.maxLength
- A-2-14 server.http.entity.maxLength
- A-2-15 server.http.log.reverseDNS
- A-2-16 server.http.cache.size
- A-2-17 server.http.cache.maxFileSize
- A-2-18 server.http.fileTypes.noLog
- A-2-19 server.http.mode
- A-2-20 server.installTime
- A-2-21 server.base.home
- A-2-22 server.horcmconfigfile.hostname
- A-2-23 server.base.initialsynchro
- A-2-24 server.cim.agent
- A-2-25 server.cim.support
- A-2-26 server.cim.support.job
- A-2-27 server.cim.support.protocol
- A-2-28 server.cim.http.port
- A-2-29 server.cim.https.port
- A-2-30 server.configchange.enabled
- A-2-31 server.configchange.autorefresh.lastrefreshed
- A-2-32 server.mail.enabled
- A-2-33 server.mail.from
- A-2-34 server.mail.smtp.host
- A-2-35 server.mail.smtp.port
- A-2-36 server.mail.smtp.auth
- A-2-37 server.mail.alert.type
- A-2-38 server.mail.alert.status
- A-2-39 server.subsystem.ssid.availableValues
- A-2-40 server.smisclient.indication.port
- A-3 Device Manager database properties
- A-4 Device Manager logger properties
- A-5 Device Manager dispatcher properties
- A-5-1 server.dispatcher.agent.priority
- A-5-2 server.dispatcher.message.timeout
- A-5-3 server.dispatcher.message.timeout.in.processing
- A-5-4 server.dispatcher.daemon.pollingPeriod
- A-5-5 server.dispatcher.traps.purgePeriod
- A-5-6 server.dispatcher.startTimeOfIgnoringConnectionAlert
- A-5-7 server.dispatcher.endTimeOfIgnoringConnectionAlert
- A-5-8 server.dispatcher.daemon.receiveTrap
- A-5-9 server.dispatcher.daemon.configUpdate.detection.interval
- A-5-10 server.dispatcher.daemon.autoSynchro.doRefresh
- A-5-11 server.dispatcher.daemon.autoSynchro.type
- A-5-12 server.dispatcher.daemon.autoSynchro.dayOfWeek
- A-5-13 server.dispatcher.daemon.autoSynchro.startTime
- A-5-14 server.dispatcher.daemon.autoSynchro.interval
- A-5-15 server.dispatcher.daemon.autoSynchro.refresh.interval
- A-5-16 server.dispatcher.daemon.autoSynchro.refresh.timeout
- A-6 Device Manager MIME properties
- A-7 Device Manager client properties
- A-8 Device Manager security properties
- A-9 Device Manager SNMP trap log output function properties
- A-10 Device Manager mainframe host agent properties
- A-11 Device Manager report function properties
- A-12 XP Provisioning Manager server configuration properties
- A-13 XP Provisioning Manager server log properties
- A-14 XP Provisioning Manager client properties
- Glossary
- Index

Settings for CIM/WBEM (SMI-S CIMOM)
118
If the following message is displayed when Device Manager is uninstalled, release the SLP daemon
from the Linux daemons manually.
WARNING: An attempt to release the SLP daemon has failed. After
uninstallation, release the SLP daemon manually. Uninstallation
continues.
To release the SLP daemon:
1. Log in as the root user.
2. Stop the SLP daemon.
Execute the following command:
installation-directory-for-the-Device-Manager-
server/Server/wsi/bin/slpd.sh stop
The following shows an example of executing the command:
# /opt/CVXPAE/Server/wsi/bin/slpd.sh stop
3. If /etc/init.d/slpd exists, delete it.
Execute the following commands:
# chkconfig --level 01345 slpd off
# chkconfig --del slpd
# rm -f /etc/init.d/slpd
7-6-1-3 In SUSE Linux Enterprise Server
OpenSLP is provided with the standard configuration. No settings are required to use the service
discovery feature after installing SUSE Linux Enterprise Server. You can use the service discovery
feature as is.
7-6-2 Starting and stopping the service discovery feature
This section describes how to start and stop the SLP service.
7-6-2-1 In Windows
To manually start the SLP service, perform either of the following procedures:
• From Administrative Tools, select Services and then Service Location Protocol to start the
SLP service.
• Show the command prompt, move to the folder containing the OpenSLP executable file, and
execute the following command:
> slpd -start
To stop the SLP service, perform either of the following:
• From Administrative Tools, select Services and then Service Location Protocol.
• Display the command prompt, move to the folder containing the OpenSLP executable file, and
execute the following command:
> slpd –stop
7-6-2-2 In Red Hat Enterprise Linux
To manually start the SLP daemon, execute the following command:
installation-directory-for-the-Device-Manager-
server/Server/wsi/bin/slpd.sh start
To stop the SLP daemon, execute the following command: