
HP XP Cluster Extension Software Installation Guide


1. Download the HP XP Cluster Extension Software from https://h20392.www2.hp.com/portal/
swdepot/displayProductInfo.do?productNumber=CLX.
2. Move all the applications from the current node to any other node.
NOTE: Save the HP XP Cluster Extension configuration file, if it exists. You can save the file
by using the Export feature in the HP XP Cluster Extension configuration tool. For instructions
on saving the file, see the HP XP Cluster Extension Administrator Guide. After completing the
upgrade procedure in this section, use the Import feature in the HP XP Cluster Extension
configuration tool to import the saved configuration file.
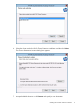
3. Double-click the HP XP Cluster Extension installation package and then follow the onscreen
instructions.
4. Restart the cluster service on the node.
5. Carry out steps 1 to 4 on all the other nodes that are running HP XP Cluster Extension 6.01.00.
NOTE: If you are using the CLX 3DC solution, then see Configuring the HP XP Cluster Extension
for HP XP Continuous Access 3DC environment section in HP XP Cluster Extension Software
Administrator Guide. There is a change in the possible value for 3DCSyncPreference. Select
the appropriate 3DCSyncPreference value depending on your requirement after CLX
upgradation.
Upgrading HP XP Cluster Extension from versions earlier than 6.00.00
Perform the following steps to upgrade to the latest HP XP Cluster Extension Software version without
loosing your CLX configuration and cluster resource configuration information:
1. Move all applications from the current node to another node in the Microsoft Failover Cluster.
2. Close Microsoft Failover Cluster Manager GUI.
3. Uninstall XP Cluster Extension from the current node. For uninstallation instructions, see
“Removing HP XP Cluster Extension” (page 16).
a. This procedure has an exception. Do not unregister the CLX resource when prompted as
part of the process.
b. Store the Cluster Extension configuration file also during the uninstallation process.
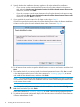
4. Install the new XP Cluster Extension version only on the local node. For installation instructions,
see “Installing HP XP Cluster Extension Software ” (page 10).
• Follow the steps as described in Importing configuration settings using the GUI section
of HP XP Cluster Extension Software Administrator Guide to import the CLX configuration
that was saved during the uninstallation of the old CLX version. You must import the
configuration only to the current node where you are performing the upgrade.
5. Restart the cluster service on the local node.
6. Repeat steps 1 through 5 for all other cluster nodes that are running HP XP Cluster Extension
versions earlier than 6.00.00.
HP XP Cluster Extension maintenance
After installation, you can modify, repair, or remove the HP XP Cluster Extension.
In the Server Core or Hyper-V Server environment, the Control Panel Programs and Features function
is not available. To perform maintenance operations in a Server Core or Hyper-V Server environment,
run the HP XP Cluster Extension installation package from the command prompt. HP recommends
saving a copy of the HP XP Cluster Extension installation package in case it is needed for performing
maintenance operations on Server Core or Hyper-V Server systems.
Modifying the HP XP Cluster Extension installation
Once HP XP Cluster Extension is installed, you can modify the installation by adding or removing
components.
14 Installing HP XP Cluster Extension Software