
- HP All-in-One Printer Manual

252 Troubleshooting Q2431-90912
Hard-disk initialization
CAUTION A hard-disk initialization erases and reformats the printer hard disk. Perform a hard disk
initialization only if an error code on the control panel indicates an EIO disk error. Always try
initializing the hard disk before replacing it.
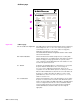
Note Before performing a hard-disk initialization, print a menu map and a configuration page (see “Menu
map” on page 240 and “Configuration page” on page 241). Use the information on the
configuration page to reset any customer-set printer configuration values that the hard disk
initialization procedure changes.
To initialize the hard disk
1. Turn the printer power off.
2. Hold down the P
AUSE/RESUME button, and then turn the printer power on. Continue holding
down the P
AUSE/RESUME button until all three printer control panel lights flash once and then
remain on. This might take up to 10 seconds.
3. Press the B
ACK ARROW ( ) button. The display should show INITIALIZE DISK.
4. Press the S
ELECT ( ) button. The printer initializes the hard disk and continues its power-on
sequence.
Power-on bypass
When the power is turned on the printer begins the power-on sequence. By performing a
power-on bypass, you can cause the printer to resume the power-on sequence but not to
recognize any installed EIO hard disk (skip disk load procedure). This can be helpful in isolating
EIO hard-disk errors.
You can also resume the power-on sequence but make the printer continuously print
configuration pages until the Pause/Resume button is pressed (self test procedure). This can be
helpful if you need to verify the printer components that are installed by reviewing the information
found on the configuration page, but the you cannot open the menus to print a configuration
page.
Skip disk load
1. Turn the printer power off.
2. Hold down the D
OWN ARROW ( ) button, and then turn the printer power on. Continue
holding down the D
OWN ARROW ( ) button until all three printer control panel lights flash
once and then remain on. This might take up to 10 seconds.
3. Press the U
P ARROW ( ) button followed by the Pause/Resume button.
4. Press the U
P ARROW ( ) button or the DOWN ARROW ( ) button until SKIP DISK LOAD is
highlighted.
5. Press the S
ELECT ( ) button. The printer continues the power-on sequence but ignores an
installed EIO hard disk.