
- HP All-in-One Printer Manual


Q2431-90912 Chapter 6 Removing and replacing parts 191
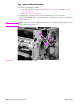
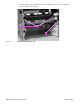
Paper-feed belt assembly
1. Remove the power supply. See “Power supply” on page 188.
2. Remove three screws (callout 1).
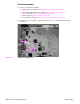
Figure 144. Paper-feed belt assembly (1 of 2)
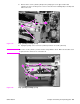
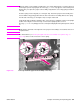
CAUTION Verify that the four rubber belts and plastic rollers (callout 3) remain in place. These belts and
rollers can easily come off and be lost.
When you install the paper-feed belt assembly, verify that the center foot (on the power-supply
side; callout 4) is correctly hooked under the support leg on the power supply.
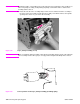
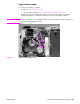
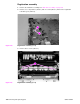
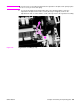
3. Release the paper-feed belt assembly alignment pins (callout 2). Rotate the assembly
toward the back of the power supply and remove it.
Figure 145. Paper-feed belt assembly (2 of 2)
11
4
2
3
2
3
4