
- HP All-in-One Printer Manual


174 Removing and replacing parts Q2431-90912
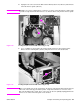
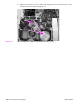
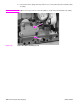
4. Remove four screws (callout 4). Do not turn the laser/scanner adjustment screw (circled).
Figure 119. Laser/scanner (3 of 4)
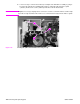
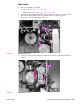
Reinstall note The two front mounting screws have grounding clips that are not captive when the screws are
removed. Be sure to replace these clips when the laser/scanner is installed.
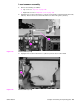
5. Carefully lift the laser/scanner up and out of the printer. Make sure the wires along the
bottom of the laser/scanner assembly don’t get snagged by the assembly when the
assembly is removed.
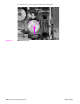
Figure 120. Laser/scanner (4 of 4)
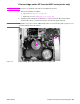
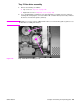
CAUTION When the laser/scanner assembly is installed, make sure that the wire-harnesses are properly
routed through the cable guides. It the wire-harnesses are not properly routed, they can be
damaged when the top cover is installed.
34