
- HP All-in-One Printer Manual


160 Removing and replacing parts Q2431-90912
Internal components
Firmware DIMM
CAUTION The product contains components that are sensitive to electrostatic discharge (ESD). Always
perform service work at an ESD-protected workstation. If an ESD-protected workstation is not
available, discharge body static by grasping the printer chassis before touching an
ESD-sensitive component. Ground the printer chassis before servicing the product
1. Remove the formatter cover. See “Formatter cover” on page 145.
Hint If possible, print a menu map and a configuration page. See “Menu map” on page 240 and
“Configuration page” on page 241. Use the information on the these pages to restore any user-set
printer configuration options after you install the replacement DIMMs.
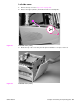
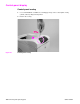
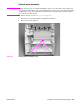
2. Open the formatter door.
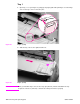
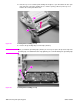
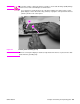
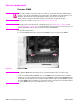
3. Push the DIMM locking arms away from the DIMM to release it. Remove the DIMM.
Figure 98. Firmware DIMM
Reinstall note The firmware DIMM must be installed in slot 1 (formatter PCA location J1; topmost slot).
If you are installing additional DIMMs, the second DIMM must be installed in slot 2 (formatter
location J2; second slot down from the top). If another DIMM is installed, the third DIMM must be
installed in slot 3 (formatter location J3; third slot down from the top). If another DIMM is installed,
the fourth DIMM must be installed in slot 4 (formatter location J4; bottom slot). The printer will not
recognize DIMMs if they are not installed in the correct order.