
Brocade Network Advisor SAN User Manual v12.0.0 (53-1002696-01, April 2013)

Brocade Network Advisor SAN User Manual 569
53-1002696-01
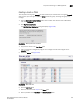
Steps for connecting to a TEKA appliance
20
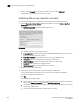
Signing the encryption node KAC CSR on TEKA
The KAC certificate signing request (KAC CSR) generated when the encryption node is initialized
must be exported for each encryption node and signed by the local CA on TEKA. The signed
certificate must then be imported back into the encryption node.
1. From the Encryption Center, select Switch > Export Certificate.
The Export Switch Certificate dialog box displays.
2. Select Public Key Certificate Request (CSR), then click OK.
A dialog box displays that allows you to save the CSR to your SAN Management Program
client PC.
Alternatively, you can select Switch > Properties, then click the Export button beside the Public
Key Certificate Request, or you can copy the CSR for pasting in the From Text box on the Thales
management program Sign Certificate Request page.
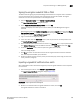
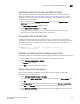
3. Log in to the Thales management program.
4. In the user table under the Certificate column, click the pen icon for the newly created user.
The Sign Certificate Request page displays.
5. Enter the CSR file name exported from the switch in the From File box, or if you copied the CSR
from Switch > Properties, paste the CSR file contents to the From Text box, then click Sign.
6. Under the Certificate column, click the export icon (globe with an arrow).
A file save dialog displays.
7. Cl ic k Save and enter the destination location for this signed certificate. Save the certificate
with a Privacy Enhanced Mail (.pem) extension.
8. Perform the above steps for both the primary and secondary key vaults using the same user
name, password, and group.
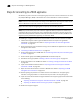
Importing a signed KAC certificate into a switch
After a KAC CSR has been submitted and signed by a CA, the signed certificate must be imported
into the switch.
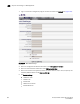
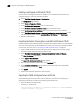
1. From the Encryption Center, select Switch > Import Certificate.
The Import Signed Certificate dialog box displays (Figure 204).
FIGURE 204 Import Signed Certificate dialog box
2. Browse to the location where the signed certificate is stored, then click OK.
The signed certificate is stored on the switch.