
Brocade Network Advisor SAN User Manual v12.0.0 (53-1002696-01, April 2013)


Brocade Network Advisor SAN User Manual 989
53-1002696-01
SNMP traps
32
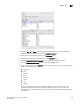
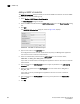
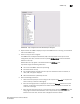
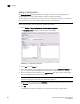
FIGURE 428 Trap Configuration tab of the Event Reception dialog box
3. Expand a folder for a MIB to display the traps in the MIB. If the list is too long, use the Search
tool to find a MIB or trap.
4. Select the trap you want to register.
The SNMP name and Object Identification (OID) of the trap appear at the top line of the
configuration pane. Also, the status of the trap shows Not Registered, which is the default
definition of the trap.
Details about the trap appear in the fields beneath the MIB Name field.
Trap details supply the following information:
• The name of the MIB to which the trap belongs
• Information about the trap
• Any variable bindings (varbinds) that the trap uses. Information about the varbind, its
name, OID, and type, is displayed
• Recommended action specified by the user
5. Enter the following information:
a. Select the severity level you want to assign to the trap from the Severity list. If you do not
select a severity, it defaults to Emergency.
b. Enter the message you want to display for this trap in the Message field. If the trap has
varbinds, use $#, where # represents the varbind number, to indicate the varbind. You
must enter a message.
c. Enter an alias string that serves as a second name for the trap in the MIB Alias field. This
string might be more understandable to users. This parameter is optional. The Event
Processor uses this alias, and this alias is displayed in the Event Action.