
Brocade Network Advisor SAN User Manual v12.0.0 (53-1002696-01, April 2013)

Brocade Network Advisor SAN User Manual 629
53-1002696-01
Creating a new encryption group
20
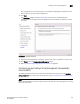
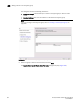
All configuration items have green check marks if the configuration is successful. A red stop
sign indicates a failed step. A message displays below the table, indicating the encryption
switch was added to the group you named, and the public key certificate is stored in the
location you specified.
After configuration of the encryption group is completed, the Management application sends
API commands to verify the switch configuration.
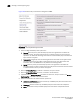
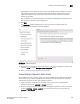
15. Click Next.
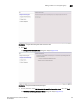
The Next Steps dialog box displays (Figure 274). Instructions for installing public key
certificates for the encryption switch are displayed.
FIGURE 274 Next Steps dialog box
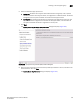
16. Review the post-configuration instructions, which you can copy to a clipboard or print for later,
then click Finish to exit the Configure Switch Encryption wizard.
17. Refer to “Understanding configuration status results”.
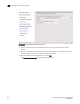
Understanding configuration status results
After configuration of the encryption group is completed, the Management application sends API
commands to verify the switch configuration. The CLI commands are detailed in the encryption
administrator’s guide for your key vault management system.
1. Initialize the switch. If the switch is not already in the initiated state, the Management
application performs the cryptocfg
--initnode command.
2. Create an encryption group on the switch. The Management application creates a new group
using the cryptocfg
--create -encgroup command, and sets the key vault type using the
cryptocfg
--set -keyvault command.