
Brocade Network Advisor Installation and Migration Guide v12.0.0 (53-1002699-01, April 2013)


12 Network Advisor Installation and Migration Guide
53-1002699-01
Installing the application
1
Installing the application
Before you install the application, make sure your system meets the minimum pre-installation
requirements (refer to
“Pre-installation requirements” on page 10). If you are migrating data, refer
to “Data Migration” on page 41.
NOTE
SAN with SMI Agent + IP is not supported on 32-bit Windows
systems. For more information, refer to
“Pre-migration requirements” on page 45.
NOTE
SMI Agent is only available with the SAN with SMI Agent or SAN with SMI Agent + IP packages, it is
not available with the IP only package.
NOTE
On Windows systems, you must be an Administrator with Read and Write privileges to install Network
Advisor.
NOTE
On UNIX systems, you must be the root user to install Network Advisor.
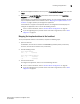
To install the new application version, complete the following steps.
1. Choose one of the following options:
• For Windows systems, open this file:
Download_Location\Application_Name\windows\install.exe.
• For UNIX systems, complete the following steps.
a. On the Management application server, go to the following directory:
Download_Location/Application_Name/UNIX_Platform/bin
b. Type the following at the command line:
./install.bin
OR
sh install.bin
NOTE
On Linux systems, if you double-click the install.bin file, select Run. Do not select Run in
Terminal.
2. Click Next on the Introduction screen.
3. Read the agreement on the License Agreement screen, select I accept the terms of the
License Agreement, and click Next.
4. Select the usual location for your system application files (for example, D:\Program
Files\Application_Name or opt/Application_Name) on the Select Install Folder screen and
click Next.
NOTE
Do not install to the root directory C:\ (Windows) or / (UNIX).