
Installation and Reference Guide (J3210A, J3212A, J3200A, J3202A, J3204A) 1996-08

1-3
Installing the Management Module
Installation Steps
Installing the Management
Module
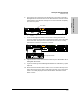
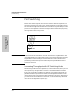
6. Unscrew the two captured screws holding the cover plate to the hub’s
Management Slot and remove the cover. Note that the screws will release
outward when unscrewed far enough. Do not unscrew them completely
from the cover plate.
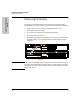
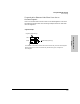
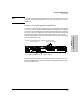
7. Insert the Management Module into the hub. Leading with the hub
connector edge, line up the sides of the module with the rails on the sides
of the hub’s slot. Then push the module into the slot until it is firmly
seated in the connector in the back of the slot.
8. Tighten the two screws that hold the module in place. Be careful not to
overtighten the screws.
9. If you are installing a second Management Module for redundancy, repeat
steps 1-8.
10. Reconnect the Extender Cable if there is one. The hub at the top of the
stack should only have a cable connected in the OUT port so that stack
order is accurately displayed in HP AdvanceStack Assistant and the
ASCII console.
Loosen these
screws
cover plate
Management Module
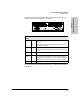
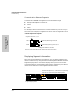
Base MAC Address
Active