
HP 3PAR T-Class Installation and Deinstallation Guide

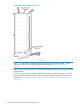
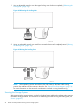
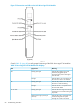

1. Use an adjustable wrench to turn the upper locking nuts clockwise completely (“Releasing the
Locking Nut” (page 76)).
Figure 68 Releasing the Locking Nut
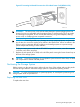
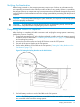
2. Using an adjustable wrench, turn each foot counterclockwise until completely raised (“Raising
the Leveling Foot” (page 76)).
Figure 69 Raising the Leveling Foot
NOTE: If the operating site has raised floor tiles with cutouts to facilitate cable routing,
position the cabinets over the cutouts in the tiles. See “Raised Floor Requirements” (page 14)
for more information on the structural considerations involved in using raised flooring.
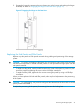
Securing the Storage System
After positioning the storage system, use the four leveling feet to stabilize the cabinet and to prevent
movement during operation. For instructions on stabilizing the cabinet using the leveling feet, see
Section (page 45).
76 Checks and Setup before Powering On the Storage System