
HP 3PAR T-Class Installation and Deinstallation Guide
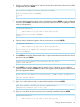

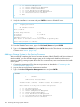


2 ==> Network Configuration
3 ==> InServ Configuration Management
4 ==> InServ Product Maintenance
5 ==> Local Notification Configuration
6 ==> Site Authentication Key Manipulation
7 ==> Interactive CLI for an InServ
X Exit
1
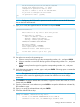
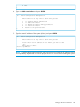
9. Verify the installation is accurate and press ENTER to return to SPMAINT menu.
1.1 Display SP Version
SP Software Version
SP-2.5.1.GA-15
SP Base Image Version: 3.1-8
SP Version: 2.5.1.GA-15
SP Patches:
InFormOS release (3.1.1): 3.1.1.226
More detail is available in the latest SPLOR or spconfig data.
press <enter/return> to continue
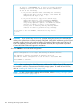
10. From the SPMAINT main menu, type 1 for SP Control/Status and press ENTER
11. Type 10 for Unmount a CDROM and press ENTER. Remove the CD and store in a secure place.
Continue on to Section (page 146).
Adding a Storage System to the Service Processor
After successfully completing the Service Processor Moment of Birth (SPMOB) with Secure Network
Mode enabled, you must add the storage system to the configuration database of the service
processor. Adding a storage system allows the SP to communicate, service and monitor the health
of the system.
1. Connect the maintenance PC to the service processor as described in “Connecting to the
Service Processor” (page 193).
2. Log into the service processor maintenance interface.
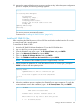
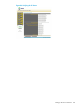
3. Type 3 for InServ Configuration Management menu and press ENTER.
SPXXXXX
1 SP Main
3PAR Service Processor Menu
Transfer media: ethernet Transfer status: No transfer yet
Enter Control-C at any time to abort this process
1 ==> SP Control/Status
2 ==> Network Configuration
3 ==> InServ Configuration Management
4 ==> InServ Product Maintenance
5 ==> Local Notification Configuration
6 ==> Site Authentication Key Manipulation
7 ==> Interactive CLI for an InServ
146 Initializing the Storage System Software