
HP 3PAR T-Class Installation and Deinstallation Guide
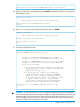

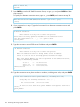


21. Type the external NTP server address (if available) and press ENTER. If unavailable, type none
and press ENTER.
Network Time Server
Enter Control-C at any time to abort this process
Please enter the I/P address of an external NTP server,
or a blank delimited list if more than one is desired,
or 'none' if there will not be any time server [?]:
Enter the IP address of an external NTP server
<NTP.server.address>
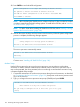
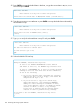
22. Typeyes to verify the supplied network information and press ENTER.
SP Network Parameters
Enter Control-C at any time to abort this process
The Host Name is: <spname>
The IP address entered is: <static.IP.address>
The Netmask entered is: <subnet.mask.address>
The default gateway is: <default.gateway.address>
NTP Server address: <NTP.server.address>
Data Transfer media: MODEM
Remote Operations media: MODEM
Connection Server <3PAR default server> OR <server_name>
IP: <PPPD.server.IP>
Phone number: <phone_number>
The SP local number is: <splocalnumber>
The dialup prefix is: <prefix>
Is this data correct? (yes or no)? [yes]
yes
NOTE: The connection server IP and phone number only appear when you are not using
the HP Connection Server at HP Central.
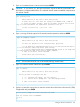
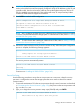
23. Set up the time zone for the operating site:
a. Select a country from the list, type the corresponding number <X> , and press ENTER.
b. Select a continent or ocean from the list, type the corresponding number <X> , and press
ENTER.
c. Select a country from the region list, type the corresponding number <X> , and press
ENTER
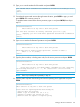
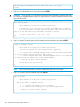
24. Verify the time zone setting is correct, type 1 and press ENTER. Choosing option 2 restarts the
time zone configuration.
NOTE: The system automatically makes the time zone change permanent. Disregard the
instructions on the screen for appending the command to make the time zone change
permanent.
Setting up the Service Processor 137