
HP 3PAR T-Class Installation and Deinstallation Guide
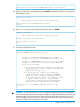


Please enter the current date in MM/DD/YYYY format [<current date>] :
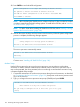
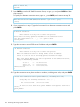
25. Type the current time in HH:MMformat or press ENTER to accept the default time indicated by
the installation script.
Basic Date and Time
Enter Control-C at any time to abort this process
Please enter the time in HH:MM format [<Time>]:
[enter]
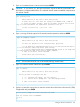
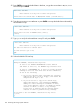
26. Type yes to verify the indicated date from step 24 and press ENTER.
Basic Date and Time
Enter Control-C at any time to abort this process
The date You entered is <current date>
Is this Correct? (yes or no)
yes
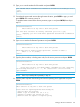
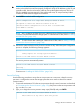
27. Select the default SSH site keys.
Using the DEFAULT, installed Site key files:
If this is the INITIAL INSTALLATION of this 3PAR SP
and InServ at this site, the DEFAULT keys should be used.
If this is a REPLACEMENT SP, or there is already an InServ
running at this site with which this SP must communicate,
do one of the following:
1) If you have external media containing the currently
deployed key pair (on CD or floppy), then answer NO
and provide the Keys to use.
2) If you do not have a copy of the current keys,
answer YES and force a key-exchange by MANUALLY
adding the cluster during the SP Moment of Birth,
or by using "spmaint" option 6.4.2 AFTER the moment
of birth to invoke (or force) a key exchange.
You may have to manually add any existing InServ
clusters in order to perform the key exchange.
Do you wish to use the DEFAULT, installed Site key files?
(y or n)
y
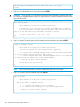
CAUTION: If you receive any Password: prompts during this process, this indicates the
nodes in the system have not been properly configured. Verify the IP addresses on the SP and
controller nodes. Use the red crossover cable to connect the highest node port ETH 0 to SP
ETH 0 to establish a private network. If the problem still exists, do not proceed any further.
Contact HP 3PAR Technical Support for assistance.
Setting up the Service Processor 131