
HP 3PAR T-Class Installation and Deinstallation Guide


11. Press ENTER to accept the default network speed or enter the network speed and press ENTER.
Please enter the network speed (10HD,10FD,100HD,100FD,1000HD,1000FD,AUTO)
[AUTO]
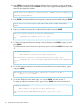
12. Type the static IPv4 address assigned to the domain server or none and press ENTER.
SP Network Parameters
Enter Control-C at any time to abort this process
Please enter the IPv4 address (or blank separated list of addresses) of
the Domain Name Server(s)
or 'none' if there will not be any DNS support: [?]:
<static.ipv4.address> or none
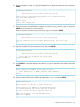
13. Type yes to assign use of the HP 3PAR Secure Service Policy Manager with the HP 3PAR
Secure Service Collector and press ENTER. If you answered yes, skip to step 16.
To refrain from assigning use of the HP 3PAR Secure Service Policy Manager with the HP
3PAR Secure Service Collector, type no, press ENTER, and continue with step 14.
NOTE: In SP 2.5.2, do not configure Policy Manager.
Will a 3PAR Secure Service Policy Manager be used with this 3PAR Secure Service
Collector Server? (yes or no) [yes]:
no
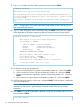
14. Type yes to allow remote access to the service processor and press ENTER.
Remote access to this Service Processor would normally be controlled by the 3PAR
Secure Service Policy Manager. Since there will not be one, the ability to
remotely access this SP will be controlled by a configuration setting of the local
SSAgent.
Will remote access to this Service Processor be allowed (yes or no)? [yes]:
yes
15. Type yes to confirm that the data is correct, and press ENTER. If you indicated yes, skip to
step 26.
3PAR Secure Service Policy Manager
- Name/address: none
- Remote access: Allowed
Is this data correct? (yes or no)? [yes]
yes
Setting up the Service Processor 119