HP 3PAR VMware ESX Implementation Guide This implementation guide provides information for establishing communication between an HP 3PAR StoreServ Storage and a VMware ESX host. General information is provided on the basic steps required to allocate storage on the HP 3PAR StoreServ Storage that is accessed by the ESX host.
© Copyright 2014 Hewlett-Packard Development Company, L.P. Confidential computer software. Valid license from HP required for possession, use or copying. Consistent with FAR 12.211 and 12.212, Commercial Computer Software, Computer Software Documentation, and Technical Data for Commercial Items are licensed to the U.S. Government under vendor's standard commercial license. The information contained herein is subject to change without notice.
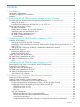
Contents 1 Introduction...............................................................................................6 Supported Configurations..........................................................................................................6 HP 3PAR OS Upgrade Considerations.........................................................................................7 Audience................................................................................................................................
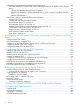
Performance Considerations for Multiple Host Configurations........................................................48 ESX/ESXi Handling SCSI Queue Full and Busy Messages from the HP 3PAR StoreServ Storage Array...............................................................................................................................49 VMware ESX Releases through ESX 3.5 Update 3.............................................................49 VMware ESX Release 3.5 Update 4 through ESX 4.x, ESXi 5.0 and 5.
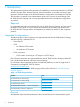
11 Documentation feedback..........................................................................84 A Appendix................................................................................................85 Follow-up Actions/Recommendations for ESX 3.5 Update 3 and Earlier.........................................85 Recommendations for ESX Hosts Attached to a Storage Port on the HP 3PAR StoreServ Storage....85 Modifying the Tuneable Parameters for Queue Depth Throttling in ESX 3.x........................
1 Introduction This implementation guide provides information for establishing communication between an HP 3PAR StoreServ Storage and a VMware ESX host. General information is provided on the basic steps required to allocate storage on the HP 3PAR StoreServ Storage that is accessed by the ESX host. The information contained in this implementation guide is the outcome of careful testing of the HP 3PAR StoreServ Storage with as many representative hardware and software configurations as possible.
HP 3PAR OS Upgrade Considerations For information about planning an online HP 3PAR Operating System (HP 3PAR OS) upgrade, see the HP 3PAR Operating System Upgrade Pre-Planning Guide, which is available on the HP Storage Information Library: www.hp.com/go/storage/docs For complete details about supported host configurations and interoperability see the HP SPOCK website: www.hp.
2 Configuring the HP 3PAR StoreServ Storage for Fibre Channel This chapter explains how to establish a Fibre Channel connection between the HP 3PAR StoreServ Storage and a VMware ESX host and covers HP 3PAR OS 3.1.x and 2.3.x versions. For information on setting up the physical connection for a particular HP 3PAR StoreServ Storage, see the appropriate HP 3PAR installation manual. Configuring the HP 3PAR StoreServ Storage Running HP 3PAR OS 3.1.x or OS 2.3.
2. If the port has not been configured, take the port offline before configuring it for the ESX host by issuing the following HP 3PAR OS CLI command: controlport offline [node:slot:port] CAUTION: Before taking a port offline in preparation for a direct or fabric connection, you should verify that the port has not been previously defined and that it is not already connected to a host as this would interrupt the existing host connection.
NOTE: When changing an existing host persona from 6 to 11, a host reboot is required tor the change to take effect. This is an offline process. See “Configuring ESX/ESXi Multipathing for Round Robin via SATP PSP” (page 42) for the detailed procedure, as the host persona change should coincide with changing the SATP rules on the host as well. For both host persona 6 and persona 11, see the appropriate chapters in this guide for iSCSI, Fibre Channel, or FCoE setup considerations. 1.
NOTE: See the HP 3PAR Command Line Interface Reference or the HP 3PAR Management Console Users Guide for complete details on using the controlport, createhost, and showhost commands. These documents are available on the HP Storage Information Library at: www.hp.
After configuring zoning and connecting each host HBA port and HP 3PAR StoreServ Storage port to the fabric(s), verify the switch and zone configurations using the HP 3PAR OS CLI showhost command, to ensure that each initiator is zoned with the correct target(s). HP 3PAR Coexistence The HP 3PAR StoreServ Storage array can coexist with other HP array families.
• Cisco switch ports that connect to HP 3PAR StoreServ Storage ports or host HBA ports should be set to AdminMode = FX and AdminSpeed = auto port, with the speed set to auto negotiate. • QLogic switch ports should be set to port type GL-port and port speed auto-detect. QLogic switch ports that connect to the HP 3PAR StoreServ Storage should be set to I/O Stream Guard disable or auto, but never enable.
HP 3PAR OS Persistent Ports for FC The HP 3PAR OS Persistent Ports (or virtual ports) feature minimizes I/O disruption during an HP 3PAR StoreServ Storage online upgrade or node-down event (online upgrade, node reboot, or cable pull test). Port shutdown or reset events do not trigger this feature. Each FC target storage array port has a partner array port automatically assigned by the system. Partner ports are assigned across array node pairs.
3 Configuring the HP 3PAR StoreServ Storage for iSCSI This chapter explains how to establish an iSCSI connection between the HP 3PAR StoreServ Storage and the VMware ESX host. If you are running specific CNA cards, a software or hardware iSCSI initiator can be used. For details about hardware iSCSI configuration, see “Hardware iSCSI Support ” (page 22).
4. On your HP 3PAR StoreServ Storage array, use the controliscsiport command to configure networking as shown in the following example: # # # # controliscsiport controliscsiport controliscsiport controliscsiport addr addr addr addr 10.1.1.100 10.1.1.102 10.1.1.101 10.1.1.103 255.255.255.0 255.255.255.0 255.255.255.0 255.255.255.0 -f -f -f -f 0:1:1 0:1:1 0:1:2 0:1:2 NOTE: A maximum of 64 host iSCSI initiator ports can be connected to any one HP 3PAR StoreServ Storage target port.
The following example for creating a host definition uses a VMware iSCSI initiator iqn.1998-01.com.vmware:sqahpbc02icm5-40e25c56 on an ESX host (the only iSCSI initiator for this server in this case) connecting through a VLAN to a pair of HP 3PAR StoreServ Storage iSCSI ports. The host definition is given the name ESX1 and the host persona is set to 6 (Generic-legacy). 1.
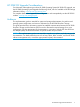
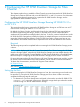
The following example uses the CHAP secret (CHAP password) host_secret3 for the ESX host. The CHAP secret must be at least 12 characters long. 2. On the ESX host VI/vSphere client, select the Configuration tab, and then click Storage Adapters under the Hardware pane. Select the iSCSI Software Adapter and then select the Properties link. For ESX 3.5, select the CHAP Authentication tab, and then select the Use the following CHAP credentials radio button. Figure 1 CHAP Authentication in ESX 3.
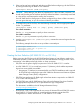
Figure 2 CHAP Credentials in ESX/ESXi 4.x or ESXi 5.x 3. Enter the CHAP Secret. NOTE: 4. Use the same CHAP secret on both the ESX host and the HP 3PAR StoreServ Storage. Click OK. A warning screen appears indicating that a reboot of the ESX host is required. NOTE: A server reboot is required for ESX 3.5 (see Figure 3 (page 20)). For ESX 4.x and ESXi 5.
Figure 3 Server Reboot in ESX 3.5 5. 6. Click OK to confirm. On the HP 3PAR StoreServ Storage, use the HP 3PAR OS CLI sethost command with the initchap parameter to set the CHAP secret for the ESX host.
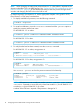
NOTE: If mutual CHAP on ESX is configured, you must configure the target CHAP on the HP 3PAR StoreServ Storage as well as the initiator CHAP. Set the target CHAP secret using the HP 3PAR OS CLI sethost command and the targetchap parameter. # sethost targetchap -f secret3_host ESX1 NOTE: a. The initiator CHAP secret and the target CHAP secret cannot be the same. ESX 4.x and 5.x: Figure 4 CHAP Credentials in ESX 4.x and 5.x 7.
NOTE: Use the HP 3PAR OS CLI showsys command to get the Mutual CHAP Name (Name of your HP 3PAR StoreServ Storage). # showsys ---------------(MB)---------------ID -Name- 99800 s331 ---Model---- -Serial- Nodes Master TotalCap AllocCap FreeCap FailedCap HP_3PAR 7200 1699800 2 1 8355840 849920 7504896 1024 Hardware iSCSI Support At ESX 5.0 and above, hardware iSCSI is supported using the CN1100E CNA card and other Emulex BE3 models.
3. 4. 5. Select a controller and then press Enter. On the Controller Configuration screen, select Network Configuration and then press Enter. On the Network Configuration screen, select Configure Static IP Address and then press Enter. The screen for setting a static IP address appears. Figure 6 Setting a Static IP Address 6. Type the IP address, subnet mask, default gateway and then click Save to return to the Controller Configuration menu.
Figure 7 Adding an iSCSI Target 8. Click Ping to verify connectivity. 9. After a successful ping, click Save/Login. 10. When both controllers are configured, use the showiscsisession command to display the iSCSI sessions on the HP 3PAR StoreServ Storage and the host. If everything is configured correctly, the output should be similar to the following example: root@jnodec103140:S99814# showiscsisession 0:2:1 10.101.0.100 21 15 1 iqn.1990-07.com.emulex:a0-b3-cc-1c-94-e1 2012-09-24 09:57:58 PDT 1:2:1 10.101.
Figure 8 One-Way CHAP When the CHAP Configuration screen appears, type the Target CHAP name (the initiator IQN name) and Target secret as shown below: Figure 9 CHAP Configuration for One-Way CHAP • In the Authentication Method setting on the Add-Ping iSCSI Target screen (???), select Mutual CHAP. The CHAP Configuration screen appears (see ???).
Figure 10 CHAP Configuration for Mutual CHAP Fill in the Target CHAP Name (the initiator IQN name), the Target Secret, the Initiator CHAP Name (DNS name of the storage), and an Initiator Secret, click OK. • To remove CHAP authentication, in the Authentication Method setting on the Add-Ping iSCSI Target screen, select None. 12. If you set up CHAP authentication, before rebooting the host system, make sure to set the matching CHAP parameters for the host in the HP 3PAR StoreServ Storage.
Figure 11 CN1100E BIOS 4. Make sure that your CNA is not configured for Independent Hardware iSCSI. NOTE: These steps are specific to the CN1100E. Different vendors employ different methods of implementing Dependent Hardware iSCSI. See vendor documentation for specific procedures. a. b. c. d. On the CN1100E, press Ctrl+S to enter the BIOS. Select Controller Configuration. Select your controller port. Select Erase Configuration, as shown in Figure 12 (page 27): Figure 12 Erase Configuration 5. 6.
Figure 13 vCenter Configuration Tab 7. On the Configuration tab, click Storage Adapters, and right-click the CNA port you want to configure (Figure 14 (page 28)): Figure 14 vCenter Storage Adapters Menu 8. 28 Select Properties, and then click Configure (Figure 15 (page 29)).
Figure 15 General Properties 9. Enter the IP address for your Subnet Mask and Default Gateway, and then click OK. 10. Click the Dynamic Discovery tab, and then click Add (Figure 16 (page 29)). Figure 16 Dynamic Discovery 11. Enter the IP address of your HP 3PAR StoreServ Storage and click OK. 12. Repeat for each HP 3PAR StoreServ Storage port you want this initiator port to access. 13.
Figure 17 Static Discovery 14. Click Close. 15. Click Yes to rescan the host bus adapter. 16. Use the showiscsisession command on the HP 3PAR OS CLI to verify connectivity.
HP 3PAR Priority Optimization for iSCSI The HP 3PAR Priority Optimization feature introduced in HP 3PAR OS 3.1.2.MU2 is an efficient and dynamic solution for managing server workloads and can be used as an alternative to setting host I/O throttles. Using this feature, a storage administrator can share storage resources effectively by enforcing quality of service limits on the array.
4 Configuring the HP 3PAR StoreServ Storage for FCoE Setting Up the FCoE Switch, FCoE Initiator, and FCoE target ports Connect the ESX host FCoE initiator ports and the HP 3PAR StoreServ Storage FCoE target ports to the FCoE switches. NOTE: FCoE switch VLANs, routing setup, and configuration is beyond the scope of this document. See your switch manufacturer's documentation for instructions on setting up VLANs and routing. 1.
2. Turn off the iSCSI ports by with the controlport offline [node:slot:port] command: # controlport offline 0:3:1 # controlport offline 0:3:2 showport 0:3:1 target offline 3.
For both host persona 6 and persona 11, see the appropriate chapters in this guide for host FCoE setup considerations. 1. To display all available host personas: # showhost -listpersona 2. To create host definitions, use the createhost command with the -persona option to specify the persona and the host name. For HP 3PAR OS 3.1.1 or earlier: # createhost -persona 6 ESXserver1 10000000C9724AB2 10000000C97244FE For HP 3PAR OS 3.1.
Target Port Limits and Specifications To avoid overwhelming a target port and ensure continuous I/O operations, observe the following limitations on a target port: • For information available on host port per target port and the maximum total host ports per array, see the HP 3PAR Feature Availability Matrix documentation on the HP Single Point of Connectivity Knowledge (HP SPOCK) website: HP SPOCK • I/O queue depth on each HP 3PAR StoreServ Storage HBA model, as follows: ◦ QLogic CNA: 1748 (HP 3PAR Sto
For a more complete description of the HP 3PAR OS Persistent Ports feature, its operation, and a complete list of required setup and connectivity guidelines, see: • the HP Technical white paper HP 3PAR StoreServ Persistent Ports (HP document #F4AA4-4545ENW) on the HP SC website: HP Support Center • the HP 3PAR Command Line Interface Administrator’s Manual, “Using Persistent Ports for Nondisruptive Online Software Upgrades” This document is available on the HP Storage Information Library : www.hp.
5 Configuring the Host for a Fibre Channel Connection This chapter describes the procedures and considerations required to set up an ESX host to communicate with an HP 3PAR StoreServ Storage over a Fibre Channel connection. Installing the HBA and Drivers Before setting up the ESX host, make sure the host adapters are installed and operating properly. If necessary, see the documentation provided by the HBA vendor for instructions.
Port type Bandwidth IOC state PWWN NWWN Path TOV Portlog IO Profile Interrupt coalescing Interrupt delay Interrupt latency : : : : : : : : : : : FC 8 Gbps operational 10:00:00:05:1e:dc:f3:2f 20:00:00:05:1e:dc:f3:2f 14 seconds Enabled Off on 0 us 0 us Installing Virtual Machine Guest Operating System The VMware ESX host documentation provides a list of recommended virtual machine guest operating systems (GOS) with their installation and setup as virtual machines (VMs).
NOTE: VMware and HP recommend the LSI logic adapter emulation for Windows 2003 Servers. The LSI Logic adapter is also the default option for Windows 2003 when creating a new virtual machine. HP testing has noted a high incidence of Windows 2003 virtual machine failures during an ESX multipath failover/failback event when the BUS Logic adapter is used with Windows 2003 VMs.
The VI/vSphere client GUI allows for settings to be changed only on a volume-by-volume (LUN-by-LUN) basis. The GUI is appropriate and preferred for use in managing I/O paths within theFIXED path policy scheme. See “Configuring Round Robin Multipathing on ESX 4.x or later for Fibre Channel” (page 41) for procedures on implementing and configuring the round-robin path policy on ESX/ESXi 4.0 and later with an HP 3PAR StoreServ Storage.
Figure 18 vSphere Client • A path policy of MRU (most recently used) does not maintain or reinstate balancing of I/O load after a failover/failback multipath event. This could leave I/O in an unplanned and unbalanced state which might yield significant I/O performance issues. HP does not recommend the Implementation of an MRU path policy.
Figure 19 LUN Set to Round Robin Managing a round robin I/O path policy scheme through the VI/vSphere client GUI for a large network can be cumbersome and challenging to maintain because the policy must be specified for each LUN individually and then updated when new devices are added.
and starting point for further optimization of IO throughput with PSP Round-Robin. With the exception of ESX/ESXi 4.0 versions, it is preferable to set the IOPS value within a SATP custom rule. CAUTION: VMware specifically warns not to directly edit the esx.conf file. NOTE: • The setting of IOPs=1 is a new recommended initial value as documented in the HP technical white paper HP 3PAR StoreServ Storage and VMware vSphere 5 Best Practice (HP document #4AA4–3286ENW).
1. 2. 3. 4. 5. Stop all host I/O and apply the necessary SATP changes (create custom SATP rule and/or modify default SATP rule PSP defaults) to the ESX/ESXi host. Shut down the host. Change the host persona on the array. Boot the host. Verify that the target devices have been claimed properly by the SATP rule. ESX/ESXi 4.0 GA - 4.0 Ux NOTE: • Although ESX 4.0 GA - 4.0 Ux supports custom SATP rules, the -P options for setting PSP (path policy) within the custom rule are not supported.
CAUTION: The procedure for changing the default SATP rules to use the round robin I/O multipathing policy is intended to apply only to VMware hosts using HP 3PAR StoreServ Storage LUNs. If the host shares storage from other vendors, before making any I/O policy changes, you must consider the effect that changing the default rules will have on the storage environment as a whole. A change of the default PSP for a given SATP affects all storage devices (FC, FCoE, iSCSI) that use the same default SATP rule.
To remove the above Active-Active custom SATP rule: # esxcli storage nmp satp rule remove -s "VMW_SATP_DEFAULT_AA" -P "VMW_PSP_RR" -O iops=1 –c "tpgs_off" -V "3PARdata" -M "VV" -e "HP 3PAR Custom iSCSI/FC/FCoE Rule" HP 3PAR custom SATP rule for use with persona 11/VMware (ALUA compliant array port presentation) # esxcli storage nmp satp rule add -s "VMW_SATP_ALUA" -P "VMW_PSP_RR" -O iops=1 -c "tpgs_on" -V "3PARdata" -M "VV" -e "HP 3PAR Custom iSCSI/FC/FCoE ALUA Rule" To remove the above ALUA custom SATP r
ESXi 5.x example For persona 11: For persona 6: ESX/ESXi 4.x example # esxcli nmp satp listrules | grep -i 3par VMW_SATP_ALUA 3PARdata VV tpgs_on HP 3PAR Custom iSCSI/FC/FCoE ALUA Rule Show Device Information To show device information, use the commands in the following examples: ESXi 5.x example # esxcli storage nmp device list naa.50002ac0000a0124 Device Display Name: 3PARdata iSCSI Disk (naa.
ESXi 5.x # esxcli storage nmp device list | grep -i naa.50002ac | grep -v Device naa.50002ac0005800ac naa.50002ac003b800ac naa.50002ac0039300ac ESX/ESXi 4.x # esxcli nmp device list | grep -i naa.50002ac | grep -v Device naa.50002ac0005800ac naa.50002ac003b800ac naa.50002ac0039300ac 2. Change the I/O path policy to round robin for each device identified in the previous output: ESXi 5.x # esxcli storage nmp device set -d naa.50002ac0005800ac -P VMW_PSP_RR ESX/ESXi 4.
ESX/ESXi Handling SCSI Queue Full and Busy Messages from the HP 3PAR StoreServ Storage Array VMware ESX Releases through ESX 3.5 Update 3 The default behavior of ESX 3.5 Update 3 and older servers to the Queue Full and Busy SCSI messages from the HP 3PAR StoreServ Storage is to treat them as valid commands and to continue sending data. When continued outstanding commands are sent to an HP 3PAR StoreServ Storage port, the port cannot recover and stops responding for attached hosts.
You can also use the esxcli command to set these values on a per-device basis. If both options (the esxcli and the advanced parameters) are used, the per-device values take precedence. To set QFullSampleSize and QFullThreshold on a per-device level, use theesxcli command: # esxcli storage core device set --device device_name -q Q -s S The settings do not require a reboot to take effect and are persistent across reboots.
the provisioning of VMs. This offloads some of the file space zeroing functions to the storage array. • Hardware Assisted Locking (ATS) provides an alternative to SCSI reservations as a means to protect the metadata for VMFS cluster file systems and helps improve the scalability of large ESX host farms sharing a datastore. HP 3PAR VAAI Plugin 1.1.1 for ESX 4.1 Support for VMware VAAI functionality is available by installing the HP 3PAR VAAI Plugin 1.1.1 on ESX/ESXi 4.1 with HP 3PAR HP 3PAR OS version 2.3.
NOTE: To avoid possible issues described in VMware KB 2007427 and KB 2014849, automatic VAAI Thin Provisioning Block Space Reclamation (UNMAP) should be disabled on ESXi 5.0 GA. The KB articles are available on the VMware Knowledge Base website: VMware ESXi 5.0 Update 1 and later includes an updated version of vmkfstools that provides an option [-y] for sending the UNMAP command regardless of the ESXi host’s global setting.
When the warning limit is reached, the HP 3PAR StoreServ Storage sends a soft threshold error asc/q: 0x38/0x7 and ESX continues to write. InServ debug log: 1 Debug Host error undefined Port 1:5:2 -- SCSI status 0x02 (Check condition) Host:sqa-dl380g5-14-esx5 (WWN 2101001B32A4BA98) LUN:22 LUN WWN:50002ac00264011c VV:0 CDB:280000AB082000000800 (Read10) Skey:0x06 (Unit attention) asc/q:0x38/07 (Thin provisioning soft threshold reached) VVstat:0x00 (TE_PASS -- Success) after 0.
The Quota Exceeded Behavior present in ESXi 5.x is accomplished through the "Thin Provisioning Soft Threshold Reached" check condition, providing alerts and warnings. VAAI and New Feature Support Table The following table summarizes the VAAI plug-in requirements and New Primitives support. Table 3 HP 3PAR VAAI Plugin Installation Requirements VMware ESX ESX 4.1 Features/Primitives HP 3PAR OS 2.3.1 MU2 or later ESX 4.1 ESXi 5.x ESXi 5.x HP 3PAR OS 3.1.1 or later HP 3PAR OS 2.3.
To show that the plug-in is active in the claimrule which runs for each of the devices discovered: • To show that the VAAI is enabled for the HP 3PAR data device: # esxcfg-scsidevs -l naa.50002ac0002200d7 Device Type: Direct-Access Size: 51200 MB Display Name: 3PARdata Fibre Channel Disk (naa.50002ac0002200d7) Multipath Plugin: NMP Console Device: /vmfs/devices/disks/naa.50002ac0002200d7 Devfs Path: /vmfs/devices/disks/naa.
ESXi 5.x with HP 3PAR OS 3.1.1 uses the native T10 plugin, and should not show any HP 3PAR plugin. # esxcli storage core plugin list Plugin name Plugin class ----------- -----------NMP MP The following output shows that Hardware Acceleration is enabled on HP 3PAR LUNs to take advantage of the storage primitives on ESX 4.1 and ESXi 5.x.
6 Configuring the Host as an FCoE Initiator Connecting to a FC target or an FCoE Target All contents of the Fibre Channel section of this guide also apply to FCoE connectivity. See the following sections: • “Installing Virtual Machine Guest Operating System” (page 38) • “Multipath Failover Considerations and I/O Load Balancing” (page 39) • “Performance Considerations for Multiple Host Configurations” (page 48) • “ESX/ESXi 4.1, ESXi 5.
Figure 23 NIC Personality Options 3. In the PCI Slot 2 Pane, select FCoE for both Port 1 and Port 2. Figure 24 Configuring the PCI Slots 4. 58 PCI Slot 2 Port 1 and Port 2 now display FCoE.
Figure 25 PCI Slot 1 and Slot 2 Configured for FCoE 5. Save the changes and exit the BIOS. Figure 26 Exiting the BIOS Utility Configuring an HP 3PAR StoreServ Storage Port for a FCoE Host Connection Setting up an FCoE initiator to FC target, does not require any special configuration on the HP 3PAR StoreServ Storage. The initiator coming from the host adapters through the FCoE Forwarder switch is treated as another Fibre Channel device connecting to the HP 3PAR StoreServ Storage ports.
Configuring Initiator FCoE to FC Target If an FCoE to FC configuration is being set up, the figure below summarizes the general steps to configure a CNA and FCoE Forwarder Switch. Figure 27 Initiator FCoE to FC Target NOTE: For complete and detailed instructions for configuring a server with a given Converged Network Adapter, see the CNA manufacturer documentation.
FCoE. See “Configuring the HP 3PAR StoreServ Storage for FCoE” (page 32), for notes on how to configure FCoE ports on the StoreServ. Figure 28 Initiator FCoE to Target FCoE 1. 2. 3. 4. 5. Install the CNA card in the server like any other PCIe card - see the server vendor documentation for specific instructions. Install the CNA card driver following the CNA card installation instructions (it assumes the server is already running a supported operating system).
7 Configuring the Host for an iSCSI Connection This chapter describes the procedures for setting up an ESX software iSCSI configuration with an HP 3PAR StoreServ Storage. Use the instructions in this chapter in conjunction with the VMware vSphere Storage guide available at VMware. Setting Up the Switch and iSCSI Initiator Connect the ESX host iSCSI initiator ports and the HP 3PAR StoreServ Storage iSCSI target ports to the switches.
Figure 29 iSCSI Software Initiator Configuration NOTE: When multiple teamed NICs are configured, all HP 3PAR StoreServ Storage iSCSI ports and ESX iSCSI NICs must be in the same VLAN of the IP switch. NOTE: NIC teaming is not supported in ESXi 5.x Installing Virtual Machine Guest Operating System The VMware ESX documentation lists recommended virtual machine guest operating systems (GOS) and their installation and setup as virtual machines.
NOTE: VMware and HP recommend the LSI logic adapter emulation for Windows 2003 Servers. The LSI Logic adapter is also the default option for Windows 2003 when creating a new virtual machine. HP testing has noted a high incidence of Windows 2003 virtual machine failures during an ESX multipath failover/failback event when the BUS Logic adapter is used with Windows 2003 VMs.
Figure 30 Add Network Wizard 4. 5. 6. 7. Select VMkernel and click Next. This lets you connect to the VMkernel which runs services for iSCSI storage to the physical network. The Network Access page appears. Select Create a Virtual Switch and select the NICs that will be used for iSCSI. (In this example, 2 NICs are selected to configure an active/active teamed NICs that will connect to the HP 3PAR storage array.) Click Next. In ESX 4.
Figure 31 vSwitch1 Properties 8. Click OK to complete. NOTE: HP recommends an Active/Active NIC Teaming configuration for best failover performance with ESX 4.x. NIC Teaming however, is not supported with ESXi 5.x. The VMkernel – Network Access pane appears.
Figure 32 VMkernel — Network Access 9. Click Next, enter a network label, and then click Next. 10. Specify the IP settings for the iSCSI network and then click Next. 11. Review the information and then click Finish . Configuring a Service Console Connection for the iSCSI Storage The following steps describe how to configure the Service Console connection for the iSCSI storage. 1.
Figure 33 iSCSI Network vSwitch1 Properties 2. 3. 68 Click Add.
Figure 34 Service Console – Network Access 4. 5. 6. Click Next. Enter the network label and IP address for the service console used to communicate with the iSCSI software initiator. The IP address must be in the same subnet as the iSCSI. Click Next.
Figure 35 Ready to Complete 7. 8. 9. Click Finish. Close all windows associated with the network configuration. Check the Configuration display: Figure 36 VMware ESX Server—Configuration Tab The new network configuration is displayed with the addition of the iSCSI network. Ping the HP 3PAR StoreServ Storage ports that were previously defined from the COS.
Configuring the VMware SW iSCSI Initiator The following steps show how to configure the VMware iSCSI initiator. 1. With the Configuration tab selected, select Security Profile from the Software menu box and then Firewall Properties as shown: Figure 37 Firewall Properties 2. 3. Open the ports that will be used for the iSCSI connection, and then click OK. The iSCSI software initiator must be enabled before the ESX host can use it.
5. 6. 7. 8. 9. 10. Click the Properties tab. Select the General tab. Click Configure... Select the Enabled check box for the status. Click OK. Click the Dynamic Discovery tab. Dynamic discovery enables the Send Targets discovery method, where the initiator sends the request to discover and log into the targets: Figure 39 Send Targets 11. 12. 13. 14. Click Add.... Enter the IP address of one of the previously defined HP 3PAR StoreServ Storage iSCSI ports. Click OK.
15. When all of the HP 3PAR StoreServ Storage iSCSI ports have been added to the Dynamic Discovery tab, close this window. 16. Reboot the ESX host. If virtual machines are active, either shut them down or suspend them. The ESX host and HP 3PAR StoreServ Storage should now be configured for use. Using the showhost command on the HP 3PAR StoreServ Storage, the new iSCSI connections should now show as present. # showhost Id Name -- ----------------WWN/iSCSI_Name---------------- Port iqn.1998-01.com.
8 Allocating Storage for Access by the ESX Host This chapter describes the basic procedures required for creating and exporting virtual volumes so they can be used by the VMware ESX host. For complete details on creating and managing storage on the HP 3PAR StoreServ Storage, see the appropriate HP 3PAR documentation. Creating Storage on the HP 3PAR StoreServ Storage This section describes the general recommendations and restrictions for exporting storage from the HP 3PAR StoreServ Storage to an ESX host.
When exporting VLUNs to the VMware ESX host, you should be aware of the following: • New VLUNs that are exported while the host is running may not be registered until a Bus Rescan is initiated. This may be performed from the VI/vSphere client Management Interface. Some versions of ESX will automatically scan for newly exported LUNs. • Disks can be added to a virtual machine with the virtual machine powered up. To remove a disk, the virtual machine may not need to be powered off.
Using the HP 3PAR Management Console 1. 2. From the Menu bar, select Actions→Provisioning→VLUN→Create VLUN. Use the Export Virtual Volume dialog box to create a VLUN template.
The maximum number of LUNs on a single ESX HBA port is 256, and there are 256 total LUNs on the ESX host. Internal devices, such as local hard drives and CD drives, are counted as a LUN in the ESX host LUN count. Removing Volumes After removing a VLUN exported from the HP 3PAR StoreServ Storage, perform a ESX host bus adapter rescan. ESX will update the disk inventory upon rescan. This applies to both FC and iSCSI.
Host and Storage Usage Eventlog and Host Log Messages You can see all HP 3PAR system debug messages by using the showeventlog -debug cli command. On the ESX host, errors are reported in /var/log/vmkernel files. Use the showalert HP 3PAR OS CLI command to see alerts and warnings posted from the HP 3PAR StoreServ Storage.
9 Booting the VMware ESX Host from the HP 3PAR StoreServ Storage This chapter provides a general overview of the procedures required to boot the VMware ESX operating system from the SAN. In a boot-from-SAN environment, each ESX host operating system is installed on a the HP 3PAR StoreServ Storage, instead of on the internal disk. In this situation, you should create a separate virtual volume for each ESX host used for the boot image.
10 Support and Other Resources Contacting HP For worldwide technical support information, see the HP support website: http://www.hp.
For information about: See: Migrating data from one HP 3PAR storage system to another HP 3PAR-to-3PAR Storage Peer Motion Guide Configuring the Secure Service Custodian server in order to monitor and control HP 3PAR storage systems HP 3PAR Secure Service Custodian Configuration Utility Reference Using the CLI to configure and manage HP 3PAR Remote Copy HP 3PAR Remote Copy Software User’s Guide Updating HP 3PAR operating systems HP 3PAR Upgrade Pre-Planning Guide Identifying storage system components
For information about: See: Planning for HP 3PAR storage system setup Hardware specifications, installation considerations, power requirements, networking options, and cabling information for HP 3PAR storage systems HP 3PAR 7200, 7400, and 7450 storage systems HP 3PAR StoreServ 7000 Storage Site Planning Manual HP 3PAR StoreServ 7450 Storage Site Planning Manual HP 3PAR 10000 storage systems HP 3PAR StoreServ 10000 Storage Physical Planning Manual HP 3PAR StoreServ 10000 Storage Third-Party Rack Physic
Typographic conventions Table 4 Document conventions Convention Element Bold text • Keys that you press • Text you typed into a GUI element, such as a text box • GUI elements that you click or select, such as menu items, buttons, and so on Monospace text • File and directory names • System output • Code • Commands, their arguments, and argument values • Code variables • Command variables Bold monospace text • Commands you enter into a command line interface • System
11 Documentation feedback HP is committed to providing documentation that meets your needs. To help us improve the documentation, send any errors, suggestions, or comments to Documentation Feedback (docsfeedback@hp.com). Include the document title and part number, version number, or the URL when submitting your feedback.
A Appendix Follow-up Actions/Recommendations for ESX 3.5 Update 3 and Earlier The behavior of the HP 3PAR StoreServ Storage port being overrun is limited only to ESX 3.5 Update 3 and earlier. Other HP-supported operating systems handle Queue Full notifications by backing off on I/O for a period of time. HP currently does not have any HP 3PAR StoreServ Storage firmware to address this issue but there are recommendations in the following section that can help prevent this problem. Since the ESX 3.
Example 2 (set up as follows): • LSI 2G FC HBA installed on the HP 3PAR StoreServ Storage • 12 ESX hosts attached to a LSI port on the HP 3PAR StoreServ Storage Formula: 510 / 12 = 42.xxx (recommended max target port queue depth = 42) Setting tgt_queue_depth for Emulex in ESX 3.x (example) To set the tgt_queue_depth for an Emulex FC HBA in ESX 3.x to something other than the default requires a multistep process: 1. Shut down all of the virtual machines. 2. Log into the ESX service console as root. 3.
4. Identify the QLogic HBA module currently loaded. vmkload_mod -l | grep qla2300 5. The target port queue depth can now be modified via the service console command line using VMware supplied binaries. Depending on the model of the HBA, the module can be one of the following: qla2300_707 (ESX 3.0.x) qla2300_707_vmw (ESX 3.5) The example shows the qla2300_707 module. Use the appropriate module based on the result of the previous step. The server must now be rebooted for the changes to take effect.