
Basic Operation Guide 2013/06
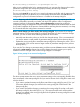


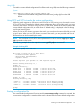

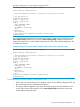
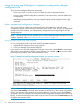
Table Of Contents
- Switch Software
- Contents
- 1 Commands found in the Basic Operation Guide
- 2 Getting started
- 3 Using the Menu Interface
- 4 Using the Command Line Interface (CLI)
- Overview
- Accessing the CLI
- Using the CLI
- Return message types with CLI commands
- CLI interactive commands
- CLI control and editing
- 5 Using the HP WebAgent
- 6 Switch memory and configuration
- Overview
- Configuration file management
- Using the CLI to implement configuration changes
- Creating a custom default configuration
- Using the menu and WebAgent to implement configuration changes configuration file
- Zeroization
- Using Primary and Secondary flash image options
- Multiple configuration files
- Display configuration of selected interface
- Automatic configuration update with DHCP Option 66
- 7 Interface access and system information
- 8 Configuring IP addressing
- Overview
- IP configuration
- Loopback interfaces
- IP Preserve: retaining VLAN-1 IP addressing across configuration file downloads
- Configuring a single source IP address
- 9 Software management
- Downloading switch documentation and software from the web
- Viewing or downloading the software manual set
- Downloading software updates for your switch
- Software signing and verification
- Saving configurations while using the CLI
- Important: Best Practices for software updates
- Updating the switch: overview
- Updating the switch: detailed steps
- Rolling back switch software
- Viewing or transferring alternate configuration files
- Downloading switch documentation and software from the web
- Index

NOTE: This feature does not change the system defaults. The custom default configuration file is
automatically used when the startup configuration file is erased. It has no effect on what is loaded
onto the switch when a remotely stored configuration file is restored.
The default configuration file can be customized using commands at the CLI prompt or by copying
a configuration file with the desired configuration using TFTP, USB, or XMODEM copy commands.
The existing default configuration file also can be transferred from the switch using these commands.
To start creating the configuration file to be used as the custom default configuration file, enter the
commands that configure the features desired and then save the configuration file using the write
memory command. An example is shown below.
Example 28 Creating a config file with the desired features
HP Switch(config)# spanning-tree
HP Switch(config)# interface 4 flow-control
HP Switch(config)# write memory
This configuration, which enables flow control on interface 4, and also spanning-tree on the switch,
is stored in the startup configuration file.
To save this configuration as the custom default configuration, the startup configuration file is copied
to the default configuration file, as shown below.
Example 29 Copying the startup configuration file to the custom default configuration file
HP Switch(config)# copy startup-config default-config
Copying an existing configuration file to the custom default configuration file
The switch can have up to 3 different configuration files stored in flash memory. (For more
information about multiple configuration files, see "Multiple Configuration Files" in the Management
and Configuration Guide for your switch.) To copy a configuration file that exists in flash memory
to the custom default configuration file, use this command.
Syntax:
copy config <source-filename>
default-config
Copies the configuration file specified in [<source-filename>] to the custom
default configuration file.
Example 30 Copying the abc.cfg config file to the custom default config file
HP Switch(config)# copy abc.cfg default-config
Copying the custom default config file onto the switch
The following sections explains how to copy the custom default config file onto the switch using:
• TFTP
• XMODEM
• USB
Using TFTP
To copy a configuration file stored on a TFTP server to the custom default configuration file, use
the copy tftp default-config command.
Creating a custom default configuration 55