
DCFM Installation, Migration, and Transition Guide - Supporting DCFM 10.3.x (53-1001360-01, October 2009)
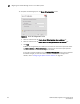
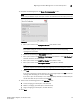

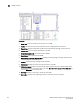
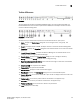


Table Of Contents
- Contents
- About This Document
- Installation
- In this chapter
- Headless installation information
- Professional, Professional Plus, and Enterprise edition feature support
- Requirements
- Professional edition installation
- Installing Professional edition on Windows systems
- Professional edition pre-installation requirements on UNIX systems
- Installing Professional edition on UNIX systems
- Professional edition pre-installation requirements on UNIX systems (headless)
- Installing Professional edition on UNIX systems (headless)
- Troubleshooting the Linux installation
- Professional Plus trial installation
- Professional Plus trial requirements
- Installing Professional Plus trial on Windows systems
- Professional Plus trial pre-installation requirements on UNIX systems
- Installing Professional Plus trial on UNIX systems
- Professional Plus trial pre-installation requirements on UNIX systems (headless)
- Installing Professional Plus trial on UNIX systems (headless)
- Professional Plus edition installation
- Installing Professional Plus edition on Windows systems
- Professional Plus edition pre-installation requirements on UNIX systems
- Installing Professional Plus edition on UNIX systems
- Professional Plus edition pre-installation requirements on UNIX systems (headless)
- Installing Professional Plus edition on UNIX systems (headless)
- Enterprise trial installation
- Enterprise trial requirements
- Installing Enterprise trial on Windows systems
- Enterprise trial pre-installation requirements on UNIX systems
- Installing Enterprise trial on UNIX systems
- Enterprise trial pre-installation requirements on UNIX systems (headless)
- Installing Enterprise trial on UNIX systems (headless)
- Enterprise edition installation
- Installing the ODBC driver
- Configuring an explicit server IP address
- Smart Card driver installation
- Uninstall
- Migration
- In this chapter
- Professional edition migration
- Professional edition pre-migration requirements on Windows systems
- Migrating from Professional edition 10.0.X to Professional edition 10.3.X on Windows systems
- Professional edition pre-migration requirements on UNIX systems
- Migrating from Professional edition 10.0.X to Professional edition 10.3.X on UNIX systems
- Migrating from Professional edition 10.1.X to Professional edition 10.3.X on Windows systems
- Migrating from Professional edition 10.1.X to Professional edition 10.3.X on UNIX systems
- Migrating from Professional edition 10.3.X to Professional Plus trial 10.3.X on Windows systems
- Migrating from Professional edition 10.3.X to Professional Plus trial 10.3.X on UNIX systems
- Migrating from Professional edition 10.3.X to Professional Plus edition 10.3.X on Windows systems
- Migrating from Professional edition 10.3.X to Professional Plus edition 10.3.X on UNIX systems
- Migrating from Professional edition 10.3.X to Enterprise trial 10.3.X on Windows systems
- Migrating from Professional edition 10.3.X to Enterprise trial 10.3.X on UNIX systems
- Migrating from Professional edition 10.3.X to Enterprise edition 10.3.X on Windows systems
- Migrating from Professional edition 10.3.X to Enterprise edition 10.3.X on UNIX systems
- Professional Plus trial migration
- Professional Plus trial requirements
- Upgrading Professional Plus trial to Professional Plus edition
- Professional Plus trial pre-migration requirements on Windows systems
- Migrating from Professional Plus trial to Professional Plus edition on Windows systems
- Professional Plus trial pre-migration requirements on UNIX systems
- Migrating from Professional Plus trial to Professional Plus edition on UNIX systems
- Migrating from Professional Plus trial to Enterprise trial on Windows systems
- Migrating from Professional Plus trial to Enterprise trial on UNIX systems
- Migrating from Professional Plus trial to Enterprise edition on Windows systems
- Migrating from Professional Plus trial to Enterprise edition on UNIX systems
- Professional Plus edition migration
- Upgrading Professional Plus edition to Enterprise edition
- Professional Plus edition pre-migration requirements on Windows systems
- Migrating from Professional Plus edition to Enterprise edition on Windows systems
- Professional Plus edition pre-migration requirements on UNIX systems
- Migrating from Professional Plus edition to Enterprise edition on UNIX systems
- Enterprise trial migration
- Enterprise trial requirements
- Upgrading Enterprise trial to Enterprise edition
- Enterprise pre-migration requirements on Windows systems
- Migrating from Enterprise trial to Enterprise trial on Windows systems
- Migrating from Enterprise trial to Enterprise edition on Windows systems
- Enterprise pre-migration requirements on UNIX systems
- Migrating from Enterprise trial to Enterprise trial on UNIX systems
- Migrating from Enterprise trial to Enterprise edition on UNIX systems
- Troubleshooting Linux installation
- Enterprise edition migration
- Enterprise edition pre-migration requirements on Windows systems
- Migrating from Enterprise edition 10.0.X on Windows systems
- Enterprise edition pre-migration requirements on UNIX systems
- Migrating from Enterprise edition 10.0.X on UNIX systems
- Migrating from Enterprise edition 10.1.X on Windows systems
- Migrating from Enterprise edition 10.1.X on UNIX systems
- EFCM migration
- Importing names
- Editing a user account
- Fabric Manager migration
- Transition
- Index

DCFM Installation, Migration, and Transition Guide 215
53-1001360-01
Migrating from Fabric Manager 5.4 or 5.5 on UNIX systems
2
6. Make sure the Launch DCFM Configuration check box is selected (default) on the Installation
Complete screen, and click Done.
7. Click Next on the Welcome screen.
8. To migrate data from Fabric Manager, select Yes, from EFCM, FM, or DCFM installed in this
machine or on network and click Browse to browse to the installation directory.
To migrate data from a previous management application, you must do so now.
9. Click Next on the Copy Data and Settings screen.
An error message displays if any of the following occur:
10. Click Next on the Uninstall screen, which displays when legacy EFCM and FM software exist in
the system.
The EFCM and FM services will be fully uninstalled.
11. Click Start on the Data Migration screen.
Data migration may take up to 30 minutes. When data migration is complete, the Fabric
Manager services are uninstalled.
12. Click Next on the Data Migration screen.
13. Enter the serial number (on the DVD jewel case) and license key (on the Key Certificate) on the
Server License screen or browse to the license file (.xml) and click Next.
The License Key field is not case-sensitive.
14. Select Internal FTP Server or External FTP Server on the FTP Server screen and click Next.
The default selection reflects the current FM configuration.
If port 21 is busy, a message displays. Click OK to close the message and continue. Once the
Management application is configured make sure port 21 is free and restart the Server to start
the FTP service.
NOTE
If you select to use an FTP Server which is not configured on the same machine as DCFM, the
Firmware Repository feature will not be available.
Error Fix
Selected location is not valid or not supported. Browse to the correct location of the application.
Upgrade to a supported version.