Hitachi Dynamic Link Manager Software User's Guide (for Linux(R)) 3000-3-F04-60(E)
Relevant program products Hitachi Dynamic Link Manager version 6.6.2 For details about applicable OSs, see the Release Notes. Trademarks AIX is a trademark of International Business Machines Corporation in the United States, other countries, or both. AMD, AMD Opteron, and combinations thereof, are trademarks of Advanced Micro Devices, Inc. Brocade is a trademark or a registered trademark of Brocade Communications Systems, Inc. in the United States and/or in other countries.
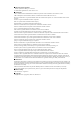
Summary of Amendments The following table lists changes in this manual (3000-3-F04-60(E)) and product changes related to this manual. Changes Location in this manual Systems that use an IP-SAN are now supported. 2.2, 2.2.2, 3.1.1, 3.1.2, 3.1.4, 3.1.5, 3.6.3, 3.6.6, 3.22.1, 3.22.2, 4.6.4, 6.7.2, 7.2.3, 7.10.3, Appendix D The following messages have been added: KAPL04053-W, KAPL05712-I, KAPL10948-W, KAPL10949-E, KAPL15001-I, KAPL15002-E, KAPL15064-I, KAPL15065-E 2.12.1, 8.4, 8.5, 8.10, 8.
Preface This manual describes the functions and use of the following program products: • Hitachi Dynamic Link Manager Intended Readers This manual is intended for system administrators who use Hitachi Dynamic Link Manager (HDLM) to operate and manage storage systems.
problems that you might encounter. 6. Command Reference Chapter 6 describes all the HDLM commands. 7. Utility Reference Chapter 7 describes the HDLM utilities. 8. Messages Chapter 8 provides information for all the possible messages that could be output by HDLM. It also lists and explains the HDLM messages and shows the actions to be taken in response to each message. A. Notes on Linux Commands and Files Appendix A gives notes on Linux commands and files. B.
• HITACHI Gigabit Fibre Channel Board User's Guide • ServerConductor/DeploymentManager User's Guide Conventions: Abbreviations This manual uses the following abbreviations for product names.
Abbreviation Full name or meaning HP XP128 HP StorageWorks XP128 Disk Array HP XP1024 HP StorageWorks XP1024 Disk Array HP XP10000 HP StorageWorks XP10000 Disk Array HP XP12000 HP StorageWorks XP12000 Disk Array HP XP20000 HP StorageWorks XP20000 Disk Array HP XP24000 HP StorageWorks XP24000 Disk Array HP XP series A generic term for: • HP XP128 • HP XP1024 • HP XP10000 • HP XP12000 • HP XP20000 • HP XP24000 HVM Hitachi Virtualization Manager JDKTM JavaTM 2 SDK, Standard Edition JRE Jav
Abbreviation Full name or meaning Oracle RAC A generic term for: • Oracle9i Real Application Clusters • Oracle Real Application Clusters 10g • Oracle Real Application Clusters 11g P9500 HP StorageWorks P9500 Disk Array Red Hat Enterprise Linux A generic term for: • Red Hat Enterprise Linux(R) AS4/ES4 • Red Hat Enterprise Linux(R) 5 • Red Hat Enterprise Linux(R) 6 Red Hat Enterprise Linux AS4/ES4 A generic term for: • Red Hat Enterprise Linux(R) AS 4 • Red Hat Enterprise Linux(R) AS 4.
Abbreviation Full name or meaning SUSE LINUX Enterprise Server A generic term for: • SUSE LINUX(R) Enterprise Server 9 • SUSE LINUX(R) Enterprise Server 10 • SUSE LINUX(R) Enterprise Server 11 SVS HP StorageWorks 200 Storage Virtualization System Thunder 9200 Hitachi Freedom Storage Thunder 9200 Universal Storage Platform V/VM A generic term for: • Hitachi Universal Storage Platform V • Hitachi Universal Storage Platform VM • HP XP20000 • HP XP24000 UNIX A generic term for: • AIX • Solaris • Linu
Abbreviation Full name or meaning CLPR Cache Logical Partition CPU Central Processing Unit CU Control Unit DBMS Database Management System Dev Device DMI Desktop Management Interface DNS Domain Name Server DRBD Distributed Replicated Block Device ELILO Extensible Firmware Interface Linux Loader EM64T Extended Memory 64 Technology EVMS Enterprise Volume Management System ext Extended File System FC Fibre Channel FC-SP Fibre Channel Security Protocol FO Failover GMT Greenwich
Abbreviation Full name or meaning IPF Itanium(R) Processor Family IRQ Interrupt ReQuest iSCSI Internet Small Computer System Interface KVM Kernel-based Virtual Machine LAN Local Area Network LDAP Lightweight Directory Access Protocol LDEV Logical Device LILO Linux Loader LU Logical Unit LUN Logical Unit Number LVM Logical Volume Manager md Multiple Devices NAS Network Attached Storage NIC Network Interface Card NTP Network Time Protocol OS Operating System P Port PCI Per
Abbreviation Full name or meaning UUID Universally Unique Identifier VG Volume Group WWN World Wide Name Conventions: Diagrams This manual uses the following conventions in diagrams: Conventions: Fonts and Symbols Font and symbol conventions are classified as: • General font conventions • Conventions in syntax explanations These conventions are described below.
Font Convention Bold Bold type indicates text on a window, other than the window title. Such text includes menus, menu options, buttons, radio box options, or explanatory labels. For example, bold is used in sentences such as the following: • From the File menu, choose Open. • Click the Cancel button. • In the Enter name entry box, type your name. Italics Italics are used to indicate a placeholder for some actual text provided by the user or system. Italics are also used for emphasis.
Example font or symbol Convention [ ] Square brackets enclose an item or set of items whose specification is optional. An item that is underlined is specified when all items are omitted. { } One of the options enclosed in { } must be specified. | Only one of the options separated by a vertical bar can be specified at the same time. ... An ellipsis (...) indicates that the item or items enclosed in ( ) or [ ] immediately preceding the ellipsis may be specified as many times as necessary.
Contents Preface i Intended Readers ........................................................................................................i Organization of This Manual .....................................................................................i Related Publications..................................................................................................ii Conventions: Abbreviations ....................................................................................
2.11.3 Collecting Error Information Using the Utility for Collecting HDLM Error Information (DLMgetras)............................................................................. 43 2.11.4 Utility for Collecting HDLM Installation Error Information (installgetras) ................................................................................................ 43 2.12 Collecting Audit Log Data..................................................................................... 44 2.12.
3.7.1 Notes on Installing HDLM in a Boot Disk Environment............................172 3.7.2 Overview of the Procedure for Installing HDLM in a Boot Disk Environment................................................................................................175 3.7.3 Settings for Using an HDLM Device as a Boot Disk .................................177 3.7.4 Upgrade Installation in an Environment Where an HDLM Device Is Used as a Boot Disk ................................................................
3.20.2 When Using Red Hat Enterprise Linux AS4/ES4 or SUSE LINUX Enterprise Server ......................................................................................................... 282 3.21 Creating File Systems for HDLM (When Volume Management Software Is Not Used)..................................................................................................................... 284 3.21.1 Mounting a File System............................................................................ 284 3.21.
4.3.5 Displaying Corresponding Information About an HDLM Device, SCSI Device, and LDEV......................................................................................344 4.3.6 Initializing Statistical Information for Paths ...............................................345 4.3.7 Viewing and Setting Up the Operating Environment..................................346 4.3.8 Viewing License Information......................................................................348 4.3.9 Updating the License.......
6.4 6.5 6.6 6.7 6.3.1 Format......................................................................................................... 402 6.3.2 Parameter .................................................................................................... 402 offline (Places Paths Offline)................................................................................. 404 6.4.1 Format......................................................................................................... 404 6.4.
7.10.3 Editing an Installation-Information Settings File......................................514 7.11 installux.sh Utility for HDLM Common Installer ................................................521 7.11.1 Format .......................................................................................................521 7.11.2 Parameters .................................................................................................521 7.11.3 Log file ......................................................
C.3 Functional Differences Between Version 6.0 or Later and Versions Earlier Than 6.0 ................................................................................................................. 703 C.4 Functional Differences Between Version 5.9.4 or Later and Versions Earlier Than 5.9.4..................................................................................................... 703 C.5 Functional Differences Between Version 5.9.1 or Later and Versions Earlier Than 5.9.1........................
Chapter 1. Overview of HDLM HDLM is a software package that manages paths between a host and a storage system. HDLM is designed to distribute loads across multiple paths and will switch a given load to another path if there is a failure in the path that is currently being used, thus improving system reliability. This chapter gives an overview of HDLM and describes its features. 1.1 What is HDLM? 1.
1. Overview of HDLM 1.1 What is HDLM? With the widespread use of data warehousing and increasing use of multimedia data, the need for high-speed processing of large volumes of data on networks has rapidly grown. To satisfy this need, networks dedicated to the transfer of data, such as SANs, are now being used to provide access to storage systems. HDLM manages the access paths to these storage systems.
1.
1. Overview of HDLM 1.2 HDLM Features HDLM features include the following: The ability to distribute a load across multiple paths. This is also known as load balancing. When a host is connected to a storage system via multiple paths, HDLM can distribute the load across all the paths. This prevents one, loaded down path from affecting the processing speed of the entire system. For details on load balancing, see 2.7 Distributing a Load Using Load Balancing.
Chapter 2. HDLM Functions This chapter describes the various functions that are built into HDLM. Before the function specifications are explained though, this chapter will go into detail about the HDLM management targets, system configuration, and basic terms that are necessary to know to effectively operate HDLM. After that, the rest of the chapter focus on describing all the HDLM functions, including the main ones: load distribution across paths and path switching. 2.1 2.2 2.3 2.4 2.5 2.6 2.7 2.8 2.
2. HDLM Functions 2.1 Devices Managed by HDLM Below is a list of devices that can or cannot be managed by HDLM. The devices that can be managed by HDLM are called HDLM management-target devices. HDLM management-target devices: The following devices of the storage systems listed in Section 1.1 What is HDLM?: • SCSI devices • Boot disks Non-HDLM management-target devices: • SCSI devices other than those of the storage systems listed in Section 1.
2. HDLM Functions 2.2 System Configuration HDLM manages routes between a host and a storage system by using the SCSI driver. A host and a storage system are connected via an FC-SAN or an IP-SAN. 2.2.1 System Configuration Using an FC-SAN In an FC-SAN, fiber cables connect hosts to storage systems. The cable port on the host is a host bus adapter (HBA). The cable port on the storage system is a port (P) on a channel adapter (CHA).
2. HDLM Functions Figure 2-1: Configuration of an HDLM System When Using an FC-SAN Table 2-1: HDLM System Components When Using an FC-SAN lists the HDLM system components when using an FC-SAN. Table 2-1: HDLM System Components When Using an FC-SAN Components 8 Description HBA A host bus adapter. This serves as a cable port on the host. FC-SAN A dedicated network that is used for data transfer between the host and storage systems. CHA A channel adapter. P A port on a CHA.
2. HDLM Functions Components Path Description A route that connects a host and a Dev. 2.2.2 System Configuration Using an IP-SAN In an IP-SAN, LAN cables are used to connect hosts to storage systems. The cable port on the host is called a network interface card (NIC). In order to use an NIC, the iSCSI software must be installed ahead of time on the host. The cable port on the storage system is called a port (P) on a channel adapter (CHA) used for iSCSI connections.
2. HDLM Functions Figure 2-2: Configuration of an HDLM System When Using an IP-SAN Table 2-2: HDLM System Components When Using an IP-SAN lists the HDLM system components when using an IP-SAN. Table 2-2: HDLM System Components When Using an IP-SAN Components Description iSCSI software The driver software that contains the iSCSI initiator function NIC A network interface card that serves as a cable port on a host. The NIC is referred to as the HBA in HDLM commands.
2. HDLM Functions Components Description Physical path A route that connects a host and an LU. Path A route that connects a host and a Dev. IP-SAN environments supported by HDLM HDLM supports system configurations that use an IP-SAN in the following environments: • OS • Red Hat Enterprise Linux 5.6 • Red Hat Enterprise Linux 5.6 Advanced Platform • Red Hat Enterprise Linux 6 • iSCSI software HDLM supports the iSCSI initiator (iscsi-initiator-utils) supplied with the OS.
2. HDLM Functions 2.3 LU Configuration After you have properly installed HDLM, the LU configuration will change as follows: Before the installation of HDLM: The host recognizes that a SCSI device is connected to each path. Thus, a single LU in the storage system is recognized as though there are as many LUs as there are paths. After the installation of HDLM: An HDLM device corresponding one-to-one with an LU in the storage system is created at a level higher than the SCSI device.
2. HDLM Functions Figure 2-3: LU Configuration Recognized by the Host After HDLM Installation Table 2-3: LU Components lists the components recognized by the host. Table 2-3: LU Components Components Description HDev A Dev (partition) in an LU that the host recognizes via the HDLM driver. It is called a host device. One host device is recognized for one Dev in the storage system. HLU An LU that the host recognizes via the HDLM driver. It is called a host LU.
2. HDLM Functions 2.4 Program Configuration HDLM is actually a combination of several programs. Because each program corresponds to a specific HDLM operation, it is important to understand the name and purpose of each program, along with how they are all interrelated. Figure 2-4: Configuration of the HDLM Programs shows the configuration of the HDLM programs. Figure 2-4: Configuration of the HDLM Programs Table 2-4: Functionality of HDLM Programs lists and describes the functions of these programs.
2.
2. HDLM Functions 2.5 Position of the HDLM Driver and HDLM Device The HDLM driver is positioned above the SCSI driver. Each application on the host uses the HDLM device (logical device file) created by HDLM, to access LUs in the storage system. Figure 2-5: Position of the HDLM Driver and HDLM Devices shows the position of the HDLM driver and HDLM device.
2. HDLM Functions 2.6 Logical Device Files for HDLM Devices The logical device file name of an HDLM device is different from the logical device file name of a SCSI device. When you configure the logical device file of an HDLM device for applications such as volume management software, these applications can access the LUs that HDLM manages. The following shows an example of the logical device file name that the application uses to access the LU (for accesses before and after HDLM installation).
2. HDLM Functions Figure 2-6: About Alphabetic Letters Used in the Logical Device File Name About numeric values used in a logical device file name: [1-15] indicates a partition number in the applicable LU. For example, if the logical device file name of an HDLM device is sddlmaa1, it indicates partition 1 on sddlmaa. To specify the entire LU, simply use sddlmaa. Note that HDLM creates block device files. The system dynamically selects the major number of the block device that this file uses.
2. HDLM Functions 2.7 Distributing a Load Using Load Balancing When the system contains multiple paths to a single LU, HDLM can distribute the load across the paths by using multiple paths to transfer the I/O data. This function is called load balancing, and it prevents a single, heavily loaded path from affecting the performance of the entire system. Note that some I/O operations managed by HDLM can be distributed to each path, while others cannot.
2. HDLM Functions Figure 2-7: Flow of I/O Data When the Load Balancing Function Is Not Used When the load balancing function is not used, I/O operations converge onto a single path (A). The load on that one path (A) will cause a bottleneck, which might cause problems with system performance.
2. HDLM Functions Figure 2-8: Flow of I/O Data When the Load Balancing Function Is Used When the load balancing function is used, I/O operations are distributed via multiple paths (A, B, C, and D). This helps to prevent problems with system performance and helps prevent bottlenecks from occurring. 2.7.1 Paths To Which Load Balancing Is Applied This subsection describes, for each type of storage system, the paths to which the load balancing function is applied.
2. HDLM Functions that uses a CHA other than the owner controller (a non-owner controller). Paths used for load balancing are selected from owner paths first, then non-owner paths. To prevent performance in the entire system from deteriorating, HDLM does not perform load balancing between owner paths and non-owner paths. When some owner paths cannot be used due to a problem such as a failure, load balancing is performed among the remaining usable owner paths.
2. HDLM Functions Data When the Load Balancing Function Is Used, the load is balanced among the four paths A, B, C, and D. If one of the paths were to become unusable, the load would be balanced among the three, remaining paths. 2.7.
2. HDLM Functions • Extended Round Robin The paths are simply selected in order from among all the connected paths. • Extended Least I/Os The path that has the least number of I/Os being processed is selected from among all the connected paths. • Extended Least Blocks The path that has the least number of I/O blocks being processed is selected from among all the connected paths. Table 2-6: Features of the Load Balancing Algorithms describes the features of the load balancing algorithms.
2. HDLM Functions 2.8 Performing Failovers and Failbacks Using Path Switching When the system contains multiple paths to an LU and an error occurs on the path that is currently being used, HDLM can switch to another functional path, so that the system can continue operating. This is called a failover. If a path in which an error has occurred recovers from the error, HDLM can then switch back to that path. This is called a failback.
2. HDLM Functions For details on error levels, see 2.11.2 Filtering of Error Information. When the Thunder 9500V series, or Hitachi AMS/WMS series is being used, HDLM will select the path to be used next from among the various paths that access the same LU, starting with owner paths, and then non-owner paths. For example, in Figure 2-10: Path Switching, the owner controller of an LU is CHA0, and access to the LU is made via only one path (A).
2. HDLM Functions Figure 2-10: Path Switching (2) Automatic Failbacks When a path recovers from an error, HDLM can automatically place the recovered path back online. This function is called the automatic failback function. In order to use the automatic failback function, HDLM must already be monitoring error recovery on a regular basis.
2. HDLM Functions Storage Platform V/VM, Virtual Storage Platform, Hitachi AMS2000 series, or Hitachi SMS is being used, all the paths are owner paths. As a result, if the path that was previously used recovers from an error, and then HDLM automatically places the recovered path online, the path that is currently being used will continue to be used (as opposed to switching over to the path that was just recovered).
2. HDLM Functions Executing the online operation places the offline path online. For details on the online operation, see 6.5 online (Places Paths Online). After a path status is changed to online, the path can be selected as a useable path by HDLM in the same manner as automatic path switching. When using the Thunder 9500V series, or Hitachi AMS/WMS series, HDLM selects the path to use from online owner paths, and then from online non-owner paths.
2. HDLM Functions The status indicating that an I/O could not be issued on a given path, because an error occurred on the path. The (E) means error. (3) Status Transitions of a Path Figure 2-11: Path Status Transitions shows the status transitions of a path. Figure 2-11: Path Status Transitions Legend: Online operation: Online operation performed by executing the dlnkmgr command's online operation. Offline operation: Offline operation performed by executing the dlnkmgr command's offline operation.
2. HDLM Functions • All the paths connected to an LU are Online(E), Offline(E), or Offline(C). • All the paths connected to an LU have been determined to have an intermittent error. • The processing of continuous I/O operations issued to an LU is successful. #2 When an Online or Offline(E) path exists among the paths that access the same LU. If there is only one available online path for an LU, it cannot be placed offline by executing the offline operation.
2. HDLM Functions 2.9 Monitoring Intermittent Errors (Functionality When Automatic Failback Is Used) An intermittent error refers to an error that occurs irregularly because of something like a loose cable. In such a case, I/O performance might decrease while an automatic failback is being performed to repair an intermittent error. This is because the automatic failback operation is being performed repeatedly (because the intermittent error keeps occurring).
2. HDLM Functions 2.9.3 Intermittent Error Monitoring Actions Intermittent error monitoring is performed on each path, and it automatically starts as soon as a path is recovered from an error by using the automatic failback function.
2. HDLM Functions (2) When an Intermittent Error Does Not Occur If an error does not occur on a path a specified number of times within a specified interval, an intermittent error will not occur. In such a case, the error monitoring will finish when the specified error-monitoring interval finishes, upon which the number of errors is reset to 0. If an error occurs on the path again at a later time, error monitoring will resume when the path is recovered from the error via an automatic failback.
2. HDLM Functions (3) When the Conditions for an Intermittent Error Are Changed During Error Monitoring When the conditions for an intermittent error are changed during error monitoring, the number of errors and the amount of time that has passed since the error monitoring started are both reset to 0. As such, the error monitoring will not finish, and it will start over by using the new conditions.
2. HDLM Functions check the IEP item displayed when the dlnkmgr command's view -path operation is executed with the -iem parameter specified. If 0 or greater is displayed in the Intermittent Error Path item, then intermittent error monitoring is being performed.
2. HDLM Functions When you turn the intermittent error monitoring function off, information about paths not subject to automatic failback will be reset. If you do not want to reset the information about paths not subject to automatic failback when you turn the intermittent error monitoring function off, change the target paths to Offline(C).
2. HDLM Functions 2.10 Detecting Errors by Using Path Health Checking HDLM can check the status of paths for which I/O operations are not being performed at regular intervals. This function is called path health checking. Without path health checking, an error cannot be detected unless an I/O operation is performed, because the system only checks the status of a path when an I/O operation is performed.
2. HDLM Functions 2.11 Error Management HDLM collects information for troubleshooting into log files. HDLM can also filter error information according to the error level when collecting the information. Figure 2-15: Flow of Data When Collecting Error Information shows the flow of data when collecting error information.
2. HDLM Functions Figure 2-15: Flow of Data When Collecting Error Information Logs might be collected in layers below HDLM, such as for the SCSI driver. For more details, see the Linux documentation.
2. HDLM Functions 2.11.1 Types of Collected Logs HDLM collects information on the detected error and trace information in the process-specific-trace information file, trace file, error logs, log for the dlmcfgmgr utility for managing the HDLM configuration and syslog. You can use the error information to examine the status of an error and analyze the cause of the error. Table 2-8: Types of Error Information describes the types of error information.
2. HDLM Functions # When you want to configure the system so that HDLM messages are output to syslog, specify user for the facility in the syslog settings file. The following shows an example where the system function name is user, and messages at the info level or higher are output to the /tmp/syslog.user.log file: user.info /tmp/syslog.user.log For details on error levels, see 2.11.2 Filtering of Error Information. 2.11.
2. HDLM Functions • Collects error information from the Information level and higher. • Collects error information from the Information level and higher (including maintenance information). Collection levels for log information in trace files: • Outputs no trace information • Outputs error information only • Outputs trace information on program operation summaries • Outputs trace information on program operation details • Outputs all trace information For details on how to set the collection level, see 3.
2. HDLM Functions 2.12 Collecting Audit Log Data HDLM and other Hitachi storage-related products provide an audit log function so that compliance with regulations, security evaluation standards, and industry-specific standards can be shown to auditors and evaluators. The following table describes the categories of audit log data that Hitachi storage-related products can collect.
2.
2. HDLM Functions Table 2-11: Categories and Audit Events that Can Be Output to the Audit Log Category Explanation Audit event Severity #1 StartStop Authentication ConfigurationAccess 46 Startup and termination of the software Administrator or end-user authentication Viewing or updating configuration information Message ID Startup of the HDLM manager was successful. 6 KAPL154 01-I Startup of the HDLM manager failed. 3 KAPL154 02-E The HDLM manager stopped.
2. HDLM Functions Category Explanation Audit event Severity #1 Message ID Setup of the operating environment was successful. 6 KAPL151 05-I Setup of the operating environment failed. 3 KAPL151 06-E An attempt to display program information was successful. 6 KAPL151 07-I An attempt to display program information failed. 3 KAPL151 08-E An attempt to display HDLM management-target information was successful. 6 KAPL151 09-I An attempt to display HDLM management-target information failed.
2. HDLM Functions Category Explanation Audit event Severity #1 Processing of the dlmcfgmgr -i command was successful. 6 KAPL150 44-I Processing of the dlmcfgmgr -i command failed. 3 KAPL150 45-E Processing of the dlmcfgmgr -v command was successful. 6 KAPL150 46-I Processing of the dlmcfgmgr -v command failed. 3 KAPL150 47-E Processing of the dlmcfgmgr -u command was successful. 6 KAPL150 48-I Processing of the dlmcfgmgr -u command failed.
2. HDLM Functions Category Explanation Audit event Severity #1 Processing of the 6 KAPL150 56-I 3 KAPL150 57-E 6 KAPL150 58-I 3 KAPL150 59-E dlmsetopt -inqr command was successful. Processing of the dlmsetopt -inqr command failed. Processing of the dlmupdatesysinit command was successful. Processing of the Message ID dlmupdatesysinit command failed.
2. HDLM Functions • You might need to perform operations such as changing the log size and backing up and saving collected log data, because the amount of audit log data might be quite large. • If the severity specified by the HDLM command's set operation differs from the severity specified by the configuration file /etc/syslog.conf, the higher severity level is used for outputting audit log data. 2.12.3 Destination and Filtering of Audit Log Data Audit log data is output to syslog.
2. HDLM Functions Filtering by category: The following categories can be specified: • StartStop • Authentication • ConfigurationAccess • All of the above For details on how to specify audit log settings, see 3.18.2 Setting Up the HDLM Functions. 2.12.
2. HDLM Functions Explanation Item# Common specification revision number Fixed to 1.1 Serial number Serial number of the audit log message Message ID Message ID in KAPL15nnn-l format Date and time The date and time when the message was output. This item is output in the following format: yyyy-mm-ddThh:mm:ss.
2. HDLM Functions Item# Explanation Reserved area This field is reserved. No data is output here. Message text Data related to the audit event is output. #: The output of this item depends on the audit event. Example of the message section for the audit event An attempt to display HDLM management-target information was successful: CELFSS,1.1,0,KAPL15109-I,2008-04-09T10:18:40.
2. HDLM Functions 2.13 Integrated HDLM management using Global Link Manager By using Global Link Manager, you can perform integrated path management on systems running multiple instances of HDLM. For large-scale system configurations using many hosts running HDLM, the operational load for managing paths on individual hosts increases with the size of the configuration.
2.
2. HDLM Functions 2.14 Cluster Support HDLM can also be used in cluster configurations. For details about the cluster software supported by HDLM, see (1) Cluster Software Supported by HDLM in 3.1.3 Related Products When Using Red Hat Enterprise Linux AS4/ES4, (1) Cluster Software Supported by HDLM (If an FC-SAN Is Used) in 3.1.4 Related Products When Using Red Hat Enterprise Linux 5, (1) Cluster Software Supported by HDLM (If an FC-SAN Is Used) in 3.1.
Chapter 3. Creating an HDLM Environment This chapter explains the procedure for setting up an HDLM environment and the procedure for canceling the environment settings. Make sure that HDLM installation and function setup has been performed. Set up volume groups and cluster software according to the environment you are using. 3.1 HDLM System Requirements 3.2 Flow for Creating an HDLM Environment 3.3 HDLM Installation Types 3.4 Knowledge Required Before You Install HDLM 3.
3. Creating an HDLM Environment 3.1 HDLM System Requirements Check the following before installing HDLM: 3.1.
3. Creating an HDLM Environment 1. Execute the following command to check which kernel architecture is used: # uname -m x86_64 # The following shows the meaning of the execution result of the uname command: i686: IA32 architecture ia64: IPF architecture x86_64: AMD64/EM64T architecture 2.
3. Creating an HDLM Environment Table 3-2: Red Hat Enterprise Linux AS4/ES4 Kernels Supported by HDLM Kernel Kernel architecture#1 IA32#2 2.6.9-11.EL 2.6.9-11.ELsmp 2.6.9-11.ELhugemem 2.6.9-34.EL 2.6.9-34.ELsmp 2.6.9-34.ELhugemem 2.6.9-34.0.2.EL 2.6.9-34.0.2.ELsmp 2.6.9-34.0.2.ELhugemem 2.6.9-42.EL 2.6.9-42.ELsmp 2.6.9-42.ELhugemem 2.6.9-42.0.3.EL 2.6.9-42.0.3.ELsmp 2.6.9-42.0.3.ELhugemem 2.6.9-55.EL 2.6.9-55.ELsmp 2.6.9-55.ELhugemem 2.6.9-67.EL 2.6.9-67.ELsmp 2.6.9-67.ELhugemem 2.6.9-78.EL 2.6.9-78.
3. Creating an HDLM Environment Kernel Kernel architecture#1 2.6.9-55.EL 2.6.9-55.ELlargesmp 2.6.9-67.EL 2.6.9-67.ELlargesmp 2.6.9-78.EL 2.6.9-78.ELlargesmp 2.6.9-89.EL 2.6.9-89.ELlargesmp 2.6.9-100.EL 2.6.9-100.ELlargesmp EM64T/AMD64#4 2.6.9-11.EL 2.6.9-11.ELsmp 2.6.9-34.EL 2.6.9-34.ELsmp 2.6.9-34.ELlargesmp 2.6.9-34.0.2.EL 2.6.9-34.0.2.ELsmp 2.6.9-34.0.2.ELlargesmp 2.6.9-42.EL 2.6.9-42.ELsmp 2.6.9-42.ELlargesmp 2.6.9-42.0.3.EL 2.6.9-42.0.3.ELsmp 2.6.9-42.0.3.ELlargesmp 2.6.9-55.EL 2.6.9-55.ELsmp 2.6.
3. Creating an HDLM Environment Kernel Kernel architecture#1 2.6.9-100.EL 2.6.9-100.ELsmp 2.6.9-100.ELlargesmp #1 Only kernels that are provided by OS distributors in binary format are supported. #2 HDLM supports an environment where an IA32 kernel is installed on a system that uses an Intel CPU or AMD Opteron processor. #3 HDLM supports an environment where an IPF kernel is installed on a system that uses an Intel CPU.
3. Creating an HDLM Environment Kernel Kernel architecture#1 2.6.18-128.el5 2.6.18-128.el5PAE 2.6.18-164.el5 2.6.18-164.el5PAE 2.6.18-194.el5 2.6.18-194.el5PAE 2.6.18-238.el5 2.6.18-238.el5PAE 2.6.18-8.el5 IPF#3 2.6.18-53.el5 2.6.18-92.el5 2.6.18-128.el5 2.6.18-164.el5 2.6.18-194.el5 2.6.18-238.el5 EM64T/AMD64#4 2.6.18-8.el5 2.6.18-53.el5 2.6.18-92.el5 2.6.18-128.el5 2.6.18-164.el5 2.6.18-194.el5 2.6.18-238.el5 #1 Only kernels that are provided by OS distributors in binary format are supported.
3. Creating an HDLM Environment HDLM supports an environment where an IPF kernel is installed on a system that uses an Intel CPU. #4 Note the following in an EM64T/AMD64 environment: • HDLM supports an environment where an EM64T/AMD64 kernel is installed on a system that uses an Intel CPU or AMD Opteron CPU. • In an EM64T/AMD64 environment, the RPM (Red Hat Package Manager) packages listed below are required. Install these RPM packages before installing HDLM: - libstdc++-RPM package version.i386.
3. Creating an HDLM Environment - glibc-RPM package version.i686.rpm RPM package version depends on the OS version you are using. Table 3-5: SUSE LINUX Enterprise Server 9 Kernels Supported by HDLM Kernel architecture#1 Kernel 2.6.5-7.308-default 2.6.5-7.308-smp 2.6.5-7.308-bigsmp IA32#2 2.6.5-7.315-default 2.6.5-7.315-smp 2.6.5-7.315-bigsmp IPF#3 2.6.5-7.308-default 2.6.5-7.308-64k-pagesize EM64T/AMD64#4 2.6.5-7.308-default 2.6.5-7.308-smp 2.6.5-7.315-default 2.6.5-7.
3. Creating an HDLM Environment HDLM supports an environment where an IPF kernel is installed on a system that uses an Intel CPU. #4 HDLM supports an environment where an EM64T/AMD64 kernel is installed on a system that uses an Intel CPU or AMD Opteron CPU. Table 3-6: SUSE LINUX Enterprise Server 10 Kernels Supported by HDLM Kernel architecture#1 IA32#2 Kernel 2.6.16.21-0.8-default#3 2.6.16.21-0.8-smp#3 2.6.16.21-0.8-bigsmp#3 2.6.16.46-0.14-default#4 2.6.16.46-0.14-smp#4 2.6.16.46-0.14-bigsmp#4 2.6.16.
3. Creating an HDLM Environment Kernel architecture#1 EM64T/AMD64#9 Kernel 2.6.16.21-0.8-default#3 2.6.16.21-0.8-smp#3 2.6.16.46-0.14-default#4 2.6.16.46-0.14-smp#4 2.6.16.60-0.21-default#5 2.6.16.60-0.21-smp#5 2.6.16.60-0.21-xen#5 2.6.16.60-0.54.5-default#6 2.6.16.60-0.54.5-smp#6 2.6.16.60-0.54.5-xen#6 2.6.16.60-0.85.1-default#7 2.6.16.60-0.85.1-smp#7 2.6.16.60-0.85.1-xen#7 Note: This subsection describes the operating environment common to SUSE LINUX Enterprise Server 10.
3. Creating an HDLM Environment #4 All of the packages of SP1 for SUSE LINUX Enterprise Server 10 must be installed. #5 All of the SP2 packages for SUSE LINUX Enterprise Server 10 must be installed. #6 All of the SP3 packages for SUSE LINUX Enterprise Server 10 must be installed. #7 All of the SP4 packages for SUSE LINUX Enterprise Server 10 must be installed. #8 HDLM supports an environment where an IPF kernel is installed on a system that uses an Intel CPU.
3. Creating an HDLM Environment • Among the functions for SUSE LINUX Enterprise Server, HDLM only supports CFQ, and the default I/O scheduler functionality. • An HDLM device that applies EVMS functions is not supported. • You cannot use DRBD functions in an environment where HDLM is installed. • You cannot use HDLM in a User-Mode Linux environment. #1 Only kernels that are provided by OS distributors in binary format are supported.
3. Creating an HDLM Environment #2 HDLM supports an environment where an IA32 kernel is installed on a system that uses an Intel CPU or AMD Opteron processor. #3 Note the following in an EM64T/AMD64 environment: • HDLM supports an environment where an EM64T/AMD64 kernel is installed on a system that uses an Intel CPU or AMD Opteron CPU. • In an EM64T/AMD64 environment, the RPM (Red Hat Package Manager) packages listed below are required.
3. Creating an HDLM Environment Note the following in an EM64T/AMD64 environment: • HDLM supports an environment where an EM64T/AMD64 kernel is installed on a system that uses an Intel CPU or AMD Opteron CPU. • In an EM64T/AMD64 environment, the RPM (Red Hat Package Manager) packages listed below are required. Install these RPM packages before installing HDLM: - libstdc++-RPM package version.i386.rpm - libgcc-RPM package version.i386.rpm - glibc-RPM package version.i686.
3. Creating an HDLM Environment Storage systems that are used must have a dual controller configuration. If you use them in a HUB-connected environment, specify a unique loop ID for all the connected hosts and storage systems. For details on the microprogram version required for using HDLM, see HDLM Release Notes. For details on the settings information for storage system, see the maintenance documentation for the storage system.
3. Creating an HDLM Environment HDLM on all the nodes that comprise the cluster. If different versions of HDLM are installed, the cluster system may not operate correctly.
3. Creating an HDLM Environment Usable kernels Cluster software 2.6.9-34.EL 2.6.9-34.ELsmp 2.6.9-34.ELhugemem LifeKeeper v6 LifeKeeper v6 Update1 LifeKeeper v6 Update2 LifeKeeper v6 Update3 LifeKeeper v6 Update4 LifeKeeper v7 LifeKeeper v7 Update1 LifeKeeper v7 Update2 LifeKeeper v7 Update3 Oracle9i RAC Release 2 (9.2.0.8.0)#1 Oracle RAC 10g Release 2 (10.1.0.5.0)#2 Oracle RAC 10g Release 2 (10.2.0.2.0)#8 Oracle RAC 10g Release 2 (10.2.0.3.0)#4 Oracle RAC 10g Release 2 (10.2.0.4.
3. Creating an HDLM Environment Usable kernels Cluster software 2.6.9-42.EL 2.6.9-42.ELsmp 2.6.9-42.ELhugemem LifeKeeper v6 LifeKeeper v6 Update1 LifeKeeper v6 Update2 LifeKeeper v6 Update3 LifeKeeper v6 Update4 LifeKeeper v7 LifeKeeper v7 Update1 LifeKeeper v7 Update2 LifeKeeper v7 Update3 Oracle9i RAC Release 2 (9.2.0.8.0)#1 Oracle RAC 10g Release 2 (10.1.0.5.0)#2 Oracle RAC 10g Release 2 (10.2.0.2.0)#8 Oracle RAC 10g Release 2 (10.2.0.3.0)#4 Oracle RAC 10g Release 2 (10.2.0.4.
3. Creating an HDLM Environment Usable kernels 2.6.9-55.EL 2.6.9-55.ELsmp 2.6.9-55.ELhugemem 2.6.9-67.EL 2.6.9-67.ELsmp 2.6.9-67.ELhugemem 2.6.9-78.EL 2.6.9-78.ELsmp 2.6.9-78.ELhugemem 2.6.9-89.EL 2.6.9-89.ELsmp 2.6.9-89.ELhugemem 2.6.9-100.EL 2.6.9-100.ELsmp 2.6.9-100.ELhugemem Cluster software LifeKeeper v6 LifeKeeper v6 Update1 LifeKeeper v6 Update2 LifeKeeper v6 Update3 LifeKeeper v6 Update4 LifeKeeper v7 LifeKeeper v7 Update1 LifeKeeper v7 Update2 LifeKeeper v7 Update3 Oracle RAC 10g Release 2 (10.
3. Creating an HDLM Environment For details, see 3.14 Settings for Oracle RAC. #2 Only configurations that include the Automatic Storage Management (ASM) function (the ASMLib kernel driver (ASMLib) is used) and Cluster Ready Service (CRS) are supported. For details, see 3.14 Settings for Oracle RAC.
3. Creating an HDLM Environment function (raw devices used) and Oracle Clusterware • Configurations that include the Automatic Storage Management (ASM) function (the ASMLib kernel driver (ASMLib) is used) and Oracle Clusterware • Configurations that include the Oracle Cluster File System 2 and Oracle Clusterware For details, see 3.14 Settings for Oracle RAC.
3. Creating an HDLM Environment Table 3-11: Cluster Software When Using Red Hat Enterprise Linux ES4 (IA32) Usable kernels Cluster software 2.6.9-11.EL 2.6.9-11.ELsmp 2.6.9-11.ELhugemem LifeKeeper v6 LifeKeeper v6 Update1 LifeKeeper v6 Update2 LifeKeeper v6 Update3 LifeKeeper v6 Update4 LifeKeeper v7 LifeKeeper v7 Update1 LifeKeeper v7 Update2 LifeKeeper v7 Update3 Oracle RAC 10g Release 2 (10.1.0.5.0)#1 Oracle RAC 10g Release 2 (10.2.0.2.0)#2 Oracle RAC 10g Release 2 (10.2.0.3.
3. Creating an HDLM Environment Usable kernels 2.6.9-42.EL 2.6.9-42.ELsmp 2.6.9-42.ELhugemem 2.6.9-42.0.3.EL 2.6.9-42.0.3.ELsmp 2.6.9-42.0.3.ELhugemem 2.6.9-55.EL 2.6.9-55.ELsmp 2.6.9-55.ELhugemem 2.6.9-67.EL 2.6.9-67.ELsmp 2.6.9-67.ELhugemem 80 Cluster software LifeKeeper v6 LifeKeeper v6 Update1 LifeKeeper v6 Update2 LifeKeeper v6 Update3 LifeKeeper v6 Update4 LifeKeeper v7 LifeKeeper v7 Update1 LifeKeeper v7 Update2 LifeKeeper v7 Update3 Oracle RAC 10g Release 2 (10.1.0.5.
3. Creating an HDLM Environment Usable kernels 2.6.9-78.EL 2.6.9-78.ELsmp 2.6.9-78.ELhugemem 2.6.9-89.EL 2.6.9-89.ELsmp 2.6.9-89.ELhugemem 2.6.9-100.EL 2.6.9-100.ELsmp 2.6.9-100.ELhugemem Cluster software LifeKeeper v6 Update4 LifeKeeper v7 LifeKeeper v7 Update1 LifeKeeper v7 Update2 LifeKeeper v7 Update3 Oracle RAC 10g Release 2 (10.1.0.5.0)#1 Oracle RAC 10g Release 2 (10.2.0.2.0)#7 Oracle RAC 10g Release 2 (10.2.0.3.0)#3 Oracle RAC 10g Release 2 (10.2.0.4.0)#4 Oracle RAC 11g Release 1 (11.1.0.6.
3. Creating an HDLM Environment #3 The following configurations are supported: • Configurations that include the Automatic Storage Management (ASM) function (raw devices used) and Cluster Ready Service (CRS) • Configurations that include the Automatic Storage Management (ASM) function (the ASMLib kernel driver (ASMLib) is used) and Cluster Ready Service (CRS) For details, see 3.14 Settings for Oracle RAC.
3. Creating an HDLM Environment function (raw devices used) and Cluster Ready Service (CRS) For details, see 3.14 Settings for Oracle RAC. #8 Only configurations that include the Automatic Storage Management (ASM) function (using raw devices) and Oracle Clusterware are supported. For details, see 3.14 Settings for Oracle RAC. Table 3-12: Cluster Software When Using Red Hat Enterprise Linux AS4/ES4 (IPF) Usable kernels Cluster software 2.6.9-11.EL Oracle RAC 10g Release 2 (10.2.0.1.
3. Creating an HDLM Environment For details, see 3.14 Settings for Oracle RAC. #2 The following configurations are supported: • Configurations that include raw devices and Cluster Ready Service (CRS) • Configurations that include the Automatic Storage Management (ASM) function (raw devices used) and Cluster Ready Service (CRS) • Configurations that include the Automatic Storage Management (ASM) function (the ASMLib kernel driver (ASMLib) is used) and Cluster Ready Service (CRS) For details, see 3.
3. Creating an HDLM Environment Usable kernels Cluster software 2.6.9-34.EL 2.6.9-34.ELsmp 2.6.9-34.ELlargesmp LifeKeeper v6 LifeKeeper v6 Update1 LifeKeeper v6 Update2 LifeKeeper v6 Update3 LifeKeeper v6 Update4 LifeKeeper v7 LifeKeeper v7 Update1 LifeKeeper v7 Update2 LifeKeeper v7 Update3 Oracle RAC 10g Release 2 (10.2.0.2.0)#1 Oracle RAC 10g Release 2 (10.2.0.3.0)#2 Oracle RAC 10g Release 2 (10.2.0.4.0)#2 Oracle RAC 11g Release 1 (11.1.0.6.0)#3 Oracle RAC 11g Release 1 (11.1.0.7.0)#4 RHCM 1.0.
3. Creating an HDLM Environment Usable kernels Cluster software 2.6.9-42.EL 2.6.9-42.ELsmp 2.6.9-42.ELlargesmp LifeKeeper v6 LifeKeeper v6 Update1 LifeKeeper v6 Update2 LifeKeeper v6 Update3 LifeKeeper v6 Update4 LifeKeeper v7 LifeKeeper v7 Update1 LifeKeeper v7 Update2 LifeKeeper v7 Update3 Oracle RAC 10g Release 2 (10.2.0.2.0)#1 Oracle RAC 10g Release 2 (10.2.0.3.0)#2 Oracle RAC 10g Release 2 (10.2.0.4.0)#2 Oracle RAC 11g Release 1 (11.1.0.6.0)#3 Oracle RAC 11g Release 1 (11.1.0.7.0)#4 RHCM 1.0.
3. Creating an HDLM Environment Usable kernels 2.6.9-55.EL 2.6.9-55.ELsmp 2.6.9-55.ELlargesmp 2.6.9-67.EL 2.6.9-67.ELsmp 2.6.9-67.ELlargesmp 2.6.9-78.EL 2.6.9-78.ELsmp 2.6.9-78.ELlargesmp 2.6.9-89.EL 2.6.9-89.ELsmp 2.6.9-89.ELlargesmp 2.6.9-100.EL 2.6.9-100.ELsmp 2.6.9-100.
3. Creating an HDLM Environment For details, see 3.14 Settings for Oracle RAC. #2 The following configurations are supported: • Configurations that include raw devices and Cluster Ready Service (CRS) • Configurations that include the Automatic Storage Management (ASM) function (raw devices used) and Cluster Ready Service (CRS) • Configurations that include the Automatic Storage Management (ASM) function (the ASMLib kernel driver (ASMLib) is used) and Cluster Ready Service (CRS) For details, see 3.
3. Creating an HDLM Environment #6 Only configurations that include the Automatic Storage Management (ASM) function (using raw devices) and Oracle Clusterware are supported. For details, see 3.14 Settings for Oracle RAC. (2) Volume Managers Supported by HDLM Table 3-14: Volume Managers When Using Red Hat Enterprise Linux AS4/ES4 lists and describes the related programs when using a volume manager.
3. Creating an HDLM Environment Kernel architecture IPF Kernel Volume Manager 2.6.9-100.EL 2.6.9-100.ELsmp 2.6.9-100.ELhugemem LVM2.02.42-9.el4 2.6.9-11.EL LVM2.01.08-1.0.RHEL4 2.6.9-34.EL LVM2.02.01-1.3.RHEL4 LVM2.02.21-5.el4 2.6.9-42.EL LVM2.02.06-6.0.RHEL4 2.6.9-42.0.3.EL EM64T/AMD64 2.6.9-55.EL 2.6.9-55.ELlargesmp LVM2.02.21-5.el4 2.6.9-67.EL 2.6.9-67.ELlargesmp LVM2.02.27-2.el4 2.6.9-78.EL 2.6.9-78.ELlargesmp LVM2.02.21-5.el4 LVM2.02.37-3.el4 2.6.9-89.EL 2.6.9-89.ELlargesmp LVM2.
3. Creating an HDLM Environment Kernel architecture Kernel Volume Manager 2.6.9-67.EL 2.6.9-67.ELsmp 2.6.9-67.ELlargesmp LVM2.02.27-2.el4 2.6.9-78.EL 2.6.9-78.ELsmp 2.6.9-78.ELlargesmp LVM2.02.21-5.el4 LVM2.02.37-3.el4 2.6.9-89.EL 2.6.9-89.ELsmp 2.6.9-89.ELlargesmp LVM2.02.42-5.el4 2.6.9-100.EL 2.6.9-100.ELsmp 2.6.9-100.ELlargesmp LVM2.02.42-9.
3. Creating an HDLM Environment Table 3-15: Operating Environments for BladeSymphony When Using Red Hat Enterprise Linux AS4/ES4 Kernel architecture IA32 Kernel HBA 2.6.9-11.ELsmp hitachi 2.6.9-34.ELsmp 2.6.9-55.ELsmp 2.6.9-78.ELsmp IPF Supported storage systems Hitachi AMS2000/AMS/WMS/SMS series Hitachi USP#1 Lightning 9900V series#1#2 Thunder 9500V series Universal Storage Platform V/VM#1 Virtual Storage Platform#1 2.6.9-11.EL 2.6.9-34.EL 2.6.9-42.EL 2.6.9-55.EL 2.6.9-78.EL EM64T 2.6.9-11.
3. Creating an HDLM Environment Table 3-16: Operating Environments for Boot Disks When Using Red Hat Enterprise Linux AS4/ES4(IA32) Kernel 2.6.9-11.EL 2.6.9-11.ELsmp 2.6.9-11.ELhugemem HBA QLogic 2.6.9-34.EL 2.6.9-34.ELsmp 2.6.9-34.ELhugemem Supported storage systems Hitachi AMS2000/AMS/WMS/SMS series Hitachi USP Lightning 9900V series Thunder 9500V series Universal Storage Platform V/VM Virtual Storage Platform 2.6.9-34.0.2.EL 2.6.9-34.0.2.ELsmp 2.6.9-34.0.2.ELhugemem 2.6.9-42.EL 2.6.9-42.ELsmp 2.6.
3. Creating an HDLM Environment Table 3-17: Operating Environments for Boot Disks When Using Red Hat Enterprise Linux AS4/ES4 (IPF) Kernel HBA 2.6.9-55.EL 2.6.9-55.ELlargesmp Emulex 2.6.9-67.EL 2.6.9-67.ELlargesmp 2.6.9-78.EL 2.6.9-78.ELlargesmp Supported storage systems Hitachi AMS2000/AMS/WMS/SMS series Hitachi USP Lightning 9900V series Thunder 9500V series Universal Storage Platform V/VM Virtual Storage Platform 2.6.9-89.EL 2.6.9-89.ELlargesmp 2.6.9-100.EL 2.6.9-100.
3. Creating an HDLM Environment Kernel HBA Supported storage systems 2.6.9-78.EL 2.6.9-78.ELsmp 2.6.9-78.ELlargesmp 2.6.9-89.EL 2.6.9-89.ELsmp 2.6.9-89.ELlargesmp 2.6.9-100.EL 2.6.9-100.ELsmp 2.6.9-100.ELlargesmp Table 3-19: Operating Environments for BladeSymphony and Boot Disks When Using Red Hat Enterprise Linux AS4/ES4 lists the operating environments when an HDLM device is used as a boot disk in a BladeSymphony environment.
3. Creating an HDLM Environment Notes on using HDLM in a BladeSymphony environment When HDLM is used in a BladeSymphony environment, the following functions cannot be used: • HotPlug • SystemManager linkage Note that HDLM cannot use the functions provided by ServerConductor/ DeploymentManager other than the following: • Backup and restoration • BIOS/firmware updating For details on the functions provided by ServerConductor/DeploymentManager, see the manual ServerConductor/DeploymentManager User's Guide.
3. Creating an HDLM Environment Table 3-20: Cluster Software Used with Red Hat Enterprise Linux 5 (IA32) Usable kernels Cluster software 2.6.18-8.el5 2.6.18-8.el5PAE LifeKeeper v6 Update1 LifeKeeper v6 Update2 LifeKeeper v6 Update3 LifeKeeper v6 Update4 LifeKeeper v7 LifeKeeper v7 Update1 LifeKeeper v7 Update2 LifeKeeper v7 Update3 Oracle RAC 10g Release 2 (10.2.0.4.0)#1 Oracle RAC 11g Release 1 (11.1.0.6.0)#2 Oracle RAC 11g Release 1 (11.1.0.7.0)#3 RHCM 2.0.60-1 2.6.18-53.el5 2.6.18-53.
3. Creating an HDLM Environment Usable kernels Cluster software 2.6.18-128.el5 2.6.18-128.el5PAE LifeKeeper v6 Update4 LifeKeeper v7 LifeKeeper v7 Update1 LifeKeeper v7 Update2 LifeKeeper v7 Update3 Oracle RAC 10g Release 2 (10.2.0.4.0)#1 Oracle RAC 11g Release 1 (11.1.0.6.0)#2 Oracle RAC 11g Release 1 (11.1.0.7.0)#3 Oracle RAC 11g Release 2 (11.2.0.1.0)#4 Oracle RAC 11g Release 2 (11.2.0.2.0)#4 RHCM 2.0.98-1 2.6.18-164.el5 2.6.18-164.
3. Creating an HDLM Environment Clusterware • Configurations that include the Oracle Cluster File System 2 and Oracle Clusterware For details, see 3.14 Settings for Oracle RAC.
3. Creating an HDLM Environment Table 3-22: Cluster Software Used with Red Hat Enterprise Linux 5 (EM64T/ AMD64) Usable kernels Cluster software 2.6.18-8.el5 LifeKeeper v6 Update1 LifeKeeper v6 Update2 LifeKeeper v6 Update3 LifeKeeper v6 Update4 LifeKeeper v7 LifeKeeper v7 Update1 LifeKeeper v7 Update2 LifeKeeper v7 Update3 Oracle RAC 10g Release 2 (10.2.0.1.0)#1 Oracle RAC 10g Release 2 (10.2.0.3.0)#2 Oracle RAC 10g Release 2 (10.2.0.4.0)#3 Oracle RAC 11g Release 1 (11.1.0.6.
3. Creating an HDLM Environment Usable kernels Cluster software 2.6.18-92.el5 LifeKeeper v6 Update3 LifeKeeper v6 Update4 LifeKeeper v7 LifeKeeper v7 Update1 LifeKeeper v7 Update2 LifeKeeper v7 Update3 Oracle RAC 10g Release 2 (10.2.0.1.0)#1 Oracle RAC 10g Release 2 (10.2.0.3.0)#2 Oracle RAC 10g Release 2 (10.2.0.4.0)#3 Oracle RAC 11g Release 1 (11.1.0.6.0)#4 Oracle RAC 11g Release 1 (11.1.0.7.0)#5 Oracle RAC 11g Release 2 (11.2.0.1.0)#6 Oracle RAC 11g Release 2 (11.2.0.2.0)#7 RHCM 2.0.84-2 2.6.18-128.
3. Creating an HDLM Environment #1 Only configurations that include the Automatic Storage Management (ASM) function (raw devices used) and Cluster Ready Service (CRS) are supported. For details, see 3.14 Settings for Oracle RAC.
3. Creating an HDLM Environment • Configurations that include raw devices and Oracle Clusterware • Configurations that include the Automatic Storage Management (ASM) function (raw devices used) and Oracle Clusterware • Configurations that include the Automatic Storage Management (ASM) function (the ASMLib kernel driver (ASMLib) is used) and Oracle Clusterware • Configurations that include the Oracle Cluster File System 2 and Oracle Clusterware For details, see 3.14 Settings for Oracle RAC.
3. Creating an HDLM Environment Kernel architecture IPF EM64T/AMD64 Kernel Volume manager 2.6.18-92.el5 2.6.18-92.el5PAE LVM2.02.32-4.el5 2.6.18-128.el5 2.6.18-128.el5PAE LVM2.02.40-6.el5 2.6.18-164.el5 2.6.18-164.el5PAE LVM2.02.46-8.el5 2.6.18-194.el5 2.6.18-194.el5PAE LVM2.02.56-8.el5 2.6.18-238.el5 2.6.18-238.el5PAE LVM2.02.74-5.el5 2.6.18-8.el5 LVM2.02.16-3.el5 2.6.18-53.el5 LVM2.02.26-3.el5 2.6.18-92.el5 LVM2.02.32-4.el5 2.6.18-128.el5 LVM2.02.40-6.el5 2.6.18-164.el5 LVM2.02.
3. Creating an HDLM Environment Table 3-24: Supported File Systems When Using Red Hat Enterprise Linux 5 Kernel architecture IA32 Kernel 2.6.18-8.el5 2.6.18-8.el5PAE File system ext2 (supplied with the OS) ext3 (supplied with the OS) 2.6.18-53.el5 2.6.18-53.el5PAE 2.6.18-92.el5 2.6.18-92.el5PAE 2.6.18-128.el5 2.6.18-128.el5PAE 2.6.18-164.el5 2.6.18-164.el5PAE ext2 (supplied with the OS) ext3 (supplied with the OS) GFS2 (supplied with the OS)# 2.6.18-194.el5 2.6.18-194.el5PAE 2.6.18-238.el5 2.6.18-238.
3. Creating an HDLM Environment An HDLM device on a GFS2 file system cannot be used as a boot disk. (4) Boot Disk Environments and BladeSymphony Environments Supported by HDLM (If an FC-SAN Is Used) HDLM supports BladeSymphony in any of the environments listed in Table 3-25: Operating Environments for BladeSymphony When Using Red Hat Enterprise Linux 5. For details on OSs (kernels) that each BladeSymphony model supports, see the BladeSymphony documentation.
3. Creating an HDLM Environment Table 3-26: Operating Environments for Boot Disks When Using Red Hat Enterprise Linux 5 Kernel architecture IA32 Kernel HBA 2.6.18-8.el5 2.6.18-8.el5PAE Emulex QLogic 2.6.18-53.el5 2.6.18-53.el5PAE Brocade Emulex QLogic 2.6.18-92.el5 2.6.18-92.el5PAE Supported storage systems Hitachi AMS2000/AMS/WMS/ SMS series Hitachi USP Thunder 9500V series Universal Storage Platform V/VM Virtual Storage Platform 2.6.18-128.el5# 2.6.18-128.el5PAE# 2.6.18-164.el5# 2.6.18-164.
3. Creating an HDLM Environment Kernel architecture Kernel HBA Supported storage systems 2.6.18-194.el5# 2.6.18-238.el5# # LUKS is not available in an environment where an HDLM device is used as a boot disk. Table 3-27: Operating Environments for BladeSymphony and Boot Disks When Using Red Hat Enterprise Linux 5 lists the operating environments when an HDLM device is used as a boot disk in a BladeSymphony environment.
3. Creating an HDLM Environment • HotPlug • SystemManager linkage Note that HDLM cannot use the functions provided by ServerConductor/ DeploymentManager other than the following: • Backup and restoration • BIOS/firmware updating For details on the functions provided by ServerConductor/DeploymentManager, see the manual ServerConductor/DeploymentManager User's Guide. 3.1.5 Related Products When Using Red Hat Enterprise Linux 6 The following describes related products when Red Hat Enterprise Linux 6 is used.
3. Creating an HDLM Environment Table 3-29: Supported File Systems When Using Red Hat Enterprise Linux 6 Kernel architecture Kernel IA32 2.6.32-71.el6.i686 EM64T/AMD64 2.6.32-71.el6.x86_64 File system ext2 (supplied with the OS) ext3 (supplied with the OS) ext4 (supplied with the OS) GFS2 (supplied with the OS)# # An HDLM device on a GFS2 file system cannot be used as a boot disk.
3. Creating an HDLM Environment # /opt/DynamicLinkManager/bin/dlnkmgr view -sys Always use Heartbeat (1.2.5-0.3) in order to create a cluster configuration. Note that environments that combine Heartbeat and LVM are not supported. (2) Volume Managers Supported by HDLM Use LVM2.01.14-3.23 as a volume manager.
3. Creating an HDLM Environment HDLM on all the nodes that comprise the cluster. If different versions of HDLM are installed, the cluster system may not operate correctly. If the HDLM Version and Service Pack Version, which are displayed by executing the following command, are the same, the versions of HDLM are the same: # /opt/DynamicLinkManager/bin/dlnkmgr view -sys Table 3-31: Cluster Software When Using SUSE LINUX Enterprise Server 10 lists the related programs used when creating a cluster.
3. Creating an HDLM Environment Kernel architecture EM64T/AMD64 Usable kernels Cluster software 2.6.16.21-0.8-default 2.6.16.21-0.8-smp Oracle RAC 10g Release 2 (10.2.0.3.0)#1 2.6.16.46-0.14-default 2.6.16.46-0.14-smp Heartbeat (2.0.8-0.19)#2 Oracle RAC 10g Release 2 (10.2.0.3.0)#1 2.6.16.60-0.21-default 2.6.16.60-0.21-smp Heartbeat (2.1.3-0.9)#2 Novell Open Enterprise Server 2 SP1 2.6.16.60-0.21-xen Heartbeat (2.1.3-0.9)#2 2.6.16.60-0.54.5-default 2.6.16.60-0.54.5-smp 2.6.16.60-0.54.
3. Creating an HDLM Environment Kernel architecture IPF EM64T/AMD64 Kernel 2.6.16.46-0.14-default 2.6.16.46-0.14-smp 2.6.16.46-0.14-bigsmp LVM2.02.17-7.9 2.6.16.60-0.21-default 2.6.16.60-0.21-smp 2.6.16.60-0.21-bigsmp 2.6.16.60-0.21-xenpae LVM2.02.17-7.19 2.6.16.60-0.54.5-default 2.6.16.60-0.54.5-smp 2.6.16.60-0.54.5-bigsmp 2.6.16.60-0.54.5-xenpae LVM2.02.17-27.8 2.6.16.60-0.85.1-default 2.6.16.60-0.85.1-smp 2.6.16.60-0.85.1-bigsmp 2.6.16.60-0.85.1-xenpae LVM2.02.17-7.30.1 2.6.16.21-0.
3. Creating an HDLM Environment • Although disk partitioning and system backup functions are supported for disks in a YaST2 system, the combination of YaST2 and LVM is not supported. • When you execute an LVM-related command such as pvscan or vgscan, a CD-ROM IOCTL command might be sent to each device in the OS. The IOCTL is available only for SCSI devices. You do not need to enter information for the IOCTL when installing HDLM because HDLM devices are not SCSI devices.
3. Creating an HDLM Environment Table 3-33: Operating Environments for BladeSymphony When Using SUSE LINUX Enterprise Server 10 Kernel architecture EM64T Kernel 2.6.16.46-0.14-smp HBA hitachi Supported storage systems Hitachi AMS2000/AMS/WMS/SMS series Hitachi USP#1 Lightning 9900V series#1#2 Thunder 9500V series Universal Storage Platform V/VM#1 Virtual Storage Platform#1 #1 The XP series is not supported.
3. Creating an HDLM Environment Kernel architecture IPF Kernel 2.6.16.60-0.21-default HBA Supported storage systems Brocade 2.6.16.60-0.54.5-default EM64T/AMD64 2.6.16.46-0.14-default 2.6.16.46-0.14-smp QLogic 2.6.16.60-0.21-default 2.6.16.60-0.21-smp Brocade QLogic 2.6.16.60-0.21-xen QLogic 2.6.16.60-0.54.5-default 2.6.16.60-0.54.5-smp 2.6.16.60-0.54.5-xen Brocade QLogic 2.6.16.60-0.85.1-default 2.6.16.60-0.85.1-smp 2.6.16.60-0.85.
3. Creating an HDLM Environment Note that HDLM cannot use the functions provided by ServerConductor/ DeploymentManager other than the following: • Backup and restoration • BIOS/firmware updating For details on the functions provided by ServerConductor/DeploymentManager, see the manual ServerConductor/DeploymentManager User's Guide. 3.1.8 Related Products When Using SUSE LINUX Enterprise Server 11 The following describes related products when SUSE LINUX Enterprise Server 11 is used.
3. Creating an HDLM Environment IOCTL when installing HDLM because HDLM devices are not SCSI devices. HDLM rejects the IOCTL request and assumes that the IOCTL processing has failed. The error message (KAPL05023-E) is output to the syslog, but HDLM operations are not affected. This message is also output in the following cases, but HDLM operations are not affected: • You execute the utility for collecting HDLM error information (DLMgetras). • The system is started.
3. Creating an HDLM Environment Table 3-37: Operating Environments for Boot Disks When Using SUSE LINUX Enterprise Server 11 Kernel architecture HBA Supported storage systems 2.6.27.21-0.1-default 2.6.27.21-0.1-pae Brocade QLogic 2.6.27.21-0.1-xen QLogic 2.6.32.12-0.7-default 2.6.32.12-0.7-pae 2.6.32.12-0.7-xen Brocade QLogic Hitachi AMS2000/AMS/WMS/ SMS series Hitachi USP Lightning 9900V series Thunder 9500V series Universal Storage Platform V/VM Virtual Storage Platform IPF 2.6.32.12-0.
3. Creating an HDLM Environment (2) File Systems Supported by HDLM When using a file system, the related programs are as follows: • ext2 (supplied with the OS) • ext3 (supplied with the OS) (3) Boot Disk Environments Supported by HDLM HDLM supports boot disks in any of the environments listed in Table 3-39: Operating Environments for Boot Disks When Using Oracle Enterprise Linux 4. For details on the OSs (kernels) that each storage system model supports, see the storage system documentation.
3. Creating an HDLM Environment # /opt/DynamicLinkManager/bin/dlnkmgr view -sys Table 3-40: Cluster Software When Using Oracle Enterprise Linux 5 lists the related programs used when creating a cluster. Table 3-40: Cluster Software When Using Oracle Enterprise Linux 5 Kernel architecture IA32 EM64T/AMD64 Usable kernels Cluster software 2.6.18-53.el5 2.6.18-53.el5PAE Oracle RAC 11g Release 1(11.1.0.6.0)# RHCM 2.0.73-1 2.6.18-164.el5 2.6.18-164.el5PAE Oracle RAC 11g Release 2(11.2.0.2.0)# 2.6.
3. Creating an HDLM Environment Kernel architecture EM64T/AMD64 Kernel Volume manager 2.6.18-53.el5 LVM2.02.26-3.el5 2.6.18-164.el5 LVM2.02.46-8.el5 2.6.18-194.el5 LVM2.02.56-8.el5 (3) File Systems Supported by HDLM Table 3-42: Supported File Systems When Using Oracle Enterprise Linux 5 lists and describes the related programs when using the file system. Table 3-42: Supported File Systems When Using Oracle Enterprise Linux 5 Kernel architecture IA32 Kernel File system 2.6.18-53.el5 2.6.18-53.
3. Creating an HDLM Environment Table 3-43: Operating Environments for Boot Disks When Using Oracle Enterprise Linux 5 Kernel architecture IA32 Kernel HBA 2.6.18-53.el5 2.6.18-53.el5PAE QLogic 2.6.18-164.el5 2.6.18-164.el5PAE Emulex QLogic Supported storage systems Hitachi AMS2000/AMS/WMS/ SMS series Hitachi USP Lightning 9900V series Thunder 9500V series Universal Storage Platform V/ VM Virtual Storage Platform 2.6.18-194.el5 2.6.18-194.el5PAE EM64T/AMD64 2.6.18-53.el5 QLogic 2.6.18-164.
3. Creating an HDLM Environment Directory Disk capacity requirements /var p MB#1 + q MB#2 + 4 MB#3 + u MB#4 + 20 MB#5 + v MB#6 + 45 MB (100 MB#7) /opt 168 MB /etc y MB#8 + z MB#9 + 5.5 MB (10 MB#7) /root 580 KB /sbin 500 KB #1 This size differs depending on the settings for log files (maximum size: 30 GB). p is obtained by the following formula: p = (s x m) / 1024 [MB] Where s is the error log file size (unit: KB, default value: 9900) and m is the number of error log files (default value: 2).
3. Creating an HDLM Environment Agent Component. The size of each log file (dlmwebagent[1-N].log) is 9900 KB (approximately 10 MB). The size of the log files is calculated as approximately 20 MB because two log files are created by default. You can create a maximum of 16 log files depending on the setting in the dlmwebagent.properties file. If you create 16 log files, the size of the log files will be approximately 160 MB. #6 The size of the log files for the dlmcfgmgr utility.
3. Creating an HDLM Environment 3.1.12 Number of Paths Supported in HDLM Table 3-46: Number of LUs and Paths Supported in HDLM lists the number of LUs, number of paths per LU, and total number of paths supported in HDLM.
3. Creating an HDLM Environment Table 3-47: Xen Hypervisor Operating Environments Supported by HDLM shows the Xen hypervisor operating environments supported by HDLM. Table 3-47: Xen Hypervisor Operating Environments Supported by HDLM OS Kernel architecture SUSE LINUX Enterprise Server 10 IA32 EM64T/AMD64 SUSE LINUX Enterprise Server 11 IA32 EM64T/AMD64 Kernel Xen hypervisor version 2.6.16.60-0.21-xenpae xen-3.2.0_16718_14-0.4 2.6.16.60-0.54.5-xenpae xen-3.2.3_17040_16-0.4.9 2.6.16.60-0.85.
3. Creating an HDLM Environment 3.2 Flow for Creating an HDLM Environment Set up the environment to use HDLM as shown in the following diagram. If you are going to use volume management software, the procedure for building a file system shown in the figure is not required.
3.
3. Creating an HDLM Environment 3.3 HDLM Installation Types This subsection describes the following types of HDLM installation: new installation, upgrade installation, and re-installation. New installation of HDLM: Installing HDLM on a server on which HDLM has not been installed is called a new installation of HDLM. Upgrade installation of HDLM: Installing a new version of HDLM without uninstalling the existing old version is called an upgrade installation of HDLM.
3. Creating an HDLM Environment 3.4 Knowledge Required Before You Install HDLM You can install HDLM on the following disks or devices: • An internal disk on a host machine • LUs of storage systems that are used as a boot disk For details about the storage systems on which HDLM can be installed, see (4) Boot Disk Environments and BladeSymphony Environments Supported by HDLM in 3.1.
3. Creating an HDLM Environment 3.5 Notes on Creating an HDLM Environment This section provides notes on creating an HDLM environment. For notes on operating HDLM, see 4.1 Notes on Using HDLM. 3.5.1 Notes on Hardware Settings The types of HBA that are installed on one host can be mixed. However, the HBAs connected to an HDLM-managed device must all be of the same type. Also make sure that the HBA driver versions are the same.
3. Creating an HDLM Environment However, you can avoid the above situations by setting a permanent target ID for each LU with the HBA driver persistent binding functionality. For details on whether the persistent binding functionality is supported for your HBA driver and the setting method, see the manual provided with the HDLM driver.
3. Creating an HDLM Environment # grep DLM /etc/rc.d/rc.sysinit # grep DLM /etc/init.d/halt If nothing is output after command execution, HDLM information is missing. For details about the dlmupdatesysinit utility, see 7.8 dlmupdatesysinit Utility for Updating System Scripts.
3. Creating an HDLM Environment configuration, memory might become insufficient due to the HAL daemon#. In this case, the host will not respond. To avoid this, stop the HAL daemon when executing the dlmcfgmgr utility. The following procedure shows how to stop the HAL daemon. # The HAL daemon detects hardware configurations changes, for example, when a USB device or CD-ROM is inserted. To stop the HAL daemon: 1. Check the status of the HAL daemon.
3. Creating an HDLM Environment # /sbin/dlmcfgmgr -i 5. Start the HAL daemon. Execute the /sbin/service command to start the HAL daemon. # /sbin/service haldaemon start Make sure that the HAL daemon is running. Execute the /sbin/service command to make sure that the HAL daemon is running. # /sbin/service haldaemon status 3.5.
3.
3. Creating an HDLM Environment 3.6 Installing HDLM The following section describes how to install HDLM for a new installation, for a re-installation, and for an upgrade installation. Depending on the procedure, the host might have to be restarted after HDLM is installed. HDLM can also be installed by performing an unattended installation, which enables a user to install HDLM without entering information. Select the procedure suitable for your environment.
3. Creating an HDLM Environment First, check the current settings. Execute the following command: # mount The current settings will be output as shown in Figure 3-2: Execution Results of the mount Command. Figure 3-2: Execution Results of the mount Command The shaded portion shows the SCSI device to be managed by HDLM. Execute the following command on this SCSI device to unmount it: # umount /mntpt 5.
3. Creating an HDLM Environment (2) Checking the Volume Group If you have already created a physical volume, volume group, or logical volume by using LVM, you can use the procedure described in 3.10 Settings for LVM2 only when all of the conditions below are satisfied. Migration is not affected even when a logical volume or file system has been created. A physical volume is created for only one of the logical device files on any one path for each SCSI device to be managed by HDLM.
3. Creating an HDLM Environment Figure 3-4: Result of Executing vgdisplay -v (When There Is One Physical Volume) Check the shaded portion and confirm that vg02 consists of /dev/sde.
3. Creating an HDLM Environment Figure 3-5: Result of Executing vgdisplay -v (When There Are Two Physical Volumes) Check the shaded portion and confirm that vg02 consists of /dev/sde and /dev/ sdu, both of which have been defined for the same device to be managed by HDLM. (3) Setting in the syslogd Settings File The log upon executing the installation is output to syslog.
3. Creating an HDLM Environment Figure 3-6: Example of the Contents of the syslogd Settings File (In Red Hat Enterprise Linux) When you collect audit log data, we recommend that you use any of the extended facilities (local0 to local7) as the exclusive output destination for the data. We also recommend that you specify info as the severity level for the extended facility. This example shows how to specify the recommended settings in the /etc/syslog.conf file: local0.
3. Creating an HDLM Environment 1. Log on to Linux as the root user. 2. Prepare the license key. Use either of the following methods to store the license key file in the specified directories: • Store the license key file (*.plk) in the /var/tmp directory, under the name hdlm_license. /var/tmp/hdlm_license • Execute the following commands to create the license key file (dlm.lic_key) in the /etc/opt/DynamicLinkManager directory.
3. Creating an HDLM Environment Distribution SUSE LINUX Enterprise Server 9 Mount point • For a CD-ROM /media/cdrom • For a CD-R or CD-RW /media/cdrecorder • For a DVD-ROM /media/dvd • For a DVD-RW /media/dvdrecorder • For a DVD-RAM /media/dvdram SUSE LINUX Enterprise Server 10 SUSE LINUX Enterprise Server 11 /media/cdrom If the DVD-ROM is automatically mounted: /media/media-volume-id# Note 1 HDLM cannot be installed if the DVD-ROM is mounted to a mount point other than the above.
3. Creating an HDLM Environment • When executing installux.sh # /media/cdrom/installux.sh -v • When executing the installhdlm utility # /media/cdrom/HDLM_Linux/installhdlm -v A command execution example is described below. x.x.x-xx is the version of HDLM. KAPL09177-I HDLM version: x.x.x-xx 5. Perform the installation. Execute installux.sh or the installhdlm utility stored on the HDLM DVD-ROM to start installation.
3. Creating an HDLM Environment # rpm -qi HDLM Name : HDLM Version : x.x.x.x.xxx Release : xx : If HDLM Version is x.x.x.x.xxx, the installed version of HDLM is correct. x.x.x.x.xxx indicates the HDLM version that was installed. 8. If IP-SAN is used for the connection between the host and the storage system, change iscsi_boot=n, written in the /etc/opt/DynamicLinkManager/ hdlm.conf file, to iscsi_boot=y. 9. If you want to set the HDLM driver options, run the dlmsetopt utility.
3. Creating an HDLM Environment A path will be established in the HDLM device and the HDLM manager will start. 14. If you have edited the /etc/fstab file as described in (1) Operations Required for Devices to Be Managed by HDLM in 3.6.1 Preparations for a New Installation of HDLM, add the line show below to change the setting from a SCSI device specification to an HDLM device specification. The Linux functionality that adds LABEL= to a SCSI device is not supported in HDLM. Do not use this functionality.
3. Creating an HDLM Environment For details on operating environments for the virtual environments supported by HDLM, see 3.1.13 Virtual Environments Supported by HDLM. For details on how to set up a virtual environment, see 3.11 Settings for Xen or 3.12 Settings for KVM. 19. Specify the settings required for operations in a cluster configuration. For a cluster configuration, change the logical device file names of SCSI devices specified in the cluster to logical device file names of HDLM devices.
3. Creating an HDLM Environment 21. Check that the correct version of HDLM is installed. If HDLM version x.x.x-xx is displayed, the installed HDLM version is correct. x.x.x-xx is the version of the installed HDLM. 22. Check that the programs are running properly. If HDLM Manager, HDLM Alert Driver, and HDLM Driver are all Alive, all programs are running correctly. If the programs are not running properly, see 5.4 What To Do for a Program Error, and then take actions.
3. Creating an HDLM Environment 2. Execute the following command to make sure that the md devices have been deactivated. In the following example, RAID1 (mirroring) is used: # cat /proc/mdstat Personalities : [raid1] unused devices: Make sure that mdx : active is not displayed. (3) Deactivating the Volume Group If you are using a logical volume on an HDLM device, you must deactivate the volume group before re-installing or upgrading HDLM. 1. Unmount the logical volume on the HDLM device.
3. Creating an HDLM Environment 2. Prepare the license key. Store the license key file (*.plk) in the /var/tmp directory, under the name hdlm_license. /var/tmp/hdlm_license Notes on the license key for a re-installation: When a permanent license key has been entered, you do not need to create the license key file. When a temporary or emergency license key has been entered, the expiration date for the key is displayed.
3.
3. Creating an HDLM Environment # 4. Check the version of HDLM. Execute installux.sh or the HDLM installation utility (installhdlm) stored on the HDLM DVD-ROM to check the version of HDLM that will be installed. The following example shows how to execute the command when the mount point for the DVD-ROM is /media/cdrom: • When executing installux.sh # /media/cdrom/installux.
3. Creating an HDLM Environment 6. The KAPL09093-I message is displayed to confirm that you want to perform an upgrade installation. Check the HDLM version, and if it is correct, enter y. 7. Make sure that HDLM is installed. Execute the following command to display detailed information about the installed package. # rpm -qi HDLM Name : HDLM Version : x.x.x.x.xxx Release : xx : If HDLM Version is x.x.x.x.xxx, the installed version of HDLM is correct. x.x.x.x.
3. Creating an HDLM Environment 12. Restart the host. Execute the following command to restart the host: # shutdown -r now A path will be established in the HDLM device and the HDLM manager will start. 13. If you have edited the /etc/fstab file as described in (1) Operations Required for Devices to Be Managed by HDLM in 3.6.1 Preparations for a New Installation of HDLM, add the line show below to change the setting from a SCSI device specification to an HDLM device specification.
3. Creating an HDLM Environment Personalities : [raid1] md0 : active raid1 sddlmaa1[0] sddlmab1[1] 5238528 blocks [2/2] [UU] unused devices: Make sure that md0 : active is displayed and that the HDLM devices are displayed. 17. Specify the settings required for using the volume management software. If you performed the operations described in (3) Deactivating the Volume Group in 3.6.
3. Creating an HDLM Environment HDLM, see 3.1.13 Virtual Environments Supported by HDLM. For details on how to set up a virtual environment, see 3.11 Settings for Xen or 3.12 Settings for KVM. 21. Specify the settings required for operations in a cluster configuration. For a cluster configuration, change the logical device file names of SCSI devices specified in the cluster to logical device file names of HDLM devices. For details on setting the cluster software, see 3.13 Settings for Heartbeat, 3.
3. Creating an HDLM Environment The following shows an example of command execution when the mount point is /media/cdrom: # mount /dev/cdrom /media/cdrom For details about the fixed mount point for each distribution, see Table 3-51: Mount Point for Each Distribution.
3. Creating an HDLM Environment This refers to the volume name for the CD-ROM or other media, formatted for ISO-9660 file systems. Use the volname command to check media-volume-id. The following shows an execution example for when media-volume-id is VOL01234. # volname /dev/cdrom VOL01234 # 4. Check the version of HDLM. Execute installux.sh or the HDLM installation utility (installhdlm) stored on the HDLM DVD-ROM to check the version of HDLM that will be installed.
3. Creating an HDLM Environment # /media/cdrom/installux.sh • When executing the installhdlm utility # /media/cdrom/HDLM_Linux/installhdlm 6. The KAPL09093-I message is displayed to confirm that you want to perform an upgrade installation. Check the HDLM version, and if it is correct, enter y. 7. Make sure that HDLM is installed. Execute the following command to display detailed information about the installed package. # rpm -qi HDLM Name : HDLM Version : x.x.x.x.
3. Creating an HDLM Environment settings file for the root user. This makes executing the HDLM commands and HDLM utilities easier. When the BourneAgain shell or Korn shell is used: PATH=$PATH:/opt/DynamicLinkManager/bin ; export PATH When the C shell is used: set path= ( $path /opt/DynamicLinkManager/bin ) If the PATH environment variable is not set, specify an absolute path to execute commands and utilities. If you have performed steps 11, go to step 14. 13. Restart the host.
3. Creating an HDLM Environment For details on setting up LUKS, see 3.8 Settings for LUKS. 16. If md devices are used, execute the following command to activate them: # mdadm -A -scan mdadm: /dev/md0 has been started with 2 drives. 17. If md devices are used, execute the following command to make sure that they have been deactivated.
3. Creating an HDLM Environment 20. Mount the logical volume that was moved. In the following example, the logical volume is /dev/vg01/lvol1 and the command mounts the volume on /mnt/lvol1: # mount /dev/vg01/lvol1 /mnt/lvol1 21. Specify the settings required for using virtual environments. If you are using Xen, set up Xen to use HDLM devices in domainU. If you are using KVM, register HDLM devices into the hardware configuration file.
3. Creating an HDLM Environment installation. For an unattended installation, you can specify any directory to store the license key file. For details, see 7.10.3 Editing an Installation-Information Settings File. 3. Insert the DVD-ROM and mount it. If the DVD-ROM was not automatically mounted, execute the mount command to mount the DVD-ROM to the fixed mount point.
3. Creating an HDLM Environment Note 2 To copy the DVD-ROM to a directory, and then install HDLM from that directory, copy the DVD-ROM to a directory with the same name as the mount point noted above. If the file permissions or the directory structure differs, HDLM cannot be installed. # This refers to the volume name for the CD-ROM or other media, formatted for ISO-9660 file systems. Use the volname command to check media-volume-id.
3. Creating an HDLM Environment Edit the installation information settings file based on your desired settings. Specify any settings that are not specified in this file after installing HDLM, as necessary. To use the sample file, copy it from the DVD-ROM to a directory on the hard disk. Note that the sample file name can be changed to any name. The following shows an installation execution example for when the DVD-ROM mount point is /media/cdrom. # cp -p /media/cdrom/HDLM_Linux/config/ sample_installhdlm.
3. Creating an HDLM Environment Name Version Release : : HDLM : x.x.x.x.xxx : xx If HDLM Version is x.x.x.x.xxx, the installed version of HDLM is correct. x.x.x.x.xxx indicates the HDLM version that was installed. 8. If you want to set the HDLM driver options, run the dlmsetopt utility. For details on this utility, see 7.6 dlmsetopt Utility for Setting HDLM Driver Options. 9.
3. Creating an HDLM Environment Add the shaded line shown in the above figure. 11. Specify the settings required for using LUKS. Perform this step if your host OS uses LUKS. If HDLM manages a SCSI device that has been configured to use LUKS, the LUKS settings must be migrated from the SCSI device to an HDLM device. For details on setting up LUKS, see 3.8 Settings for LUKS. 12. Specify the settings required for using md devices. If you want to use md devices, create them in a multi-path environment.
3. Creating an HDLM Environment 16. Specify the settings required for using virtual environments. If you are using Xen, set up Xen to use HDLM devices in domainU. If you are using KVM, register HDLM devices into the hardware configuration file. For details on operating environments for the virtual environments supported by HDLM, see 3.1.13 Virtual Environments Supported by HDLM. For details on how to set up a virtual environment, see 3.11 Settings for Xen or 3.12 Settings for KVM. 17.
3. Creating an HDLM Environment 3.7 Installing HDLM for Managing Boot Disks This section explains the procedure for installing HDLM in an environment in which the boot disk is on a SCSI device in the storage system, and for creating an HDLM device. This section also explains the procedure for setting up an environment in which the HDLM device is the boot disk. 3.7.
3. Creating an HDLM Environment 1. Check the installation directory of the OS specified in the LABEL setting. # cat /etc/fstab LABEL=/ / ext3 LABEL=/boot /boot defaults ext3 1 1 defaults 1 2 Confirm that LABEL indicates the root directory and the /boot directory. 2. Check the correspondence between the LABEL setting and the sd device.
3. Creating an HDLM Environment In an environment where HDLM has been installed, you can use the dlmcfgmgr utility to check the correspondence between a SCSI device and a udev name. Figure 3-7: Example of Executing the dlmcfgmgr Utility with the -v and -udev Parameters Specified shows an example of executing the dlmcfgmgr utility with the -v and -udev parameters specified.
3. Creating an HDLM Environment in a single-path boot disk environment that uses a SCSI device. 3.7.2 Overview of the Procedure for Installing HDLM in a Boot Disk Environment This subsection provides an overview of the procedure for installing HDLM in a boot disk environment. (1) Settings for Using an HDLM Device as a Boot Disk 1. Check whether LABEL is used. If it is, remove it.
3. Creating an HDLM Environment After completing the above procedure, you can perform an upgrade installation of HDLM in a boot disk environment that uses a SCSI device. (3) Settings for Using a Logical Volume (LVM2) on an HDLM Device as a Boot Disk To migrate a single-path boot disk environment that uses a logical volume (LVM2) on a SCSI device to a multi-path boot disk environment that uses a logical volume on an HDLM device (for details, see 3.7.
3. Creating an HDLM Environment 3. Change the definition such that the HDLM device can be used as a boot disk. Restore the configuration file to its state before the upgrade installation was performed. See steps 21 to 37 in 3.7.6 Upgrade Installation in an Environment Where a Logical Volume (LVM2) on an HDLM Device Is Used as a Boot Disk.
3. Creating an HDLM Environment : image = vmlinuz-2.6.16.60-0.54.5-default label = 51 append = "splash=silent multipath=off" description = Linux initrd = initrd-2.6.16.60-0.54.5-default root = /dev/disk/by-id/ scsi-35001862001472c70-part12 multipath=off is set in the underlined section. • When GRUB is used as the boot loader with Xen kernels: For details on Xen kernels, see Table 3-47: Xen Hypervisor Operating Environments Supported by HDLM. : : title XEN root (hd0,0) kernel /xen-pae.gz module /vmlinuz-2.
3. Creating an HDLM Environment root (hd0,0) kernel /vmlinuz-2.6.16.60-0.54.5-smp root=/dev/VG/ root vga=0x31a \ resume=/dev/VG/swap splash=silent showopts multipath=off initrd /initrd-2.6.16.60-0.54.5-smp multipath=off is set in the underlined section. 3. Check the definition in the /etc/fstab file. Check whether LABEL is used in the /etc/fstab file. If the file contains LABEL=xxxxx, LABEL is being used.
3. Creating an HDLM Environment : : title Red Hat Enterprise Linux (2.6.18-194.el5) root (hd0,0) kernel /vmlinuz-2.6.18-194.el5 ro root=LABEL=/ initrd /initrd-2.6.18-194.el5 LABEL is set in the underlined section. • When LILO or ELILO is used as the boot loader: : : image=/boot/vmlinuz-2.6.18-194.el5 label=linux initrd=/boot/initrd-2.6.18-194.el5 read-only append="root=LABEL=/" LABEL is set in the underlined section.
3. Creating an HDLM Environment : : title XEN root (hd0,1) kernel /boot/xen.gz module /boot/vmlinuz-2.6.16.60-0.21-xen root=/dev/disk/ by-id/scsi-1HITACHI_D60H03750027-part2 vga=0x31a resume=/ dev/sda1 splash=silent showopts module /boot/initrd-2.6.16.60-0.21-xen If LABEL or the device name (udev name) was not used in step 3 and step 4, proceed to step 17 and install a new instance of HDLM.
3. Creating an HDLM Environment # udevadm info --query name -n /dev/disk/by-uuid/ 55574d05-07dc-4c94-a585-5599c284d79b sda2 The sda2 value output is the SCSI device name corresponding to 55574d05-07dc-4c94-a585-5599c284d79b. • For SUSE LINUX Enterprise Server 10 or SUSE LINUX Enterprise Server 11 Execute the udevinfo command. Specify the device name (udev name) in the /dev/disk directory for -n.
3. Creating an HDLM Environment contained in the boot loader configuration file. The following shows an example configuration. Note that option in the example represents an option that can be specified to suit the user environment. • When GRUB is used as the boot loader with Xen kernels: For details on Xen kernels, see Table 3-47: Xen Hypervisor Operating Environments Supported by HDLM. : : title XEN root (hd0,1) kernel /boot/xen.gz module /boot/vmlinuz-2.6.16.60-0.
3. Creating an HDLM Environment append="option root=LABEL=/ option" 12. Change the name of the configuration contained in the boot loader configuration file. Change the name of the configuration that you copied in step 11. You can assign any name that indicates that the configuration is used for specifying the SCSI device. • When GRUB is used as the boot loader: Change the underlined text as follows: Before: title Red Hat Enterprise Linux (2.6.18-194.el5) After: title sd-Red Hat Enterprise Linux (2.6.
3. Creating an HDLM Environment Change the default number so that a boot can be performed using the configuration copied in step 11. default=2 • When LILO or ELILO is used as the boot loader: Specify label for default. default linux-sd 15. If LILO is used as the boot loader, execute the /sbin/lilo command to have the new settings take effect. 16. Restart the host to make sure that booting from the SCSI device is possible. 17. Install HDLM. To install HDLM, see 3.6.
3.
3. Creating an HDLM Environment Change the underlined text as follows: Before: label=linux-sd After: label=linux-HDLM 25. Delete the root specification contained in the boot loader configuration file. Delete the root specification in the configuration that you copied in step 23. If you are using a Xen kernel, delete the root device specification in module. For details on Xen kernels, see Table 3-47: Xen Hypervisor Operating Environments Supported by HDLM. 26.
3. Creating an HDLM Environment 29. If LILO is used as the boot loader, execute the /sbin/lilo command to have the new settings take effect. 30. Shut down the host. Execute the following command to shut down the host: # shutdown -h now 31. Change the configuration from a single-path configuration to a multi-path configuration. 32. Start the host. 33. Execute the mount command to check that the HDLM device is mounted.
3. Creating an HDLM Environment The name of the boot loader configuration file used in these procedures differs depending on the boot loader and OS. The names of the boot loader configuration files are listed in Table 3-54: Names of Boot Loader Configuration Files. Table 3-54: Names of Boot Loader Configuration Files Boot loader GRUB Configuration file name For Red Hat Enterprise Linux /etc/grub.conf For SUSE LINUX Enterprise Server 10 or SUSE LINUX Enterprise Server 11 /boot/grub/menu.
3. Creating an HDLM Environment parameter specified to check the correspondence between the HDLM device and the SCSI device. # dlmcfgmgr -v HDevName Management Device Host Channel Target Lun /dev/sddlmaa configured /dev/sda 0 0 0 0 KAPL10302-I /sbin/dlmcfgmgr completed normally. The HDevName column indicates the HDLM device, and the Device column indicates SCSI device. 4. Edit the /etc/fstab file.
3. Creating an HDLM Environment root (hd0,1) kernel /boot/xen.gz module /boot/vmlinuz-2.6.16.60-0.21-xen vga=0x31a splash=silent showopts module /boot/initrd-2.6.16.60-0.21-xen.hdlm • When GRUB is used as the boot loader with non-Xen kernels: For details on kernels supported by HDLM, see 3.1.1 Hosts and OSs Supported by HDLM. : : title Red Hat Enterprise Linux (2.6.18-194.el5) root (hd0,0) kernel /vmlinuz-2.6.18-194.el5 ro option ramdisk_size=18958 option initrd /initrd-hdlm-2.6.18-194.el5.
3. Creating an HDLM Environment After: title sd-Red Hat Enterprise Linux (2.6.18-194.el5) • When LILO or ELILO is used as the boot loader: Change the underlined text as follows: Before: label=HDLM_194.EL After: label=sd-HDLM_194.EL 7. Specify the SCSI device you checked in step 3 for root in the boot loader configuration file. Change the specification for root contained in the configuration that you copied in step 5. • When GRUB is used as the boot loader: Add root=SCSI-device to the kernel line.
3. Creating an HDLM Environment • When GRUB is the boot loader Change the default number so that a boot can be performed using the configuration copied in step 5. default=2 • When LILO or ELILO is used as the boot loader: Specify label for default. default sd-HDLM_194.EL 10. If LILO is being used as the boot loader, execute the /sbin/lilo command to have the changes take effect. 11. Shut down the host. Execute the following command to shut down the host: # shutdown -h now 12.
3. Creating an HDLM Environment 16. Perform an upgrade installation of HDLM. To perform an upgrade installation of HDLM, see 3.6.5 Performing an Upgrade Installation of HDLM, perform steps 2 to 12 to create an HDLM device. You will also need to perform step 13 if you are only restarting the host. Note that the procedure differs depending on whether the host is restarted after installation. 17.
3. Creating an HDLM Environment title HDLM-Red Hat Enterprise Linux (2.6.18-194.el5) • When LILO or ELILO is used as the boot loader: Change the underlined text as follows: Before: label=sd-HDLM_194.EL After: label=HDLM-HDLM_194.EL 22. Specify the initial RAM disk image file created in step 18 for initrd contained in the boot loader configuration file. Change the initrd specification in the configuration that you copied in step 20.
3. Creating an HDLM Environment • When GRUB is used as the boot loader: Root directory (/), /boot, /tmp, /usr, /var, swap • When LILO is used as the boot loader: Root directory (/), /tmp, /usr, /var, swap Comment out the existing SCSI device specification by placing a hash mark (#) at the beginning of each line, and then add the HDLM device specification as shown below, based on the correspondence between the SCSI device and the HDLM device as checked in step 17.
3. Creating an HDLM Environment /dev/sddlmaa6 on /usr type ext2 (rw) none on /dev/shm type tmpfs (rw) Check the underlined section. 30. If Red Hat Enterprise Linux, SUSE LINUX Enterprise Server 10, or SUSE LINUX Enterprise Server 11 is used, make sure that the HDLM device is allocated to the swap partition. Make sure that the HDLM device name is displayed in the Filename column of the /proc/swaps file. 3.7.
3. Creating an HDLM Environment append = "splash=silent multipath=off" description = Linux initrd = initrd-2.6.16.60-0.54.5-default root = /dev/disk/by-id/ scsi-35001862001472c70-part12 multipath=off is set in the underlined section. • When GRUB is used as the boot loader with Xen kernels: For details on Xen kernels, see Table 3-47: Xen Hypervisor Operating Environments Supported by HDLM. : : title XEN root (hd0,0) kernel /xen-pae.gz module /vmlinuz-2.6.16.60-0.54.
3. Creating an HDLM Environment multipath=off initrd /initrd-2.6.16.60-0.54.5-smp multipath=off is set in the underlined section. 3. Check whether the definition in the /etc/fstab file contains LABEL. Check the contents of the /etc/fstab file. Figure 3-8: Example Content of /etc/fstab file When using LVM2 shows example content of /etc/fstab file. Figure 3-8: Example Content of /etc/fstab file When using LVM2 LABEL is set in the shaded portion.
3. Creating an HDLM Environment Figure 3-9: Example of Executing the mount Command The shaded portion indicates the SCSI device for which LABEL is set. This example assumes that IA32 uses GRUB as the boot loader. When you use IPF that uses ELILO as the boot loader, the mount point is displayed as /boot/efi instead of /boot (in the line where /boot is coded), and the file system type is displayed as vfat instead of ext3.
3. Creating an HDLM Environment # udevadm info --query name -n /dev/disk/by-uuid/ 55574d05-07dc-4c94-a585-5599c284d79b sda1 The sda1 value output is the SCSI device name corresponding to 55574d05-07dc-4c94-a585-5599c284d79b. • For SUSE LINUX Enterprise Server 10 or SUSE LINUX Enterprise Server 11 Execute the udevinfo command. Specify the device name (udev name) in the /dev/disk directory for -n.
3. Creating an HDLM Environment that uses ELILO as the boot loader, the mount point is displayed as /boot/efi instead of /boot (in the line where /boot is coded), and the file system type is displayed as vfat instead of ext3. 7. If necessary, back up the /etc/fstab file. 8. Edit the /etc/fstab file. Refer to the correspondence between LABEL and the SCSI device that you checked in step 4. Copy the registration of the LABEL specification. Comment out the existing settings.
3. Creating an HDLM Environment Figure 3-11: Example of Editing /etc/lvm/lvm.conf file Comment out the existing filter and types lines, and add the shaded lines in the figure. Set 0 in md_component_detection. Record the original md_component_detection value, because it is necessary for uninstallation or upgrade installation of HDLM. 13. Execute the dlmmkinitrd utility for supporting a boot disk to create an initial RAM disk image file for HDLM.
3. Creating an HDLM Environment KAPL12329-I The utility for supporting the boot disk started. KAPL12344-I A compressed initial ramdisk image /boot/ initrd-hdlm-2.6.9-11.EL.gz was created. KAPL12330-I The utility for supporting the boot disk completed. Example of Executing the dlmmkinitrd utility when IPF (with ELILO as the boot loader) is used # /opt/DynamicLinkManager/bin/dlmmkinitrd /boot/efi/efi/ redhat/initrd-hdlm-2.6.9-11.EL.gz `uname -r` KAPL12329-I The utility for supporting the boot disk started.
3. Creating an HDLM Environment /dev/sddlmaa1 /boot : : ext3 defaults 1 2 This example assumes that IA32 uses GRUB as the boot loader. When you use IPF that uses ELILO as the boot loader, the mount point is displayed as /boot/efi instead of /boot in the line where /boot is coded, and the file system type is displayed as vfat instead of ext3. 16. Edit the boot loader configuration file so that the OS will start with HDLM specified.
3. Creating an HDLM Environment Figure 3-13: Example of Editing /boot/grub/menu.lst file (When using a kernel that supports Xen) Edit the shaded portion. Figure 3-14: Example of Editing /etc/elilo.conf file Edit the shaded portion. 17. If necessary, back up the file. 18. Copy the configuration that was used for startup from the SCSI device.
3. Creating an HDLM Environment 19. Assign a name to the copied configuration that indicates that the configuration is used for specifying the HDLM device. • If you will use GRUB as the boot loader Change title. • If you will use ELILO as the boot loader Change label. 20. Delete the root specification. If you are using a kernel that supports Xen, delete the root device specification in module. 21. In initrd, specify the initial RAM disk image file you created in step 13.
3. Creating an HDLM Environment # vgscan Reading all physical volumes. This may take a while... Found volume group "VolGroup00" using metadata type lvm2 27. Check the relationship between the volume group and HDLM devices. Execute the following command to make sure that the physical volumes that make up the volume group are HDLM devices.
3. Creating an HDLM Environment 3.7.
3. Creating an HDLM Environment device. Note that if settings are incorrect, the OS might not start. In this subsection, the procedure assumes that you are using GRUB or ELILO as the default boot loader in Red Hat Enterprise Linux, SUSE LINUX Enterprise Server 10, or SUSE LINUX Enterprise Server 11. To perform an upgrade installation of HDLM in a multi-path boot disk environment that uses a logical volume (LVM2) on an HDLM device: 1. Log in to Linux as a user with root permissions. 2.
3. Creating an HDLM Environment /dev/sda1 5. /boot : : ext3 defaults 1 2 Update the information about the volume group. Execute the following command to update the information about the volume group. # vgscan Reading all physical volumes. This may take a while... Found volume group "VolGroup00" using metadata type lvm2 6. Check the relationship between the volume group and HDLM devices.
3. Creating an HDLM Environment 7. Edit the /etc/lvm/lvm.conf file so that the LVM2 recognizes the SCSI device, not the HDLM device. Figure 3-15: Example of Editing /etc/lvm/lvm.conf file shows an example of editing the /etc/lvm/lvm.conf file.
3. Creating an HDLM Environment Figure 3-15: Example of Editing /etc/lvm/lvm.conf file Comment out the existing filter and types lines, and add the shaded lines in the figure. In addition, set md_component_detection to its original value before installation. 8. Edit the boot loader configuration file so that the OS will start with a SCSI device specified. Edit the boot loader configuration file as shown in Figure 3-16: Example of Editing /etc/grub.
3. Creating an HDLM Environment Figure 3-16: Example of Editing /etc/grub.conf file Edit the shaded portion. Figure 3-17: Example of Editing /boot/grub/menu.lst file (When using a kernel that supports Xen) Edit the shaded portion.
3. Creating an HDLM Environment Figure 3-18: Example of Editing /etc/elilo.conf file Edit the shaded portion. 9. Copy the configuration that was used for startup from the HDLM device. 10. Assign a name to the copied configuration. You can assign any name that indicates that the configuration is used for specifying the SCSI device. • If you will use GRUB as the boot loader Change title. • If you will use ELILO as the boot loader Change label. 11.
3. Creating an HDLM Environment 13. Specify the configuration that will be used for booting. • When GRUB is the boot loader Specify the position of the valid title for default. • When ELILO is the boot loader Specify label for default. 14. Shut down the host. Execute the following command to shut down the host: # shutdown -h now 15. Change the configuration from a multi-path configuration to a single-path configuration. 16. Start the host. 17.
3. Creating an HDLM Environment 20. Perform an upgrade installation of HDLM. To perform an upgrade installation of HDLM, see 3.6.5 Performing an Upgrade Installation of HDLM, perform steps 2 to 12 to create an HDLM device. You will also need to perform step 13 if you are only restarting the host.
3. Creating an HDLM Environment procedure differs depending on whether the host is restarted after installation. 21. Execute the dlmcfgmgr utility with the -v parameter specified to check the correspondence between the HDLM device and the SCSI device. # dlmcfgmgr -v HDevName Management Device Host Channel Target Lun /dev/sddlmaa configured /dev/sda 0 0 0 0 KAPL10302-I /sbin/dlmcfgmgr completed normally. The HDevName column indicates the HDLM device, and the Device column indicates the SCSI device. 22.
3. Creating an HDLM Environment for uninstallation or upgrade installation of HDLM. 23. Execute the dlmmkinitrd utility for supporting a boot disk to create an initial RAM disk image file for HDLM If the initial RAM disk image file to be created already exists and you are using Red Hat Enterprise Linux, specify the -f parameter to overwrite this file. If you are using SUSE LINUX Enterprise Server 10 or SUSE LINUX Enterprise Server 11, this file is overwritten even if you do not specify the parameter.
3. Creating an HDLM Environment initrd-2.6.16.46-0.14-default.hdlm was created. KAPL12330-I The utility for supporting the boot disk completed. 24. When you create a new initial RAM disk image file rather than overwriting the existing one, delete the existing initial RAM disk image file that is no longer required. Execute the following command: • Execution example of the command when GRUB as the boot loader is used # rm /boot/initrd-hdlm-2.6.9-11.EL.
3. Creating an HDLM Environment Server 11, check the /boot/grub/menu.lst file instead of the /etc/ grub.conf file. The detailed procedure is explained in steps 27 to 31. Figure 3-20: Example of Editing /etc/grub.conf file, Figure 3-21: Example of Editing /boot/grub/menu.lst file (When using a kernel that supports Xen), and Figure 3-22: Example of Editing /etc/elilo.conf file show examples of editing the configuration file. Figure 3-20: Example of Editing /etc/grub.conf file Edit the shaded portion.
3. Creating an HDLM Environment Figure 3-21: Example of Editing /boot/grub/menu.lst file (When using a kernel that supports Xen) Edit the shaded portion.
3. Creating an HDLM Environment Figure 3-22: Example of Editing /etc/elilo.conf file Edit the shaded portion. 27. Copy the configuration that was used for startup from the HDLM device. 28. Assign a name to the copied configuration that indicates that the configuration is used for specifying the HDLM device after update. • If you will use GRUB as the boot loader Change title. • If you will use ELILO as the boot loader Change label. 29. Delete the root specification.
3. Creating an HDLM Environment 30. In initrd, specify the initial RAM disk image file you created in step 23. If you are using a kernel that supports Xen, change the initrd file name specified in module to the initial RAM disk image file you created in step 23. When an option that depends on the user environment is specified, be careful not to delete the option. 31. Specify the configuration that will be used for booting. • When GRUB is the boot loader Specify the position of the valid title for default.
3. Creating an HDLM Environment Found volume group "VolGroup00" using metadata type lvm2 37. Check the relationship between the volume group and HDLM devices. Execute the following command to make sure that the physical volumes that make up the volume group are HDLM devices.
3. Creating an HDLM Environment 3.7.7 Countermeasures for Unsuccessful Startup of the OS from an HDLM Device This subsection explains what actions you should take if the OS cannot be started from an HDLM device.
3. Creating an HDLM Environment An error message appears and the OS stops. A prompt for a password for starting maintenance appears, and the OS stops. The following explains the action to be taken for each case. (1) When an Error Message Appears and the OS Stops The probable causes of this error are as follows: Cause 1 The initial RAM disk image file was specified incorrectly in the boot loader configuration. Cause 2 The initial RAM disk image file is corrupted.
3. Creating an HDLM Environment etc/elilo.conf file, or /boot/grub/menu.lst file to make sure that the initial RAM disk image file and ramdisk_size are specified correctly. Modify any incorrect specification. If startup from the HDLM device still fails after you correctly specify the initial RAM disk image file and ramdisk_size, the initial RAM disk image file might be corrupted. Execute the boot disk support utility to re-create the initial RAM disk image file. 4.
3. Creating an HDLM Environment 3.8 Settings for LUKS This section explains the procedures that the user must perform when using LUKS. 3.8.1 Notes on Using LUKS The followings are notes on using LUKS: • HDLM supports LUKS on the following OSs: • Red Hat Enterprise Linux 5.3 • Red Hat Enterprise Linux 5.3 Advanced Platform. • Red Hat Enterprise Linux 5.4 • Red Hat Enterprise Linux 5.4 Advanced Platform. • Red Hat Enterprise Linux 5.5 • Red Hat Enterprise Linux 5.5 Advanced Platform.
3. Creating an HDLM Environment # dlmcfgmgr -v HDevName Management Device Host Channel Target Lun /dev/sddlmaa configured /dev/sdh 1 0 0 0 /dev/sddlmab configured /dev/sdj 1 0 0 1 : : KAPL10302-I /sbin/dlmcfgmgr completed normally. # HDLM devices are listed in the HDevName column, and SCSI devices are listed in the Device column. 2. Check the /etc/crypttab file's second field.
3. Creating an HDLM Environment Before: luks-volume1 UUID="050f9901-3ab8-4556-a091-9c6e4a404f09" /etc/ cryptpassword1 After: luks-volume1 /dev/sddlmaa /etc/cryptpassword1 4. Unmap the SCSI device from the device used by the device mapper. The following shows an example of unmapping the SCSI device from the /dev/ mapper/luks-volume1 device. # cryptsetup luksClose luks-volume1 # 5. Map the device used by device mapper to the HDLM device.
3. Creating an HDLM Environment 3.9 Settings for md Devices This section explains the procedures that the user must perform when using md devices. 3.9.1 Notes on Setting Up md Devices The following are notes on using md devices: • Because HDLM is multi-path software, it cannot be used with the MULTIPATH function for md devices. • If you are using the MULTIPATH function for md devices before you install HDLM, change it to the LINEAR function after installing HDLM.
3. Creating an HDLM Environment Figure 3-23: Example of Incorrectly Configured md Devices If you want to manage md devices by using HDLM, migrate the md devices that are made up of SCSI devices to the md devices that are made up of HDLM devices. Figure 3-24: Example of Correctly Configured md Devices shows an example when this migration is performed. Figure 3-24: Example of Correctly Configured md Devices 3.9.
3. Creating an HDLM Environment During this procedure, /dev/md0 is created on /dev/sddlmaa1 and /dev/ sddlmab1. Use the following procedure to configure the environment shown in Figure 3-25: Device Configuration When Creating an md Device on an HDLM Device. Figure 3-25: Device Configuration When Creating an md Device on an HDLM Device To create an md device: 1. Create a disk partition. Specify the disk partition type 83 when you create a disk partition.
3. Creating an HDLM Environment Selected partition 1 Hex code (type L to list codes): 83 Command (m for help): p Disk /dev/sddlmaa: 5368 MB, 5368709120 bytes 166 heads, 62 sectors/track, 1018 cylinders Units = cylinders of 10292 * 512 = 5269504 bytes Device Boot Start /dev/sddlmaa1 1 End 1018 Blocks 5238597 Id System 83 Linux Command (m for help): w The partition table has been altered! Calling ioctl() to re-read partition table. Syncing disks. Also perform the above operation for /dev/sddlmab. 2.
3. Creating an HDLM Environment If the configuration file /etc/mdadm.conf has already been created, execute the following command to create a backup: # cp -pr /etc/mdadm.conf /etc/mdadm.conf.backup 5. Execute the following command to create a configuration file: # echo "DEVICE /dev/sddlmaa1 /dev/sddlmab1" >> /etc/ mdadm.conf # mdadm --detail --scan | grep -w "/dev/md0" >> /etc/ mdadm.conf For sddlmaa1 and sddlmab1, specify the HDLM devices corresponding to md0, which was displayed in step 3.
3. Creating an HDLM Environment Make sure that md0 : active and the HDLM devices are displayed. 3.9.3 Using HDLM in an md Device Environment This subsection describes how to migrate an environment where the md devices were constructed by using SCSI devices to an environment where the md devices were constructed by using HDLM-managed devices. If the MULTIPATH function is not used for md devices, perform the procedure described in (1) When the MULTIPATH Function Is Not Being Used for md Devices.
3. Creating an HDLM Environment 2. If necessary, back up the application data residing on the md device. 3. If file systems have been mounted on the md device, unmount them. 4. Check the status of the md device. Execute the following command to check the configuration of the md device: # cat /proc/mdstat Personalities : [raid1] md0 : active raid1 sdh1[0] sdi1[1] 5238528 blocks [2/2] [UU] unused devices: Make sure that md0 : active and that SCSI devices are displayed.
3. Creating an HDLM Environment For details about the contents of the configuration file, see the Linux documentation or use the man command. If you created a new configuration file, go to step 9. 7. If you have already used a configuration file (/etc/mdadm.conf), delete the unnecessary ARRAY line in that configuration file. Delete the ARRAY line that includes the same name as the md device name (md0) created in step 6. In the following example, the underlined lines are to be deleted. # cat /etc/mdadm.
3. Creating an HDLM Environment # mdadm -Ss /dev/md0 11. Make sure that the md device has been deactivated. In the following example, RAID1 (mirroring) is used for the md device: # cat /proc/mdstat Personalities : [raid1] unused devices: Make sure that md0 : active is not displayed. 12. Install HDLM. Perform steps 2 to 11 in 3.6.2 Performing a New Installation of HDLM. 13. Check the correspondence between the HDLM devices and SCSI devices.
3.
3. Creating an HDLM Environment 5238528 blocks [2/2] [UU] unused devices: Make sure that md0 : active and the HDLM devices are displayed. 18. If you need to mount the file systems on the md device, mount them. 19. Add a path to the LU. Connect a path to the corresponding LU and then restart the host, or add a path to an existing LU by performing the procedure described in (3) Adding a Path to an Existing LU in 4.6.4 Changing the HDLM Device Configuration.
3. Creating an HDLM Environment 1. Stop all applications that are using the existing md device. 2. If necessary, back up the application data residing on the md device. 3. If file systems have been mounted on the md device, unmount them. 4. Check the status of the md device.
3. Creating an HDLM Environment size=5238528K mtime=Wed Feb 6 19:17:08 2008 mdadm: /dev/sddlmaa1 appears to be part of a raid array: level=-4 devices=2 ctime=Wed Feb 6 19:16:07 2008 Continue creating array? y mdadm: array /dev/md0 started. 8. Create a configuration file. Execute the following command to add an md device definition to the existing configuration file /etc/mdadm.conf: # mdadm --detail --scan | grep -w "/dev/md0" >> /etc/ mdadm.
3. Creating an HDLM Environment ARRAY /dev/md0 level=linear num-devices=1 UUID=426a9f1c:9cfa6310:6aa9a80b:11ea2102 auto=yes 11. On the DEVICE line of the configuration file, change a SCSI device name to an HDLM device name. Based on the correspondence between the HDLM devices and SCSI devices checked in step 6, change the SCSI device names on the DEVICE line to the HDLM device names.
3. Creating an HDLM Environment 3.10 Settings for LVM2 This section describes the procedure for setting the following items in an LVM2 environment: • When using an HDLM device to create a new logical volume • When moving a logical volume created on a SCSI device in a single-path environment, to an HDLM device When using HDLM in an LVM2 environment, use the HDLM device as an LVM2 physical volume. 3.10.
3. Creating an HDLM Environment logical volume. Use the following procedure to configure the environment shown in Figure 3-28: Device configuration When Creating a Logical Volume on an HDLM Device. Figure 3-28: Device configuration When Creating a Logical Volume on an HDLM Device To create a new logical volume on an HDLM device: 1. 2. Stop all processes and services that are using the HDLM device.
3.
3. Creating an HDLM Environment When you use the parted command to change the partition, to let the system recognize the partitions on the HDLM device, execute the blockdev command after the parted command. 3. Edit the /etc/lvm/lvm.conf file.
3. Creating an HDLM Environment • Adding types entry information Add the following line: types = [ "sddlmfdrv", 16 ] Make sure that types=[ "fd", 16 ] was commented out. Figure 3-29: Example of Editing the /etc/lvm/lvm.conf File shows an example of editing the file when the OS is SUSE LINUX Enterprise Server 9. The shaded section shows the portion to be edited.
3. Creating an HDLM Environment Figure 3-29: Example of Editing the /etc/lvm/lvm.conf File 4. Create the physical volumes.
3. Creating an HDLM Environment Physical volume "/dev/sddlmad2" successfully created 5. Create a volume group. In the following example, the command creates the vg01 volume group by using the physical volumes /dev/sddlmad1 and /dev/sddlmad2: # vgcreate vg01 /dev/sddlmad1 /dev/sddlmad2 Volume group "vg01" successfully created 6. Create the logical volume.
3. Creating an HDLM Environment # mkdir /mnt/lvol1 9. Mount the logical volume. The following example shows how to mount the logical volume to the /mnt/ lvol1 directory: # mount /dev/vg01/lvol1 /mnt/lvol1 3.10.3 When Moving a Logical Volume Created on a SCSI Device in a Single-Path Environment to an HDLM Device This subsection explains the procedure for moving a logical volume created on a SCSI device in a single-path environment to an HDLM device in a multi-path environment.
3. Creating an HDLM Environment In Figure 3-30: Device Configuration When a Logical Volume on a SCSI Device Is Moved to an HDLM Device, sdn indicates the different LUs. sddlmad1 and sddlmad2 indicate the HDLM devices corresponding to each LU. To move the logical volume to an HDLM device: 1. Make sure that HDLM has been installed. Execute the rpm command to make sure that HDLM has been installed. # rpm -q HDLM HDLM-x.x.x.x.xxx-x 2. Make sure that the path is a single path.
3. Creating an HDLM Environment 7. Edit the /etc/lvm/lvm.conf file. Edit the device section in the file as shown below to disable the SCSI device configuration and enable the HDLM device configuration: • Adding and deleting filter entry information Add the following line and comment out all other filter entry information: filter = [ "a|sddlm[a-p][a-p].
3. Creating an HDLM Environment Figure 3-31: Example of Editing the /etc/lvm/lvm.conf File 8. Execute the VG scan. To re-create the volume group on the HDLM device, execute the vgscan command as shown in the following example: # vgscan Reading all physical volumes. This may take a while...
3. Creating an HDLM Environment 9. Import the volume group. In the following example, the command imports the vg01 volume group: # vgimport vg01 Volume group "vg01" successfully imported 10. Execute the pvscan command to check that the environment has been changed successfully. Execute the following command to make sure that the information about the physical volume for the target logical volume has been changed to the information about the HDLM device: # pvscan PV /dev/sddlmad1 VG vg01 lvm2 [468.
3. Creating an HDLM Environment 3.11 Settings for Xen When HDLM is installed in an environment that uses Xen, the SCSI devices corresponding to HDLM devices are accessible from a domainU environment. Therefore, you must specify the certain settings so that the SCSI devices cannot be accessed from the domainU environment directly.
3. Creating an HDLM Environment (dev sdx) (uname phy:/dev/sda) (mode w) ) ) : : If the SCSI device displayed on the uname phy line is the SCSI device that appeared in in step 1, continue to step 3. (Only a SCSI device that appears in step 1 can be migrated to an HDLM device.) 3. If domainU is running, stop it. If domainU has been set to automatically start when domain0 starts, temporarily change the setting so that domainU will not start automatically. 4.
3. Creating an HDLM Environment 3.12 Settings for KVM If you install HDLM in an environment in which KVM is used, you need to register HDLM devices into the hardware configuration file (/etc/libvirt/qemu/ domain-name.xml). For details on the hardware configuration file, see the OS documentation. To register HDLM devices by using the virsh command: 1. Execute the following command to check the domain name and operating status of the guest OS.
3. Creating an HDLM Environment After: For details on which SCSI devices correspond to which HDLM devices, see 4.3.5 Displaying Corresponding Information About an HDLM Device, SCSI Device, and LDEV. 5. Execute the following command to enable the settings in the hardware configuration file. # virsh define /etc/libvirt/qemu/domK.xml 6. Start the guest OS. For details on how to start the guest OS, see the OS documentation.
3. Creating an HDLM Environment 3.13 Settings for Heartbeat This section describes the procedure that the user must perform when HDLM is installed in an environment in which Heartbeat is used for SUSE LINUX Enterprise Server. To set up Heartbeat: 1. Stop the Heartbeat service in the cluster. If the Heartbeat service is running, stop it by executing the following command: # etc/init.d/heartbeat stop 2. Migrate the SCSI devices used by Heartbeat to HDLM devices.
3. Creating an HDLM Environment 3.14 Settings for Oracle RAC The following are notes on using Oracle RAC: When you use Oracle Cluster file System in an Oracle RAC environment, set 0 to the comm_voting parameter in the /etc/ocfs.conf file.
3. Creating an HDLM Environment Table 3-55: Formula for Calculating MISSCOUNT Storage system type • • • • • Formula for obtaining the value of MISSCOUNT Lightning 9900 series Lightning 9900V series Hitachi USP Universal Storage Platform V/VM Virtual Storage Platform number-of-paths-connected-to-the-voting-disk x 60 seconds • Hitachi AMS2000/AMS/WMS/SMS series • Thunder 9500V series number-of-paths-connected-to-the-voting-disk x 30 seconds • When using Oracle RAC 10g 10.2.0.2.
3. Creating an HDLM Environment If the Oracle command oracleasm is executed for HDLM devices, the KAPL05023-E message might be output to syslog. If the following message indicating the successful completion of the oracleasm command is output after this message, there is no problem with HDLM operation. oracleasm: succeeded If you use HDLM with Oracle RAC 10g or Oracle RAC 11g and use ASMLib of Oracle RAC 10g or Oracle RAC 11g, you must change the settings for the ASMLib configuration file.
3. Creating an HDLM Environment 3.15 Settings for the RHCM The user must execute the following procedure when HDLM is installed in an environment that uses RHCM. 3.15.1 Notes on Using RHCM The HDLM device used by the cluster service and the HDLM device used by Quorum must be the same. 3.15.2 When Using Red Hat Enterprise Linux AS4/ES4 To specify settings for RHCM: 1. Stop the service of the RHCM cluster.
3. Creating an HDLM Environment 3.15.3 When Using Red Hat Enterprise Linux 5, or Red Hat Enterprise Linux 6 To specify settings for RHCM: 1. Stop the service of the RHCM cluster. Stop the RHCM service with the following command if the service is running: # service rgmanager stop # service cman stop 2. Change the SCSI device being used by RHCM to an HDLM device. Edit as shown below if the lower SCSI device (/dev/sda) of the HDLM device (/dev/sddlmaa) is being used as /dev/raw/raw1.
3. Creating an HDLM Environment 3.16 Settings for VCS The following is the procedure that must be executed by the user when HDLM is installed in an environment that uses VCS. For details on how to operate the VCS GUI, see the VCS documentation. 1. Stop the cluster service of VCS. 2. Change the SCSI device used by VCS to an HDLM device. Change the Block Devices parameter of the Mount resource from the SCSI device to an HDLM device. 3. 268 Start the cluster service of VCS.
3. Creating an HDLM Environment 3.17 Checking the Path Configuration HDLM functions, such as load balancing and failover, are only available for HDLM management-target devices that have more than one active path. After you install HDLM or change the hardware configuration, check the structure and statuses of the paths. To check the path information, use the dlnkmgr command's view operation. The following describes how to check path information by using the dlnkmgr command's view operation.
3. Creating an HDLM Environment see whether the HDLM device corresponding to the SCSI device has been created.
3. Creating an HDLM Environment 3.18 Setting Up HDLM HDLM includes functions like the load balancing function, the automatic failback function, the error logging function, the audit logging function, etc. You can set up these functions by using the dlnkmgr command's set operation. 3.18.1 Checking the Current Settings Check the current settings by executing the following command to set the HDLM functionality by using the dlnkmgr command's view operation.
3. Creating an HDLM Environment Table 3-57: The Recommended and Default Values of Each Function Function Load-balancing Default value Recommended value on on The Extended Least I/Os algorithm is used. The recommended algorithm depends on the operating environment. on on 30-minute check interval The recommended checking interval depends on the operating environment. on 1-minute check interval The recommended checking interval depends on the operating environment.
3. Creating an HDLM Environment • rr for the Round Robin algorithm • exrr for the Extended Round Robin algorithm • lio for the Least I/Os algorithm • exlio for the Extended Least I/Os algorithm • lbk for the Least Blocks. algorithm • exlbk for the Extended Least Blocks algorithm The type of algorithm specified by the -lbtype parameter remains stored in the system, even if, you disable the load balancing function by specifying -lb off.
3. Creating an HDLM Environment If you set the number of times that the error needs to occur to 1, the above condition does not need to be satisfied. The following is an example of using a command to enable automatic failback: # /opt/DynamicLinkManager/bin/dlnkmgr set -afb on -intvl 10 To enable automatic failback, specify on. Specify off otherwise. When you specify on, you can use the -intvl parameter to specify the checking interval can be specified with the -intvl parameter when on is specified.
3. Creating an HDLM Environment monitoring, specify off. When you specify on, you can use the -intvl and -iemnum parameters to specify intermittent error conditions (the conditions used by the system to determine whether an intermittent error is occurring). In the -intvl parameter, specify the monitoring interval for an intermittent error. In the -iemnum parameter, specify the number of times that the error is to occur.
3. Creating an HDLM Environment from 1 to 64). Table 3-59: Values for the Trace Level Setting lists and describes the possible values for the trace level setting. Table 3-59: Values for the Trace Level Setting Value Description 0 No trace is output. 1 Only error information is output. 2 Program operation summaries are output. 3 Program operation details are output. 4 All information is output.
3. Creating an HDLM Environment # /opt/DynamicLinkManager/bin/dlnkmgr set -elfs 1000 Specify the size of the error log file in KB. (8) Setting the Number of Error Log Files The number of the error log files (the HDLM manager log (dlmmgrn.log (n indicates a file number from 1 to 16))) can be set. You can specify a value from 2 to 16 for the number of HDLM manager log files. By specifying both the log file size and the number of log files, you can collect up to 32000000KB (approximately 30GB) of error logs.
3. Creating an HDLM Environment message will be displayed to confirm the execution, and the trace file will be temporarily deleted. By specifying both the trace file size and the number of trace files, you can collect up to 1024000 KB of trace data. The following is an example of using a command to set the number of trace files: # /opt/DynamicLinkManager/bin/dlnkmgr set -systfn 10 Specify the number of trace files by using numbers.
3. Creating an HDLM Environment Value Explanation ca Audit log events of the ConfigurationAccess category are collected. all Audit log events of the StartStop, Authentication, and ConfigurationAccess categories are all collected. This example shows how to enable the collection of audit log data: # /opt/DynamicLinkManager/bin/dlnkmgr set -audlog on -audlv 6 -category all Specify on if you want to collect audit log data, and off if you do not want to collect audit log data.
3. Creating an HDLM Environment This example shows how to specify the audit log facility: # /opt/DynamicLinkManager/bin/dlnkmgr set -audfac local0 3.18.3 Checking the Updated Settings This chapter describes steps involved in how to check the new settings by using the dlnkmgr command's set operation after the new settings are applied. When you some these settings, you can display information about all of HDLM function settings.
3. Creating an HDLM Environment 3.19 The Process-specific-trace Information File When HDLM is used, the dlnkmgr command logs are output to the following process-specific-trace (traces for multiple processes) information files of Hitachi Network Objectplaza Trace Library (HNTRLib2): /var/opt/ DynamicLinkManager/log/dlnkmgrn.log (n indicates a file number).
3. Creating an HDLM Environment 3.20 Creating a Character-Type Device File for an HDLM Device This section describes how to create a character-type device file for an HDLM device. HDLM creates only a block-type device under /dev. If the OS is Red Hat Enterprise Linux 5 or Red Hat Enterprise Linux 6, use an udev rule file to create the character-type device file.
3. Creating an HDLM Environment Figure 3-32: Executing the raw Command In this example, the command creates /dev/raw/raw1 as a character-type device file for /dev/sddlmaa (major number of 253, minor number of 0).
3. Creating an HDLM Environment 3.21 Creating File Systems for HDLM (When Volume Management Software Is Not Used) This section describes how to build a file system in an HDLM-managed device without using volume management software. 3.21.1 Mounting a File System To mount an HDLM-managed device as a file system by specifying the logical device file name for an HDLM device: 1. Create a file system by using an HDLM device. If the file system already exists, skip to step 2.
3.
3. Creating an HDLM Environment 3.22 Settings for Automatic Mounting If you specify the name of a logical device file of an HDLM device at host startup, an HDLM-managed device is automatically mounted in the same way as if you had specified the name of a logical device file of a SCSI device. To mount an HDLM-managed device automatically, you need to edit the /etc/fstab file. In this file, you can specify the name of the logical device file of the SCSI device and the mount point of its disk.
3. Creating an HDLM Environment In the example, the name of the logical device file of the HDLM device that corresponds to /dev/sda can be identified as sddlmaa. 2. Add the name of the logical device file of the HDLM device that was confirmed in step 1 to the /etc/fstab file.
3. Creating an HDLM Environment Figure 3-35: Example of Executing the dlnkmgr Command's View Operation (With -drv Specified) In the example, the name of the logical device file of the HDLM device that corresponds to /dev/sda can be identified as sddlmaa. 2. In the /etc/fstab file, change the logical device file name for a SCSI device to that for the HDLM device that you confirmed in step 1.
3. Creating an HDLM Environment option. 3. Restart the host or manually mount the HDLM device. The HDLM-managed device is mounted using the logical device file name of the HDLM device.
3. Creating an HDLM Environment 3.23 Canceling the Settings for HDLM Return the HDLM environment to the way it was before HDLM was installed by following the procedure flow shown in Figure 3-36: Overview of HDLM Uninstallation. Figure 3-36: Overview of HDLM Uninstallation # Perform as required. 3.23.1 Operations on HDLM-Managed Devices The following procedure must be performed before uninstalling HDLM: 1. Back up all HDLM-managed devices as required (for example, using a tape backup). 2.
3. Creating an HDLM Environment If an HDLM-managed device is registered in an application (including cluster software, but excluding volume management software), cancel registration of the HDLM device. For details on how to cancel the Heartbeat settings, see 3.23.2 Canceling the Heartbeat Settings. For details on how to cancel the Oracle RAC settings, see 3.23.3 Canceling the Settings for Oracle RAC. For details on how to cancel the RHCM settings, see 3.23.4 Canceling the Settings for RHCM.
3. Creating an HDLM Environment Migrate to the SCSI devices from an environment where HDLM devices use LUKS. For details on how to cancel the LUKS settings, see 3.23.10 Canceling the LUKS Settings. 3.23.2 Canceling the Heartbeat Settings If Heartbeat is being used with SUSE LINUX Enterprise Server, the HDLM device settings must be cancelled from Heartbeat.
3. Creating an HDLM Environment company with which you have a support service contract for Oracle. • When using release 10.2.0.2.0 or later of Oracle RAC 10g, the value set in the DISKTIMEOUT parameter, must be returned to the value that was set before HDLM was installed. For details on how to set the value of the DISKTIMEOUT parameter, contact the company with which you have a support service contract for Oracle. 3.23.
3. Creating an HDLM Environment # service ccsd start # service cman start # service rgmanager start (2) When Using Red Hat Enterprise Linux 5 or When Using Red Hat Enterprise Linux 6 To cancel the settings for RHCM: 1. Stop the cluster service of RHCM. If the RHCM service is running, stop the service by executing the following command: # service rgmanager stop # service cman stop 2. Replace the HDLM device used by RHCM with a SCSI device.
3. Creating an HDLM Environment # service cman start # service rgmanager start 3.23.5 Canceling the Settings for VCS This section describes how to cancel the HDLM device settings in VCS in an environment where VCS is used. For details on how to perform operations from the VCS GUI, see the VCS documentation. To cancel the HDLM settings in an environment where VCS is used: 1. Stop the cluster service of VCS. 2. Change the HDLM device used by VCS to a SCSI device.
3. Creating an HDLM Environment In the following example, the domU configuration information is checked from the management domain: # /usr/sbin/xm list -l domU : : (device (vbd (uuid 6b393aaa-89e7-44dc-7a57-24d477dee43d) (bootable 0) (driver paravirtualised) (dev sdx) (uname phy:/dev/sddlmaa) (mode w) ) ) : : The HDLM device displayed on the uname phy line is an HDLM device that appeared in the check in step 1. 3. If domainU is running, stop it.
3. Creating an HDLM Environment If you have temporarily changed the settings so that domainU does not automatically start in step 3, restore the previous settings. 3.23.7 Canceling the KVM Settings If you are using KVM, you need to delete the HDLM device from the hardware configuration file (/etc/libvirt/qemu/domain-name.xml). For details on the hardware configuration file, see the OS documentation. To cancel the KVM settings by using the virsh command: 1.
3. Creating an HDLM Environment For details on which HDLM device correspond to which SCSI device, see 4.3.5 Displaying Corresponding Information About an HDLM Device, SCSI Device, and LDEV. 5. Execute the following command to enable the settings in the hardware configuration file. # virsh define /etc/libvirt/qemu/domK.xml 6. Start the guest OS. For details on how to start the guest OS, see the OS documentation. 3.23.
3. Creating an HDLM Environment Figure 3-37: Device Configuration When a Logical Volume on an HDLM Device Is Moved to a SCSI Device In Figure 3-37: Device Configuration When a Logical Volume on an HDLM Device Is Moved to a SCSI Device, sda1, sdb1, sdc1, and sdd1 indicate the same LU. Likewise, sda2, sdb2, sdc2, and sdd2 indicate the same LU. sddlmaa1 and sddlmaa2 indicate the HDLM devices corresponding to each LU. To move the logical volume to a SCSI device: 1.
3. Creating an HDLM Environment # vgchange -an vg01 0 logical volume(s) in volume group "vg01" now active 4. Export the volume group. In the following example, the command exports information about the vg01 volume group: # vgexport vg01 Volume group "vg01" successfully exported 5. If the LVM environment uses an HDLM device in a multi-path configuration, configure the path to an existing LU as a single path.
3. Creating an HDLM Environment enabled. Figure 3-38: Example of Editing the /etc/lvm/lvm.conf File shows an example of editing the file by adding and commenting out lines. In this example, SUSE LINUX Enterprise Server 9 is used as the OS. The shaded parts show the locations that were edited. Figure 3-38: Example of Editing the /etc/lvm/lvm.conf File 7. Execute the vgscan command.
3. Creating an HDLM Environment To re-create the volume group on the HDLM device, execute the vgscan command as shown in the following example: # vgscan Reading all physical volumes. This may take a while... Found exported volume group "vg01" using metadata type lvm2 8. Import the volume group. In the following example, the command imports the vg01 volume group: # vgimport vg01 Volume group "vg01" successfully imported 9.
3. Creating an HDLM Environment When md devices have been constructed by using SCSI devices, if you do not use the MULTIPATH function for the md devices, perform the procedure described in (1) Migrating to md Devices for which the MULTIPATH Function Is Not Used. If you want to use the MULTIPATH function for the md devices, perform the procedure described in (2) Migrating to md Devices for which the MULTIPATH Function Is Used.
3. Creating an HDLM Environment 4. If necessary, back up the application data residing on the md device. 5. If file systems have been mounted on the md device, unmount them. 6. Check the status of the md device. Execute the following command to check the configuration of the md device: # cat /proc/mdstat Personalities : [raid1] md0 : active raid1 sddlmaa1[0] sddlmab1[1] 5238528 blocks [2/2] [UU] unused devices: Make sure that md0 : active and the HDLM devices are displayed: 7.
3. Creating an HDLM Environment checked in step 9, change the HDLM device names on the DEVICE line to the SCSI device names. Before the correction: DEVICE /dev/sddlmaa1 /dev/sddlmab1 After the correction: DEVICE /dev/sdh1 /dev/sdi1 When you edit the DEVICE line, change only the device names. Do not change the partition numbers. 11. If necessary, change the disk partition type of the SCSI devices back to fd.
3. Creating an HDLM Environment Calling ioctl() to re-read partition table. Syncing disks. Also perform the above operation for /dev/sddlmab. 12. Execute the following command to activate the md device: # mdadm -As /dev/md0 mdadm: /dev/md0 has been started with 2 drives. 13. Make sure that the md device has been activated.
3. Creating an HDLM Environment Figure 3-40: Device Configuration When an md Device on an HDLM Device Is Moved to a SCSI Device (An Environment that Uses the md Device's MULTIPATH Functionality) To migrate /dev/md0: 1. Deactivate the md device. Perform steps 3 to 5 in (1) Migrating to md Devices for which the MULTIPATH Function Is Not Used. 2. Check the status of the md device.
3. Creating an HDLM Environment # cat /proc/mdstat Personalities : [linear] unused devices: Make sure that md0 : active is not displayed. 5. Check the correspondence with HDLM device. Execute the HDLM-configuration definition utility dlmcfgmgr with the -v parameter specified: # dlmcfgmgr -v HDevName Management Device Host Channel Target Lun /dev/sddlmaa configured /dev/sdh 1 0 0 0 2 0 0 1 /dev/sdo KAPL10302-I /sbin/dlmcfgmgr completed normally.
3. Creating an HDLM Environment # mdadm --detail --scan | grep -w "/dev/md0" >> /etc/ mdadm.conf The following example shows the contents of the created configuration file: The underlined part indicates the lines added in this step. # cat /etc/mdadm.
3. Creating an HDLM Environment DEVICE /dev/sddlmaa1 After the correction: DEVICE /dev/sdh1 /dev/sdo1 Specify all SCSI devices that correspond to HDLM devices. When you edit the DEVICE line, change only the device names. Do not change the partition numbers. 11. Execute the following command to deactivate the md device: # mdadm -Ss /dev/md0 12. Make sure that the md device has been deactivated.
3. Creating an HDLM Environment parameter specified to check the correspondence between the SCSI device and the HDLM device. The following shows an example of executing the dlmcfgmgr utility with the specified-v parameter: # dlmcfgmgr -v HDevName Management Device Host Channel Target Lun /dev/sddlmaa configured /dev/sdh 1 0 0 0 /dev/sddlmab configured /dev/sdj 1 0 0 1 : : KAPL10302-I /sbin/dlmcfgmgr completed normally.
3. Creating an HDLM Environment • If you uninstall HDLM, the error logs (/var/tmp/hdlminstlog/ installhdlm[01-10].log) generated during installation of HDLM are not uninstalled. Delete the /var/tmp/hdlminstlog/ installhdlm[01-10].log files as needed. For details on the installhdlm[01-10].log files, see 3.4 Knowledge Required Before You Install HDLM. • When uninstalling HDLM on a host where a Device Manager Agent 5.
3. Creating an HDLM Environment sddlmfdrv 254092 0 If a value other than 0 is displayed for Used, perform the operation described in 3.23.1 Operations on HDLM-Managed Devices, and then perform steps 2 and 3 in (1) Uninstalling HDLM so that the HDLM devices can no longer be used. 6. Execute the uninstall command. Execute the following command to uninstall HDLM: # rpm -e HDLM 7. Make sure that the uninstall processing has finished.
3. Creating an HDLM Environment 2. Make sure that the HDLM device is defined in the /etc/fstab file.
3. Creating an HDLM Environment Figure 3-41: Example of Executing the dlmcfgmgr Utility with the -v Parameter Specified Figure 3-42: Example of Executing the dlmcfgmgr Utility with the -v and -udev Parameters Specified The HDevName, Device, and Udev columns display HDLM devices, SCSI devices, and udev names, respectively. 4. Edit the /etc/fstab file. Change the mount points for the HDLM management-target devices that you checked in step 2 from the HDLM device to the SCSI device.
3. Creating an HDLM Environment to step 7. 5. Execute the following commands to check the device name: • For Red Hat Enterprise Linux 6 Execute the udevadm command. Specify the value below for the -p option. For SCSI-device-name, specify the value checked in step 3.
3. Creating an HDLM Environment pci-0000:20:01.0-scsi-0:0 :1:0-part2 disk/by-uuid/ c230c70d-1b18-4d95-b50a-31edb3bd038c In the execution result, disk/by-id/ scsi-2000c50fffecb6ae0-part2 indicates the device name (udev name) that corresponds to /dev/sda2. To specify the device name (udev name) in the /dev/disk directory instead of the SCSI device, replace the SCSI device (/dev/sda2) checked in step 3 with /dev/disk/by-id/scsi-2000c50fffecb6ae0-part2. If LVM2 is not used, go to step 7. 6.
3. Creating an HDLM Environment installation. 7. Edit the boot loader configuration file for SCSI startup. If you are using SUSE LINUX Enterprise Server 10, check the /boot/grub/ menu.lst file instead of the /etc/grub.conf file. The detailed procedure is explained in steps 8 to 11. Separate examples are provided for when the boot loader is LILO, when the boot loader is GRUB, when the boot loader is ELILO running on an IPF host, and when LVM2 is used.
3. Creating an HDLM Environment image=/boot/vmlinuz-2.6.18-194.el5 label=linux initrd=/boot/initrd-2.6.18-194.el5 read-only append="option" root=/dev/sda2 • When the boot loader is GRUB Example 1 below shows an example of editing the /etc/grub.conf file (the underlined sections). Example 2 below shows an example of editing the /boot/grub/menu.lst file when a kernel supporting Xen in SUSE LINUX Enterprise Server 10 is used (the underlined sections). Make sure that the value specified in default is correct.
3. Creating an HDLM Environment option initrd /initrd-2.6.18-194.el5 Example 2: Example of Editing /boot/grub/menu.lst file (When using a kernel that supports Xen on SUSE LINUX Enterprise Server 10) #default 0 default 1 timeout 8 gfxmenu (hd0,1)/boot/message title XEN-hdlm root (hd0,1) kernel /boot/xen.gz module /boot/vmlinuz-2.6.16.60-0.21-xen vga=0x31a splash=silent showopts module /boot/initrd-2.6.16.60-0.21-xen.hdlm title XEN-sd root (hd0,1) kernel /boot/xen.gz module /boot/vmlinuz-2.6.16.60-0.
3. Creating an HDLM Environment prompt timeout=50 #default= HDLM_2.6.18-194.el5 default= 2.6.18-194.el5-sd image=vmlinuz-2.6.18-194.el5 label=HDLM_2.6.18-194.el5 initrd=initrd-hdlm-2.6.18-194.el5.img read-only append="option ramdisk_size=18245 option" image=vmlinuz-2.6.18-194.el5 label=2.6.18-194.el5-sd initrd=initrd-2.6.18-194.el5.img read-only append="option" root=/dev/sda2 • When using LVM2 An example of editing the /etc/grub.conf file (the underlined sections) is shown below.
3. Creating an HDLM Environment kernel /vmlinuz-2.6.9-11.EL ro rhgb quiet initrd /initrd-hdlm-2.6.9-11.EL.gz title Red Hat Enterprise Linux AS (2.6.9-11.EL) root (hd1,0) kernel /vmlinuz-2.6.9-11.EL ro root=/dev/VolGroup00/ LogVol00 rhgb quiet # initrd /initrd-hdlm-2.6.9-11.EL.img initrd /initrd-2.6.9-11.EL.img 8. Copy the configuration that was used for startup from the HDLM device. 9. Assign a name to the copied configuration.
3. Creating an HDLM Environment image file for the SCSI device. When editing the file, be careful of the following: • When an option that depends on the user environment is specified: Be careful not to delete the option. • When the boot loader is LILO, or ELILO running on an IPF host, and an option that depends on the user environment is not specified: Comment out or delete append. Create the initial RAM disk image file for the SCSI device according to the mkinitrd command documentation for the OS. 12.
3. Creating an HDLM Environment Figure 3-44: Example of Executing the mount Command When the Boot Loader Is LILO or GRUB • When the boot loader is ELILO running on an IPF host Figure 3-45: Example of Executing the mount Command When the Boot Loader Is ELILO shows an example of executing the mount command. Figure 3-45: Example of Executing the mount Command When the Boot Loader Is ELILO Refer to the /proc/swaps file to make sure that the specified SCSI device name is displayed in the Filename column.
3. Creating an HDLM Environment 18. Delete the initial RAM disk image file that was created with the dlmmkinitrd utility for supporting a boot disk.
3. Creating an HDLM Environment • When an IA32 host is used: # rm /boot/initrd-hdlm-2.6.18-194.el5.gz • When an IPF host is used: # rm /boot/efi/efi/redhat/initrd-hdlm-2.6.18-194.el5.gz 19. Stop HDLM that was used in a location other than the root directory. For details on how to stop HDLM, see steps 2 to 4 in 3.23.1 Operations on HDLM-Managed Devices and (1) Uninstalling HDLM. 20. Make sure that no HDLM devices are being used.
3. Creating an HDLM Environment To uninstall HNTRLib2: 1. Log in to Linux as the root user. 2. Execute the following command to unregister the name of the bundled program products. # /opt/hitachi/HNTRLib2/etc/hntr2cancel "Hitachi Dynamic Link Manager" 3. Execute the following command. # /opt/hitachi/HNTRLib2/etc/hntr2setup The HNTRLib2 setup menu will appear. 4. From the Setup menu, select 9. HNTRLib2 will be uninstalled.
Chapter 4. HDLM Operation This chapter describes operating procedures for HDLM, including how to operate HDLM and the HDLM manager, and how to change the configuration of the operating environment. 4.1 4.2 4.3 4.4 4.5 4.
4. HDLM Operation 4.1 Notes on Using HDLM Note the following when using HDLM. 4.1.1 Notes Common to OSs The following notes are common to OSs: Do not activate the same volume group concurrently from multiple servers. When a path error exists, the period of time required to return a response to the application that made an I/O request to HDLM depends on the timeout values specified for the fibre channel switch and HBA.
4. HDLM Operation Figure 4-1: Overview of the Period Required to Respond to an Application's I/ O Request As shown in the preceding diagram, when an HDLM device has two paths (SCSI devices), the maximum period of time required to respond to the application's I/ O request is n1 + n2 seconds; where n1 indicates the timeout value specified for the path that uses SCSI device A, and n2 indicates the timeout value specified for the path that uses SCSI device B.
4. HDLM Operation fsck, the operation may not finish. In such a case, perform the operation again after restoring the path error. The name of the HDLM device file will not be displayed on the Hardware Browser of Red Hat Enterprise Linux. The Linux functionality that adds LABEL= to a SCSI device is not supported in HDLM. Do not use this functionality. With HDLM, access can constantly be made to the same LU if the name of the HDLM device file is the same.
4. HDLM Operation even while the HDLM device is in use. Before doing so, perform the following operations: 1. Unmount any devices mounted on the HDLM device. 2. Execute the dlmcfgmgr -o command to exclude the HDLM device from management. When a device is dynamically configured by using the udev function, the messages shown below might be output to the console or syslog. However, HDLM operations are not affected.
4. HDLM Operation When a device is dynamically configured by using the udev function, the messages shown below might be output to the console or syslog. However, HDLM operations are not affected. Output example: scsi_id[a01]: scsi_id: unable to access parent device of '/ block/sddlma01' For a01 in the above examples, any alphanumeric character can be output.
4. HDLM Operation JBD: barrier-based sync failed on sddlmaa1 - disabling barriers Before you update the OS SP, uninstall HDLM. After you have updated the OS SP, re-install HDLM. For details on HDLM installation and uninstallation, see 3.6 Installing HDLM and 3.23.11 Uninstalling HDLM.
4. HDLM Operation JBD: barrier-based sync failed on sddlmaa1 - disabling barriers Before you update the OS SP, uninstall HDLM. After you have updated the OS SP, re-install HDLM. For details on HDLM installation and uninstallation, see 3.6 Installing HDLM and 3.23.11 Uninstalling HDLM.
4. HDLM Operation 1. Unmount any devices mounted on the HDLM device. 2. Execute the dlmcfgmgr -o command to exclude the HDLM device from management. HDLM devices cannot be used to create an md device. If you execute the sync command on the file system that is mounted by ext3/ ReiserFS, the following message is output to syslog, but there is no problem with HDLM operations.
4. HDLM Operation • A Fibre Channel switch's zone setting is changed.
4. HDLM Operation 4.2 Updating Kernel Packages and Applying OS Update Packages When using Red Hat Enterprise Linux 5 or Red Hat Enterprise Linux 6, you can update kernel packages or apply OS update packages while HDLM is installed. Table 4-1: HDLM Installation Environments in Which Kernel Packages Can Be Updated or OS Update Packages Applied shows the HDLM installation environments in which kernel packages can be updated or OS update packages applied.
4. HDLM Operation Perform step 1 to 15 in 3.7.4 Upgrade Installation in an Environment Where an HDLM Device Is Used as a Boot Disk. 3. Update the kernel package or OS update package. 4. Execute the dlmupdatesysinit utility for updating system scripts. For details about this utility, see 7.8 dlmupdatesysinit Utility for Updating System Scripts. 5. Restart the host. 6. Specify the settings required for using an HDLM device as a boot disk. Perform step 17 to 30 in 3.7.
4. HDLM Operation 4.3 HDLM Operations Using Commands This section explains how to use the HDLM command. For details on the various command operations, see 6. Command Reference. 4.3.1 Notes on Using Commands • Execute the command as a user with root permissions. • To specify a parameter value containing one or more spaces, enclose the entire value in double quotation marks ("). 4.3.2 Viewing Path Information This section explains how to display path information by using an HDLM command.
4. HDLM Operation 1. Check the current status of the paths. To place paths online by specifying an HBA port, CHA port, or single path check the path name or PATH_ID used to manage the path. The following example shows how to execute the command: # /opt/DynamicLinkManager/bin/dlnkmgr view -path To place paths online by specifying a SCSI device name, check the SCSI device name of the path. The following shows an example of executing the command: # /opt/DynamicLinkManager/bin/dlnkmgr view -lu 2.
4. HDLM Operation port, or single path check the path name or PATH_ID used to manage the path. The following is an example of executing the command: # /opt/DynamicLinkManager/bin/dlnkmgr view -path To place a path Offline(C) by specifying a SCSI device name, check the SCSI device name of the path. The following shows an example of executing the command: # /opt/DynamicLinkManager/bin/dlnkmgr view -lu 2. To change the status of paths to Offline(C), execute the dlnkmgr command's offline operation.
4. HDLM Operation To display LU information, execute the dlnkmgr command's view operation with the -lu parameter specified.
4. HDLM Operation The following is an example of executing the dlnkmgr command's view operation: # /opt/DynamicLinkManager/bin/dlnkmgr view -drv PathID HDevName Device LDEV 000000 sddlmaa /dev/sdag 9970/9980.15001.05B7 000001 sddlmaa /dev/sdq 9970/9980.15001.05B7 000002 sddlmab /dev/sdr 9970/9980.15001.05B0 000003 sddlmac /dev/sds 9970/9980.15001.05B1 000004 sddlmad /dev/sdt 9970/9980.15001.05B2 000005 sddlmae /dev/sdu 9970/9980.15001.05B3 000006 sddlmaf /dev/sdv 9970/9980.15001.
4. HDLM Operation Operation name = clear [y/n]:y KAPL01001-I The HDLM command completed normally. Operation name = clear, completion time = yyyy/mm/dd hh:mm:ss # 3. Check to see whether the statistical information for all the paths has been initialized. The following is an example of executing the command: # /opt/DynamicLinkManager/bin/dlnkmgr view -path 4.3.7 Viewing and Setting Up the Operating Environment This section explains how to display and set up the HDLM operating environment.
4. HDLM Operation # /opt/DynamicLinkManager/bin/dlnkmgr view -sys -audlog Audit Log : off Audit Log Category : Audit Log Facility : KAPL01001-I The HDLM command completed normally. Operation name = view, completion time = yyyy/mm/dd hh:mm:ss # For details on the displayed items and their descriptions, see 6.7 view (Displays Information). (2) Setting Up the Operating Environment To set up the HDLM operating environment, execute the dlnkmgr command's set operation.
4. HDLM Operation # To check whether the settings have been applied, see (1) Viewing the Operating Environment. 4.3.8 Viewing License Information This section explains how to display license information. To display license information, execute the dlnkmgr command's view operation with the -sys and -lic parameters specified.
4. HDLM Operation # /opt/DynamicLinkManager/bin/dlnkmgr set -lic KAPL01049-I Would you like to execute the operation? Operation name = set [y/n]: y KAPL01071-I A permanent license was installed. # 4.3.10 Viewing HDLM Version Information This section explains how to display HDLM version information. To display HDLM version information, execute the dlnkmgr command's view operation with the -sys parameter specified.
4. HDLM Operation 4.3.11 Viewing HDLM Component Information This section explains how to display HDLM component information. To display HDLM component information, execute the dlnkmgr command's view operation with the -sys parameter specified. The following is an example of executing the command: # /opt/DynamicLinkManager/bin/dlnkmgr view -sys HDLM Version : x.x.
4.
4. HDLM Operation 4.4 Starting and Stopping the HDLM Manager If an error occurs in the system, such as in an HDLM program, you may need to manually stop or start HDLM to recover from the error. 4.4.1 Starting the HDLM Manager To start the HDLM manager, log in to Linux as a user with root permissions and then execute the following command. # /etc/init.d/DLMManager start Starting DLMManager: [ OK ] Lower case characters can be used for the command name (dlmmanager). # /etc/init.
4. HDLM Operation # /opt/DynamicLinkManager/bin/dlnkmgr view -sys -msrv HDLM Manager Ver WakeupTime x.x.x-xx yyyy/mm/dd hh:mm:ss Alive KAPL01001-I The HDLM command completed normally. operation name = view, completion time = yyyy/mm/dd hh:mm:ss # When the HDLM Manager column shows Alive, the HDLM manager is active. Use a script for confirmation: Execute the following command to confirm that the HDLM manager is active: # /etc/init.d/DLMManager status dlmmgr (pid 14889 14886 14884 14880) is running...
4. HDLM Operation # When the HDLM Manager column shows Dead, the HDLM manager is inactive. Use a script for confirmation: Execute the following command to confirm that the HDLM manager is inactive: # /etc/init.d/DLMManager status dlmmgr is stopped. Note If an error occurs, the execution results of the dlnkmgr command's view operation might be different from those of the DLMManager status command. In this case, see the execution results of the dlnkmgr command.
4. HDLM Operation 4.5 HDLM Resident Processes Table 4-2: HDLM resident processes lists and describes the resident processes in HDLM. To monitor these processes, use the names below. Table 4-2: HDLM resident processes Process Description .dlmmgr_exe HDLM manager process hbsa_service Hitachi Command Suite Common Agent Component# process # You only need to monitor this process when HDLM is linked to Global Link Manager.
4. HDLM Operation 4.6 Reconfiguring the HDLM Operating Environment This section describes tasks required for reconfiguring the HDLM operating environment. The tasks described in this section are required when you perform any of the following operations: • Replace hardware devices that make up a path • Add new LUs • Remove existing LUs • Add paths to or remove paths from an LU • Add devices to or remove devices from the list of devices to be managed by HDLM 4.6.
4. HDLM Operation # /sbin/lsmod | grep acpiphp acpiphp 58713 0 If the acpiphp module has been loaded, replace the HBAs as described in (2) Procedure for replacing HBAs. If the acpiphp module has not been loaded, continue to step 2. 2. Create the acpiphp.modules file. First, execute the following command: # vi /etc/sysconfig/modules/acpiphp.modules Next, edit the acpiphp.
4. HDLM Operation # /etc/sysconfig/modules/acpiphp.modules After the above command has been executed, confirm that the acpiphp module has been loaded. # /sbin/lsmod | grep acpiphp acpiphp 58713 0 (2) Procedure for replacing HBAs Before you can replace HBAs, the paths that pass through the HBAs to be replaced must be blocked. The following procedure is used for replacing HBAs. To replace HBAs: 1. Check the WWN information of the HBAs to be replaced.
4. HDLM Operation Firmware : 260803 WWPN:2400000047010270 Device:hfcldd2 [LinkUp] WWPN:2400000047010272 Device:hfcldd3 [LinkUp] The number that follows a WWPN keyword is the port WWN information of an HBA. The following steps assume that the HBAs whose WWN information is underlined above are to be replaced. 2. Execute the view operation of the dlnkmgr command (dlnkmgr view -path -hbaportwwn) to check the information about the paths that pass through the HBAs you want to replace.
4. HDLM Operation 3. Execute the offline operation of the dlnkmgr command (dlnkmgr offline -hba) to place in Offline(C) status all paths that pass through the HBA ports that you identified in step 2. For the -hba parameter, specify the host port number and the bus number by separating them with a period. The following shows an example of placing the path (host port number is 0000 and path number is 0000) in the Offline(C) status. # /opt/DynamicLinkManager/bin/dlnkmgr offline -hba 0000.
4. HDLM Operation In the above figure, new paths that have been added are indicated by shading. Although the information about the old paths (underlined information) that were placed in Offline(C) status before the HBAs were replaced remains, this information will be deleted in step 8. 7. Execute the dlmcfgmgr utility (dlmcfgmgr -v) to confirm that new SCSI devices have been added. New SCSI devices that have been added are indicated by shading in the above figure.
4. HDLM Operation information) before the HBAs were replaced remains, this information will be deleted when step 8 is performed. 8. Execute the dlmcfgmgr utility (dlmcfgmgr -u) to delete the information about the old paths and SCSI devices. In the -u parameter, specify an HDevName device for which old SCSI device information is displayed in step 9. Note that you need to execute the utility for each HDevName device that contains old SCSI device information.
4. HDLM Operation The paths existing when the HBAs were replaced remain in Offline(E) status. 2. Execute the dlmcfgmgr utility (dlmcfgmgr -v) to check the HDLM device status. Because the paths existing when HBAs were replaced are in Offline(E) status, a hyphen (-) is displayed for Device. 3. Execute the dlmcfgmgr utility (dlmcfgmgr -u) to delete the old information about paths and SCSI devices. In the -u parameter, specify an HDevName device for which a hyphen (-) is displayed for Device in step 2.
4. HDLM Operation HDevName device for which a hyphen (-) is displayed for Device. The following shows an example of the command you execute if the HDevName value is /dev/sddlmaa: # dlmcfgmgr -u /dev/sddlmaa 4. Execute the dlmcfgmgr utility (dlmcfgmgr -v) to confirm that all the lines on which a hyphen (-) was displayed for Device have been deleted. # dlmcfgmgr -v 5.
4. HDLM Operation Figure 4-2: System Configuration for Replacing a Fiber Cable (Explained in the Following Steps) To replace a fiber cable: 1. Place in Offline (C) status the path that goes through the fiber cable to be replaced (path that goes through the HBA to which the fiber cable is connected).
4. HDLM Operation Figure 4-3: When the Status of the Path That Goes Through the Fiber Cable to Be Replaced Is Offline(C) 2. Replace the fiber cable for the path that has been placed in Offline(C) status. In this example, replace the fiber cable connected to the HBA with host port number 0001. 3. Place in Online status the path that goes through the replaced fiber cable (that is, the path that goes through the HBA connected to the fiber cable).
4. HDLM Operation # /opt/DynamicLinkManager/bin/dlnkmgr view -path For details about the path information, see 6.7 view (Displays Information). 4.6.3 Replacing the Fibre Channel Switch If there are multiple online paths for a device in an LU, you can replace a desired Fibre Channel switch while running your applications by placing offline only the path that goes through the Fibre Channel switch to be replaced, and using other paths to continue accesses.
4. HDLM Operation be replaced (path that goes through the HBA to which the Fibre Channel switch is connected). For example, to place in Offline (C) status the path that goes through the HBA with host port number 0001 and bus number 0000, execute the following command: # /opt/DynamicLinkManager/bin/dlnkmgr offline -hba 0001.0000 While the path that goes through the HBA with host port number 0001 is placed Offline, the status of the path that goes through the HBA with host port number 0002 is Online.
4. HDLM Operation In this example, replace the Fibre Channel switch connected to the HBA with host port number 0001. 3. Place in Online status the path that goes through the replaced Fibre Channel switch. For example, to place in Online status the path that goes through the HBA with host port number 0001 and bus number 0000, execute the following command: # /opt/DynamicLinkManager/bin/dlnkmgr online -hba 0001.0000 4. Check the path information.
4. HDLM Operation management, HDLM places online all the normal paths to that HDLM device regardless of the previous status (such as Online(E) or Offline(C)) of the path. Do not execute the HDLM-configuration definition utility (dlmcfgmgr) with the -o, -i, or -u parameter while the LU is in use (for example, when performing I/ O or a mount).
4. HDLM Operation • A path gets disconnected. • An LU is deleted. • A fiber cable connection is changed. • A Fibre Channel switch's zone setting is changed. If you want to delete the path whose status is indicated by a hyphen (-), execute the dlmcfgmgr utility with the -u parameter specified. For details on this utility, see 7.3 dlmcfgmgr Utility for Managing the HDLM Configuration.
4.
4.
4. HDLM Operation The following is an example of executing the dlmcfgmgr utility: # /sbin/dlmcfgmgr -v (3) Adding a Path to an Existing LU To add a path to an existing LU (HDLM device): 1. Use the management program of the storage system to configure an additional path from an LU mapped with the relevant HDLM device to the relevant host. For more information on configuring an additional path, see the manual provided with the storage system. 2.
4. HDLM Operation allocations (that is, to delete the paths) to the relevant LU from ports of the storage system. For details on canceling path allocations (deleting paths), see the manual provided with the storage system. 3. If you want to delete an HDLM device that corresponds to the LU without restarting the host, perform steps 4 and 5. If you want to delete the LU and restart the host, go to step 6. 4. Delete the SCSI device for the path whose allocation was cancelled in step 2.
4. HDLM Operation The following is an example of executing the dlmcfgmgr utility: # /sbin/dlmcfgmgr -u logical_device_file_name_of_HDLM_device 9. Check /var/opt/DynamicLinkManager/log/dlmcfgmgr1.log or execute the dlmcfgmgr utility (dlmcfgmgr -v) to make sure that the HDLM device that corresponds to the deleted LU was deleted. The following is an example of executing the dlmcfgmgr utility: # /sbin/dlmcfgmgr -v (5) Deleting a Path to an Existing LU To delete a path to an existing LU (HDLM device): 1.
4. HDLM Operation Perform this operation if necessary. If it is not necessary to check this, go to step 7. If the SCSI device name is not represented with a hyphen (-), to change the SCSI device name to a hyphen, wait until the path health checking has been executed or execute the following dlnkmgr command with the AutoPATH_ID of the HDLM device. Example: # /opt/DynamicLinkManager/bin/dlnkmgr online -pathid AutoPATH_ID 7.
4. HDLM Operation HDLM. The following is an example of executing the dlmcfgmgr utility: # /sbin/dlmcfgmgr -v If the Management status of the relevant HDLM device is represented as configured in the execution result, this means that the device is managed by HDLM. 3. Execute the dlmcfgmgr utility (dlmcfgmgr -o logical_device_file_name_of_HDLM_device) on the relevant device you want to exclude from HDLM management. The specified device is excluded from HDLM management.
4. HDLM Operation 4. Refer to /var/opt/DynamicLinkManager/log/dlmcfgmgr1.log or execute the dlmcfgmgr utility (dlmcfgmgr -v) or the view operation (dlnkmgr view -path) of the HDLM command to make sure that the relevant device is now managed by HDLM.
4. HDLM Operation relevant HDLM device is restored. The following is an example of executing the dlmcfgmgr utility: # /sbin/dlmcfgmgr -v (9) Restoring the Path of an HDLM Device Started in Disconnected Status (When a Restart Is Not Required) This subsection describes how to restore the path to an HDLM device that was in disconnected status (the cable was pulled out or broken) when the host first started. In this method, the host is not restarted.
4.
4. HDLM Operation Legend: a: Host ID (Port number of the host) b: Channel number (Bus number) c: Target ID d: Lun (LU number of the host) n: host port number driver-name: qlaxxxx (driver name in use) An example entry is shown below. When adding a device by using a QLogic HBA driver in Red Hat Enterprise Linux AS4/ES4: # echo "scsi-qlascan" > /proc/scsi/qla2200/1 # cat /proc/scsi/qla2200/1 # echo "scsi add-single-device 1 0 1 1" > /proc/scsi/scsi 4.
4. HDLM Operation If the SCSI device name mapped with the path to the relevant HDLM device is represented with a hyphen (-), in the execution result, this means that the path was in disconnected status. 2. Connect the cable. If the cable is broken, replace it. When the restart of the host is possible, go to step 3. When the restart of the host is not possible, go to step 4. 3. Restart the host. The SCSI device is recreated, and the status changes to online. Go to step 6. 4.
4. HDLM Operation If the SCSI device of the new path that HDLM detected is not yet registered, a new HDLM device is allocated to the path. For example, if you define a new path from the host to an LU of the storage system, a new HDLM device is allocated to the path. The lowest available alphabetical letter is allocated as the logical device file name of the HDLM device.
4. HDLM Operation to create an HDLM device file for the new LU. Even if you add a path to an HDLM device that is not managed by HDLM and restart the host, the HDLM device will not be managed by HDLM. An AutoPATH_ID is allocated sequentially as the HDLM recognizes a SCSI device during start up of the host. Therefore, an AutoPATH_ID for the same path may change whenever the host starts.
Chapter 5. Troubleshooting This chapter describes how to properly use HDLM error information, and then how to resolve the problem, if an error has occurred in HDLM. The resolutions for path errors, HDLM program errors, and other types of errors are all described separately. 5.1 Information Collected by the DLMgetras Utility for Collecting HDLM Error Information 5.2 Checking Error Information in Messages 5.3 What To Do for a Path Error 5.4 What To Do for a Program Error 5.
5. Troubleshooting 5.1 Information Collected by the DLMgetras Utility for Collecting HDLM Error Information Immediately after an error occurs, execute the DLMgetras utility for collecting HDLM error information, since restarting the machine might delete error information before the information is collected by DLMgetras. For details about the DLMgetras utility and the error information it collects, see 7.2 DLMgetras Utility for Collecting HDLM Error Information.
5. Troubleshooting 5.2 Checking Error Information in Messages When you want to configure the system so that HDLM messages are output to syslog, specify user for the name of the system function defined in the syslogd settings file. In the following example, the system function name is user, and messages at the Information level or higher are output to the /etc/syslog.conf file: user.info /tmp/syslog.user.log You can check path errors by referring to the KAPL08xxx messages that are output to the syslog.
5. Troubleshooting • Host port number (hexadecimal) • Bus number (hexadecimal) • Target ID (hexadecimal) • Host LU number (hexadecimal) This path name is also the same as PathName displayed by the command's view operation. For details on the path name, see 6.7 view (Displays Information). DNum A Dev number, which is equivalent to a partition number in Linux. A device number beginning from 0 is assigned to the device in the LU. In Linux, this value is fixed to 0.
5. Troubleshooting 5.3 What To Do for a Path Error When a path error is detected, HDLM performs a failover on the path and outputs the KAPL08022-E message. This message indicates that an error has occurred in the components that make up the path. Figure 5-1: Error Location When the KAPL08022-E Message Is Output indicates these components.
5. Troubleshooting Figure 5-2: Troubleshooting Procedure When a Path Error Occurs The following shows the procedure for using the HDLM command (dlnkmgr) to handle a path error. 5.3.1 Examining the Messages Examine the message that is output to syslog in the host by using applications or tools for monitoring messages. If the KAPL08022-E message is output, view the message to check the path in which the error has occurred. For details on each item displayed in messages, see 5.
5. Troubleshooting 5.3.3 Identifying the Error Path Check the obtained path information to find the path with the error. In the Status column, the error path has the status Offline(E) or Online(E). 5.3.4 Narrowing Down the Hardware That Might Have Caused the Error Check the DskName, iLU, ChaPort, and HBAPortWWN columns of the path with the error to narrow down the hardware that may be the cause of the error.
5. Troubleshooting 5.4 What To Do for a Program Error The following describes what to do to handle errors that occur in an HDLM program. Figure 5-3: Troubleshooting Procedure When a Program Error Occurs shows the troubleshooting procedure. Figure 5-3: Troubleshooting Procedure When a Program Error Occurs The following shows the procedure for handling a program error by using the HDLM command (dlnkmgr). 5.4.1 Examining the Messages Examine the messages that are output to the host syslog.
5. Troubleshooting 5.4.3 What To Do for the Program Error Follow the recommended actions for messages in 8. Messages. If the error occurs again after you thought that you had resolved the problem, use the dlnkmgr command's view operation to check the status of the HDLM program, and then do whatever is necessary to resolve the problem. For details on the view operation, see 6.7 view (Displays Information).
5. Troubleshooting 5.5 What To Do for Other Errors When the cause of an error may be related to HDLM but is neither a path error nor an HDLM program error, execute the DLMgetras utility, and then report the collected information to the HDLM vendor or maintenance company if there is a maintenance contract for HDLM. For details about the DLMgetras utility and the information it collects, see 7.2 DLMgetras Utility for Collecting HDLM Error Information.
Chapter 6. Command Reference This chapter describes the HDLM command (dlnkmgr) and its operations. 6.1 6.2 6.3 6.4 6.5 6.6 6.
6. Command Reference 6.1 Overview of the HDLM Command dlnkmgr This section describes how to specify the HDLM command dlnkmgr and its subcommands (called operations in HDLM). Command format Enter the command using the following format: dlnkmgr operation [parameter [parameter-value]] dlnkmgr The command name. operation The type of operation entered after dlnkmgr. parameter A value required for an operation. parameter-value A value required for an operation parameter.
6. Command Reference Notes: • Execute the command as a user with root permissions. • To specify a value that contains a space in its parameter, enclose the entire value in double quotes (").
6. Command Reference 6.2 clear (Returns the Path Statistics to the Initial Value) The dlnkmgr command's clear operation clears the statistics (I/O count and I/O errors) of all paths that are managed by HDLM, and returns them to their initial value. 6.2.1 Format (1) To set the path statistics to 0 /opt/DynamicLinkManager/bin/dlnkmgr clear -pdst [-s] (2) To display the format of the clear operation /opt/DynamicLinkManager/bin/dlnkmgr clear -help 6.2.
6. Command Reference (2) To Display the Format of the clear Operation -help Displays the format of the clear operation. Example # /opt/DynamicLinkManager/bin/dlnkmgr clear -help clear: Format dlnkmgr clear -pdst [-s] KAPL01001-I The HDLM command completed normally.
6. Command Reference 6.3 help (Displays the Operation Format) The dlnkmgr command's help operation displays the list of operations available for the HDLM command, or the format of individual operations. 6.3.1 Format /opt/DynamicLinkManager/bin/dlnkmgr help [operation] [operation] ... 6.3.2 Parameter operation Specify the HDLM command operation whose format you want to know.
6. Command Reference # /opt/DynamicLinkManager/bin/dlnkmgr help online offline help online: Format dlnkmgr online [-path] [-s] dlnkmgr online [-path] -hba HBAPortNumber.BusNumber [-s] dlnkmgr online [-path] -cha -pathid AutoPATH_ID [-s] dlnkmgr online [-path] [-pathid AutoPATH_ID] [-s] dlnkmgr online [-path] [-device SCSI_Device_Name] [-s] Valid value AutoPATH_ID { 000000 - 999999 }(Decimal) offline: Format dlnkmgr offline [-path] -hba HBAPortNumber.
6. Command Reference 6.4 offline (Places Paths Offline) The dlnkmgr command's offline operation places online paths offline. Specify the paths to be placed offline by specifying an HBA port, CHA port, or single path. Instead of specifying a path, you can also specify a SCSI device name. There must always be at least one online path accessing each LU. Placing too many paths offline might prevent paths from being able to switch if an error occurs.
6. Command Reference HBA port that has the specified host port number and bus number. Specify the host port number and bus number of the target HBA port: the numbers are found in the PathName field displayed using the view operation. Enter a period between these two parameter values. For details about the view operation, see 6.7 view (Displays Information).
6. Command Reference connected to the target CHA port: When the confirmation message is displayed, the user enters y to continue, or n to cancel the operation. # /opt/DynamicLinkManager/bin/dlnkmgr offline -cha -pathid 000001 KAPL01055-I All the paths which pass the specified CHA port will be changed to the Offline(C) status. Is this OK? [y/n]:y KAPL01056-I If you are sure that there would be no problem when all the paths which pass the specified CHA are placed in the Offline(C) status, enter y.
6. Command Reference device name is /dev/sde while confirming command operation. # /opt/DynamicLinkManager/bin/dlnkmgr offline -path -device /dev/sde KAPL01052-I The currently selected paths will be changed to the Offline(C) status. Is this OK? [y/n]:y KAPL01053-I If you are sure that there would be no problem when the path is placed in the Offline(C) status, enter y. Otherwise, enter n. [y/n]:y KAPL01061-I 1 path(s) were successfully placed Offline(C); 0 path(s) were not.
6. Command Reference AutoPATH_ID { 000000 - 999999 }(Decimal) KAPL01001-I The HDLM command completed normally. Operation name = offline, completion time = yyyy/mm/dd hh:mm:ss # Reference Using the view operation together with standard UNIX commands enables you to filter the path information listed for a specific HBA port or CHA port. For details about the view operation, see 6.7 view (Displays Information).
6. Command Reference 6.5 online (Places Paths Online) The dlnkmgr command's online operation places offline paths online. Specify the paths to be placed online by specifying an HBA port, CHA port, or single path. Instead of specifying a path, you can also specify a SCSI device name. 6.5.1 Format (1) To place paths Online /opt/DynamicLinkManager/bin/dlnkmgr online [-path] [-hba host-port-number.
6. Command Reference Specify the host port number and bus number of the target HBA port: the numbers are found in the PathName field displayed using the view operation. Enter a period between these two parameter values. For details about the view operation, see 6.7 view (Displays Information).
6. Command Reference KAPL01057-I All the paths which pass the specified CHA port will be changed to the Online status. Is this OK? [y/n]:y KAPL01061-I 2 path(s) were successfully placed Online; 0 path(s) were not. Operation name = online # -pathid AutoPATH_ID Use this parameter to place a single path online. Specify the current AutoPATH_ID of the target path, which is displayed by using the view operation. For details about the view operation, see 6.7 view (Displays Information).
6. Command Reference the response to the confirmation message: for example, when you want to execute the command in a shell script or batch file. Example The following example shows how to place a path, whose AutoPATH_ID is 000002, online without asking for confirmation of command execution from the user: # /opt/DynamicLinkManager/bin/dlnkmgr online -pathid 2 -s KAPL01061-I 1 path(s) were successfully placed Online; 0 path(s) were not.
6. Command Reference target paths before you execute the online operation to place online all the paths connected to a specific HBA port or CHA port. Example 1 The following example shows how to filter and display the information on all paths that pass through the HBA port whose host port number is 0004 and bus number is 0000: # /opt/DynamicLinkManager/bin/dlnkmgr view -path | grep 0004.0000 The above command will display information on all the paths that pass through the specified HBA port.
6. Command Reference 6.6 set (Sets Up the Operating Environment) The dlnkmgr command's set operation sets the HDLM operating environment. 6.6.
6. Command Reference Table 6-2: Default and Recommended Values Item name Default value Load balancing Recommended value on on The Extended Least I/Os algorithm is used. The recommended algorithm depends on the operating environment. Error log collection level 3: Collect error information for the 3: Collect error information for the Information level and higher. Information level and higher.
6. Command Reference exrr: The Extended Round Robin algorithm lio: The Least I/Os algorithm exlio: The Extended Least I/Os algorithm lbk: The Least Blocks algorithm exlbk: The Extended Least Blocks algorithm The type of algorithm specified by the -lbtype parameter remains stored in the system, even when you disable the load balancing function by specifying -lb off.
6. Command Reference Operation name = set, completion time = yyyy/mm/dd hh:mm:ss # -elfs error-log-file-size Specify a value from 100 to 2,000,000 (in KB) for the size of the error log files (dlmmgrn.log (n indicates a file number from 1 to 16)). The specified files size is applied to HDLM manager logs. By specifying both the error log file size and the number of error log files, you can collect up to 32,000,000 KB (approximately 30 GB) of error logs in total.
6. Command Reference Operation name = set, completion time = yyyy/mm/dd hh:mm:ss # -elfs error-log-file-size Specify a value from 100 to 2,000,000 (in KB) for the size of the error log files (dlmmgrn.log (n indicates a file number from 1 to 16)). The specified files size is applied to HDLM manager logs. By specifying both the error log file size and the number of error log files, you can collect up to 32,000,000 KB (approximately 30 GB) of error logs in total.
6. Command Reference Operation name = set, completion time = yyyy/mm/dd hh:mm:ss # -elfs error-log-file-size Specify a value from 100 to 2,000,000 (in KB) for the size of the error log files (dlmmgrn.log (n indicates a file number from 1 to 16)). The specified files size is applied to HDLM manager logs. By specifying both the error log file size and the number of error log files, you can collect up to 32,000,000 KB (approximately 30 GB) of error logs in total.
6. Command Reference Operation name = set, completion time = yyyy/mm/dd hh:mm:ss # -elfs error-log-file-size Specify a value from 100 to 2,000,000 (in KB) for the size of the error log files (dlmmgrn.log (n indicates a file number from 1 to 16)). The specified files size is applied to HDLM manager logs. By specifying both the error log file size and the number of error log files, you can collect up to 32,000,000 KB (approximately 30 GB) of error logs in total.
6. Command Reference Operation name = set, completion time = yyyy/mm/dd hh:mm:ss # -elfs error-log-file-size Specify a value from 100 to 2,000,000 (in KB) for the size of the error log files (dlmmgrn.log (n indicates a file number from 1 to 16)). The specified files size is applied to HDLM manager logs. By specifying both the error log file size and the number of error log files, you can collect up to 32,000,000 KB (approximately 30 GB) of error logs in total.
6. Command Reference Operation name = set, completion time = yyyy/mm/dd hh:mm:ss # -elfs error-log-file-size Specify a value from 100 to 2,000,000 (in KB) for the size of the error log files (dlmmgrn.log (n indicates a file number from 1 to 16)). The specified files size is applied to HDLM manager logs. By specifying both the error log file size and the number of error log files, you can collect up to 32,000,000 KB (approximately 30 GB) of error logs in total.
6. Command Reference Operation name = set, completion time = yyyy/mm/dd hh:mm:ss # -elfs error-log-file-size Specify a value from 100 to 2,000,000 (in KB) for the size of the error log files (dlmmgrn.log (n indicates a file number from 1 to 16)). The specified files size is applied to HDLM manager logs. By specifying both the error log file size and the number of error log files, you can collect up to 32,000,000 KB (approximately 30 GB) of error logs in total.
6. Command Reference Operation name = set, completion time = yyyy/mm/dd hh:mm:ss # -elfs error-log-file-size Specify a value from 100 to 2,000,000 (in KB) for the size of the error log files (dlmmgrn.log (n indicates a file number from 1 to 16)). The specified files size is applied to HDLM manager logs. By specifying both the error log file size and the number of error log files, you can collect up to 32,000,000 KB (approximately 30 GB) of error logs in total.
6. Command Reference Operation name = set, completion time = yyyy/mm/dd hh:mm:ss # -elfs error-log-file-size Specify a value from 100 to 2,000,000 (in KB) for the size of the error log files (dlmmgrn.log (n indicates a file number from 1 to 16)). The specified files size is applied to HDLM manager logs. By specifying both the error log file size and the number of error log files, you can collect up to 32,000,000 KB (approximately 30 GB) of error logs in total.
6. Command Reference Operation name = set, completion time = yyyy/mm/dd hh:mm:ss # -elfs error-log-file-size Specify a value from 100 to 2,000,000 (in KB) for the size of the error log files (dlmmgrn.log (n indicates a file number from 1 to 16)). The specified files size is applied to HDLM manager logs. By specifying both the error log file size and the number of error log files, you can collect up to 32,000,000 KB (approximately 30 GB) of error logs in total.
6. Command Reference Operation name = set, completion time = yyyy/mm/dd hh:mm:ss # -elfs error-log-file-size Specify a value from 100 to 2,000,000 (in KB) for the size of the error log files (dlmmgrn.log (n indicates a file number from 1 to 16)). The specified files size is applied to HDLM manager logs. By specifying both the error log file size and the number of error log files, you can collect up to 32,000,000 KB (approximately 30 GB) of error logs in total.
6. Command Reference Operation name = set, completion time = yyyy/mm/dd hh:mm:ss # -elfs error-log-file-size Specify a value from 100 to 2,000,000 (in KB) for the size of the error log files (dlmmgrn.log (n indicates a file number from 1 to 16)). The specified files size is applied to HDLM manager logs. By specifying both the error log file size and the number of error log files, you can collect up to 32,000,000 KB (approximately 30 GB) of error logs in total.
6. Command Reference Operation name = set, completion time = yyyy/mm/dd hh:mm:ss # -elfs error-log-file-size Specify a value from 100 to 2,000,000 (in KB) for the size of the error log files (dlmmgrn.log (n indicates a file number from 1 to 16)). The specified files size is applied to HDLM manager logs. By specifying both the error log file size and the number of error log files, you can collect up to 32,000,000 KB (approximately 30 GB) of error logs in total.
6. Command Reference Operation name = set, completion time = yyyy/mm/dd hh:mm:ss # -elfs error-log-file-size Specify a value from 100 to 2,000,000 (in KB) for the size of the error log files (dlmmgrn.log (n indicates a file number from 1 to 16)). The specified files size is applied to HDLM manager logs. By specifying both the error log file size and the number of error log files, you can collect up to 32,000,000 KB (approximately 30 GB) of error logs in total.
6. Command Reference Operation name = set, completion time = yyyy/mm/dd hh:mm:ss # -elfs error-log-file-size Specify a value from 100 to 2,000,000 (in KB) for the size of the error log files (dlmmgrn.log (n indicates a file number from 1 to 16)). The specified files size is applied to HDLM manager logs. By specifying both the error log file size and the number of error log files, you can collect up to 32,000,000 KB (approximately 30 GB) of error logs in total.
6. Command Reference Operation name = set, completion time = yyyy/mm/dd hh:mm:ss # -elfs error-log-file-size Specify a value from 100 to 2,000,000 (in KB) for the size of the error log files (dlmmgrn.log (n indicates a file number from 1 to 16)). The specified files size is applied to HDLM manager logs. By specifying both the error log file size and the number of error log files, you can collect up to 32,000,000 KB (approximately 30 GB) of error logs in total.
6. Command Reference Operation name = set, completion time = yyyy/mm/dd hh:mm:ss # -elfs error-log-file-size Specify a value from 100 to 2,000,000 (in KB) for the size of the error log files (dlmmgrn.log (n indicates a file number from 1 to 16)). The specified files size is applied to HDLM manager logs. By specifying both the error log file size and the number of error log files, you can collect up to 32,000,000 KB (approximately 30 GB) of error logs in total.
6. Command Reference Operation name = set, completion time = yyyy/mm/dd hh:mm:ss # -elfs error-log-file-size Specify a value from 100 to 2,000,000 (in KB) for the size of the error log files (dlmmgrn.log (n indicates a file number from 1 to 16)). The specified files size is applied to HDLM manager logs. By specifying both the error log file size and the number of error log files, you can collect up to 32,000,000 KB (approximately 30 GB) of error logs in total.
6. Command Reference Operation name = set, completion time = yyyy/mm/dd hh:mm:ss # -elfs error-log-file-size Specify a value from 100 to 2,000,000 (in KB) for the size of the error log files (dlmmgrn.log (n indicates a file number from 1 to 16)). The specified files size is applied to HDLM manager logs. By specifying both the error log file size and the number of error log files, you can collect up to 32,000,000 KB (approximately 30 GB) of error logs in total.
6. Command Reference Operation name = set, completion time = yyyy/mm/dd hh:mm:ss # -elfs error-log-file-size Specify a value from 100 to 2,000,000 (in KB) for the size of the error log files (dlmmgrn.log (n indicates a file number from 1 to 16)). The specified files size is applied to HDLM manager logs. By specifying both the error log file size and the number of error log files, you can collect up to 32,000,000 KB (approximately 30 GB) of error logs in total.
6. Command Reference Operation name = set, completion time = yyyy/mm/dd hh:mm:ss # -elfs error-log-file-size Specify a value from 100 to 2,000,000 (in KB) for the size of the error log files (dlmmgrn.log (n indicates a file number from 1 to 16)). The specified files size is applied to HDLM manager logs. By specifying both the error log file size and the number of error log files, you can collect up to 32,000,000 KB (approximately 30 GB) of error logs in total.
6. Command Reference Operation name = set, completion time = yyyy/mm/dd hh:mm:ss # -elfs error-log-file-size Specify a value from 100 to 2,000,000 (in KB) for the size of the error log files (dlmmgrn.log (n indicates a file number from 1 to 16)). The specified files size is applied to HDLM manager logs. By specifying both the error log file size and the number of error log files, you can collect up to 32,000,000 KB (approximately 30 GB) of error logs in total.
6. Command Reference Operation name = set, completion time = yyyy/mm/dd hh:mm:ss # -elfs error-log-file-size Specify a value from 100 to 2,000,000 (in KB) for the size of the error log files (dlmmgrn.log (n indicates a file number from 1 to 16)). The specified files size is applied to HDLM manager logs. By specifying both the error log file size and the number of error log files, you can collect up to 32,000,000 KB (approximately 30 GB) of error logs in total.
6. Command Reference Operation name = set, completion time = yyyy/mm/dd hh:mm:ss # -elfs error-log-file-size Specify a value from 100 to 2,000,000 (in KB) for the size of the error log files (dlmmgrn.log (n indicates a file number from 1 to 16)). The specified files size is applied to HDLM manager logs. By specifying both the error log file size and the number of error log files, you can collect up to 32,000,000 KB (approximately 30 GB) of error logs in total.
6. Command Reference Operation name = set, completion time = yyyy/mm/dd hh:mm:ss # -elfs error-log-file-size Specify a value from 100 to 2,000,000 (in KB) for the size of the error log files (dlmmgrn.log (n indicates a file number from 1 to 16)). The specified files size is applied to HDLM manager logs. By specifying both the error log file size and the number of error log files, you can collect up to 32,000,000 KB (approximately 30 GB) of error logs in total.
6. Command Reference Operation name = set, completion time = yyyy/mm/dd hh:mm:ss # -elfs error-log-file-size Specify a value from 100 to 2,000,000 (in KB) for the size of the error log files (dlmmgrn.log (n indicates a file number from 1 to 16)). The specified files size is applied to HDLM manager logs. By specifying both the error log file size and the number of error log files, you can collect up to 32,000,000 KB (approximately 30 GB) of error logs in total.
6. Command Reference Operation name = set, completion time = yyyy/mm/dd hh:mm:ss # -elfs error-log-file-size Specify a value from 100 to 2,000,000 (in KB) for the size of the error log files (dlmmgrn.log (n indicates a file number from 1 to 16)). The specified files size is applied to HDLM manager logs. By specifying both the error log file size and the number of error log files, you can collect up to 32,000,000 KB (approximately 30 GB) of error logs in total.
6. Command Reference Operation name = set, completion time = yyyy/mm/dd hh:mm:ss # -elfs error-log-file-size Specify a value from 100 to 2,000,000 (in KB) for the size of the error log files (dlmmgrn.log (n indicates a file number from 1 to 16)). The specified files size is applied to HDLM manager logs. By specifying both the error log file size and the number of error log files, you can collect up to 32,000,000 KB (approximately 30 GB) of error logs in total.
6. Command Reference Operation name = set, completion time = yyyy/mm/dd hh:mm:ss # -elfs error-log-file-size Specify a value from 100 to 2,000,000 (in KB) for the size of the error log files (dlmmgrn.log (n indicates a file number from 1 to 16)). The specified files size is applied to HDLM manager logs. By specifying both the error log file size and the number of error log files, you can collect up to 32,000,000 KB (approximately 30 GB) of error logs in total.
6. Command Reference Operation name = set, completion time = yyyy/mm/dd hh:mm:ss # -elfs error-log-file-size Specify a value from 100 to 2,000,000 (in KB) for the size of the error log files (dlmmgrn.log (n indicates a file number from 1 to 16)). The specified files size is applied to HDLM manager logs. By specifying both the error log file size and the number of error log files, you can collect up to 32,000,000 KB (approximately 30 GB) of error logs in total.
6. Command Reference Operation name = set, completion time = yyyy/mm/dd hh:mm:ss # -elfs error-log-file-size Specify a value from 100 to 2,000,000 (in KB) for the size of the error log files (dlmmgrn.log (n indicates a file number from 1 to 16)). The specified files size is applied to HDLM manager logs. By specifying both the error log file size and the number of error log files, you can collect up to 32,000,000 KB (approximately 30 GB) of error logs in total.
6. Command Reference Operation name = set, completion time = yyyy/mm/dd hh:mm:ss # -elfs error-log-file-size Specify a value from 100 to 2,000,000 (in KB) for the size of the error log files (dlmmgrn.log (n indicates a file number from 1 to 16)). The specified files size is applied to HDLM manager logs. By specifying both the error log file size and the number of error log files, you can collect up to 32,000,000 KB (approximately 30 GB) of error logs in total.
6. Command Reference Operation name = set, completion time = yyyy/mm/dd hh:mm:ss # -elfs error-log-file-size Specify a value from 100 to 2,000,000 (in KB) for the size of the error log files (dlmmgrn.log (n indicates a file number from 1 to 16)). The specified files size is applied to HDLM manager logs. By specifying both the error log file size and the number of error log files, you can collect up to 32,000,000 KB (approximately 30 GB) of error logs in total.
6. Command Reference Operation name = set, completion time = yyyy/mm/dd hh:mm:ss # -elfs error-log-file-size Specify a value from 100 to 2,000,000 (in KB) for the size of the error log files (dlmmgrn.log (n indicates a file number from 1 to 16)). The specified files size is applied to HDLM manager logs. By specifying both the error log file size and the number of error log files, you can collect up to 32,000,000 KB (approximately 30 GB) of error logs in total.
6. Command Reference Operation name = set, completion time = yyyy/mm/dd hh:mm:ss # -elfs error-log-file-size Specify a value from 100 to 2,000,000 (in KB) for the size of the error log files (dlmmgrn.log (n indicates a file number from 1 to 16)). The specified files size is applied to HDLM manager logs. By specifying both the error log file size and the number of error log files, you can collect up to 32,000,000 KB (approximately 30 GB) of error logs in total.
6. Command Reference Operation name = set, completion time = yyyy/mm/dd hh:mm:ss # -elfs error-log-file-size Specify a value from 100 to 2,000,000 (in KB) for the size of the error log files (dlmmgrn.log (n indicates a file number from 1 to 16)). The specified files size is applied to HDLM manager logs. By specifying both the error log file size and the number of error log files, you can collect up to 32,000,000 KB (approximately 30 GB) of error logs in total.
6. Command Reference Operation name = set, completion time = yyyy/mm/dd hh:mm:ss # -elfs error-log-file-size Specify a value from 100 to 2,000,000 (in KB) for the size of the error log files (dlmmgrn.log (n indicates a file number from 1 to 16)). The specified files size is applied to HDLM manager logs. By specifying both the error log file size and the number of error log files, you can collect up to 32,000,000 KB (approximately 30 GB) of error logs in total.
6. Command Reference Operation name = set, completion time = yyyy/mm/dd hh:mm:ss # -elfs error-log-file-size Specify a value from 100 to 2,000,000 (in KB) for the size of the error log files (dlmmgrn.log (n indicates a file number from 1 to 16)). The specified files size is applied to HDLM manager logs. By specifying both the error log file size and the number of error log files, you can collect up to 32,000,000 KB (approximately 30 GB) of error logs in total.
6. Command Reference Operation name = set, completion time = yyyy/mm/dd hh:mm:ss # -elfs error-log-file-size Specify a value from 100 to 2,000,000 (in KB) for the size of the error log files (dlmmgrn.log (n indicates a file number from 1 to 16)). The specified files size is applied to HDLM manager logs. By specifying both the error log file size and the number of error log files, you can collect up to 32,000,000 KB (approximately 30 GB) of error logs in total.
6. Command Reference Operation name = set, completion time = yyyy/mm/dd hh:mm:ss # -elfs error-log-file-size Specify a value from 100 to 2,000,000 (in KB) for the size of the error log files (dlmmgrn.log (n indicates a file number from 1 to 16)). The specified files size is applied to HDLM manager logs. By specifying both the error log file size and the number of error log files, you can collect up to 32,000,000 KB (approximately 30 GB) of error logs in total.
6. Command Reference Operation name = set, completion time = yyyy/mm/dd hh:mm:ss # -elfs error-log-file-size Specify a value from 100 to 2,000,000 (in KB) for the size of the error log files (dlmmgrn.log (n indicates a file number from 1 to 16)). The specified files size is applied to HDLM manager logs. By specifying both the error log file size and the number of error log files, you can collect up to 32,000,000 KB (approximately 30 GB) of error logs in total.
6. Command Reference Operation name = set, completion time = yyyy/mm/dd hh:mm:ss # -elfs error-log-file-size Specify a value from 100 to 2,000,000 (in KB) for the size of the error log files (dlmmgrn.log (n indicates a file number from 1 to 16)). The specified files size is applied to HDLM manager logs. By specifying both the error log file size and the number of error log files, you can collect up to 32,000,000 KB (approximately 30 GB) of error logs in total.
6. Command Reference Operation name = set, completion time = yyyy/mm/dd hh:mm:ss # -elfs error-log-file-size Specify a value from 100 to 2,000,000 (in KB) for the size of the error log files (dlmmgrn.log (n indicates a file number from 1 to 16)). The specified files size is applied to HDLM manager logs. By specifying both the error log file size and the number of error log files, you can collect up to 32,000,000 KB (approximately 30 GB) of error logs in total.
6. Command Reference Operation name = set, completion time = yyyy/mm/dd hh:mm:ss # -elfs error-log-file-size Specify a value from 100 to 2,000,000 (in KB) for the size of the error log files (dlmmgrn.log (n indicates a file number from 1 to 16)). The specified files size is applied to HDLM manager logs. By specifying both the error log file size and the number of error log files, you can collect up to 32,000,000 KB (approximately 30 GB) of error logs in total.
6. Command Reference Operation name = set, completion time = yyyy/mm/dd hh:mm:ss # -elfs error-log-file-size Specify a value from 100 to 2,000,000 (in KB) for the size of the error log files (dlmmgrn.log (n indicates a file number from 1 to 16)). The specified files size is applied to HDLM manager logs. By specifying both the error log file size and the number of error log files, you can collect up to 32,000,000 KB (approximately 30 GB) of error logs in total.
6. Command Reference Operation name = set, completion time = yyyy/mm/dd hh:mm:ss # -elfs error-log-file-size Specify a value from 100 to 2,000,000 (in KB) for the size of the error log files (dlmmgrn.log (n indicates a file number from 1 to 16)). The specified files size is applied to HDLM manager logs. By specifying both the error log file size and the number of error log files, you can collect up to 32,000,000 KB (approximately 30 GB) of error logs in total.
6. Command Reference Operation name = set, completion time = yyyy/mm/dd hh:mm:ss # -elfs error-log-file-size Specify a value from 100 to 2,000,000 (in KB) for the size of the error log files (dlmmgrn.log (n indicates a file number from 1 to 16)). The specified files size is applied to HDLM manager logs. By specifying both the error log file size and the number of error log files, you can collect up to 32,000,000 KB (approximately 30 GB) of error logs in total.
6. Command Reference Operation name = set, completion time = yyyy/mm/dd hh:mm:ss # -elfs error-log-file-size Specify a value from 100 to 2,000,000 (in KB) for the size of the error log files (dlmmgrn.log (n indicates a file number from 1 to 16)). The specified files size is applied to HDLM manager logs. By specifying both the error log file size and the number of error log files, you can collect up to 32,000,000 KB (approximately 30 GB) of error logs in total.
6. Command Reference Operation name = set, completion time = yyyy/mm/dd hh:mm:ss # -elfs error-log-file-size Specify a value from 100 to 2,000,000 (in KB) for the size of the error log files (dlmmgrn.log (n indicates a file number from 1 to 16)). The specified files size is applied to HDLM manager logs. By specifying both the error log file size and the number of error log files, you can collect up to 32,000,000 KB (approximately 30 GB) of error logs in total.
6. Command Reference Operation name = set, completion time = yyyy/mm/dd hh:mm:ss # -elfs error-log-file-size Specify a value from 100 to 2,000,000 (in KB) for the size of the error log files (dlmmgrn.log (n indicates a file number from 1 to 16)). The specified files size is applied to HDLM manager logs. By specifying both the error log file size and the number of error log files, you can collect up to 32,000,000 KB (approximately 30 GB) of error logs in total.
6. Command Reference Operation name = set, completion time = yyyy/mm/dd hh:mm:ss # -elfs error-log-file-size Specify a value from 100 to 2,000,000 (in KB) for the size of the error log files (dlmmgrn.log (n indicates a file number from 1 to 16)). The specified files size is applied to HDLM manager logs. By specifying both the error log file size and the number of error log files, you can collect up to 32,000,000 KB (approximately 30 GB) of error logs in total.
6. Command Reference Operation name = set, completion time = yyyy/mm/dd hh:mm:ss # -elfs error-log-file-size Specify a value from 100 to 2,000,000 (in KB) for the size of the error log files (dlmmgrn.log (n indicates a file number from 1 to 16)). The specified files size is applied to HDLM manager logs. By specifying both the error log file size and the number of error log files, you can collect up to 32,000,000 KB (approximately 30 GB) of error logs in total.
6. Command Reference Operation name = set, completion time = yyyy/mm/dd hh:mm:ss # -elfs error-log-file-size Specify a value from 100 to 2,000,000 (in KB) for the size of the error log files (dlmmgrn.log (n indicates a file number from 1 to 16)). The specified files size is applied to HDLM manager logs. By specifying both the error log file size and the number of error log files, you can collect up to 32,000,000 KB (approximately 30 GB) of error logs in total.
6. Command Reference Operation name = set, completion time = yyyy/mm/dd hh:mm:ss # -elfs error-log-file-size Specify a value from 100 to 2,000,000 (in KB) for the size of the error log files (dlmmgrn.log (n indicates a file number from 1 to 16)). The specified files size is applied to HDLM manager logs. By specifying both the error log file size and the number of error log files, you can collect up to 32,000,000 KB (approximately 30 GB) of error logs in total.
6. Command Reference Operation name = set, completion time = yyyy/mm/dd hh:mm:ss # -elfs error-log-file-size Specify a value from 100 to 2,000,000 (in KB) for the size of the error log files (dlmmgrn.log (n indicates a file number from 1 to 16)). The specified files size is applied to HDLM manager logs. By specifying both the error log file size and the number of error log files, you can collect up to 32,000,000 KB (approximately 30 GB) of error logs in total.
6. Command Reference Operation name = set, completion time = yyyy/mm/dd hh:mm:ss # -elfs error-log-file-size Specify a value from 100 to 2,000,000 (in KB) for the size of the error log files (dlmmgrn.log (n indicates a file number from 1 to 16)). The specified files size is applied to HDLM manager logs. By specifying both the error log file size and the number of error log files, you can collect up to 32,000,000 KB (approximately 30 GB) of error logs in total.
6. Command Reference Operation name = set, completion time = yyyy/mm/dd hh:mm:ss # -elfs error-log-file-size Specify a value from 100 to 2,000,000 (in KB) for the size of the error log files (dlmmgrn.log (n indicates a file number from 1 to 16)). The specified files size is applied to HDLM manager logs. By specifying both the error log file size and the number of error log files, you can collect up to 32,000,000 KB (approximately 30 GB) of error logs in total.
6. Command Reference Operation name = set, completion time = yyyy/mm/dd hh:mm:ss # -elfs error-log-file-size Specify a value from 100 to 2,000,000 (in KB) for the size of the error log files (dlmmgrn.log (n indicates a file number from 1 to 16)). The specified files size is applied to HDLM manager logs. By specifying both the error log file size and the number of error log files, you can collect up to 32,000,000 KB (approximately 30 GB) of error logs in total.
6. Command Reference Operation name = set, completion time = yyyy/mm/dd hh:mm:ss # -elfs error-log-file-size Specify a value from 100 to 2,000,000 (in KB) for the size of the error log files (dlmmgrn.log (n indicates a file number from 1 to 16)). The specified files size is applied to HDLM manager logs. By specifying both the error log file size and the number of error log files, you can collect up to 32,000,000 KB (approximately 30 GB) of error logs in total.
6. Command Reference Operation name = set, completion time = yyyy/mm/dd hh:mm:ss # -elfs error-log-file-size Specify a value from 100 to 2,000,000 (in KB) for the size of the error log files (dlmmgrn.log (n indicates a file number from 1 to 16)). The specified files size is applied to HDLM manager logs. By specifying both the error log file size and the number of error log files, you can collect up to 32,000,000 KB (approximately 30 GB) of error logs in total.
6. Command Reference Operation name = set, completion time = yyyy/mm/dd hh:mm:ss # -elfs error-log-file-size Specify a value from 100 to 2,000,000 (in KB) for the size of the error log files (dlmmgrn.log (n indicates a file number from 1 to 16)). The specified files size is applied to HDLM manager logs. By specifying both the error log file size and the number of error log files, you can collect up to 32,000,000 KB (approximately 30 GB) of error logs in total.
6. Command Reference Operation name = set, completion time = yyyy/mm/dd hh:mm:ss # -elfs error-log-file-size Specify a value from 100 to 2,000,000 (in KB) for the size of the error log files (dlmmgrn.log (n indicates a file number from 1 to 16)). The specified files size is applied to HDLM manager logs. By specifying both the error log file size and the number of error log files, you can collect up to 32,000,000 KB (approximately 30 GB) of error logs in total.
6. Command Reference Operation name = set, completion time = yyyy/mm/dd hh:mm:ss # -elfs error-log-file-size Specify a value from 100 to 2,000,000 (in KB) for the size of the error log files (dlmmgrn.log (n indicates a file number from 1 to 16)). The specified files size is applied to HDLM manager logs. By specifying both the error log file size and the number of error log files, you can collect up to 32,000,000 KB (approximately 30 GB) of error logs in total.
6. Command Reference Operation name = set, completion time = yyyy/mm/dd hh:mm:ss # -elfs error-log-file-size Specify a value from 100 to 2,000,000 (in KB) for the size of the error log files (dlmmgrn.log (n indicates a file number from 1 to 16)). The specified files size is applied to HDLM manager logs. By specifying both the error log file size and the number of error log files, you can collect up to 32,000,000 KB (approximately 30 GB) of error logs in total.
6. Command Reference Operation name = set, completion time = yyyy/mm/dd hh:mm:ss # -elfs error-log-file-size Specify a value from 100 to 2,000,000 (in KB) for the size of the error log files (dlmmgrn.log (n indicates a file number from 1 to 16)). The specified files size is applied to HDLM manager logs. By specifying both the error log file size and the number of error log files, you can collect up to 32,000,000 KB (approximately 30 GB) of error logs in total.
6. Command Reference Operation name = set, completion time = yyyy/mm/dd hh:mm:ss # -elfs error-log-file-size Specify a value from 100 to 2,000,000 (in KB) for the size of the error log files (dlmmgrn.log (n indicates a file number from 1 to 16)). The specified files size is applied to HDLM manager logs. By specifying both the error log file size and the number of error log files, you can collect up to 32,000,000 KB (approximately 30 GB) of error logs in total.
6. Command Reference Operation name = set, completion time = yyyy/mm/dd hh:mm:ss # -elfs error-log-file-size Specify a value from 100 to 2,000,000 (in KB) for the size of the error log files (dlmmgrn.log (n indicates a file number from 1 to 16)). The specified files size is applied to HDLM manager logs. By specifying both the error log file size and the number of error log files, you can collect up to 32,000,000 KB (approximately 30 GB) of error logs in total.
6. Command Reference Operation name = set, completion time = yyyy/mm/dd hh:mm:ss # -elfs error-log-file-size Specify a value from 100 to 2,000,000 (in KB) for the size of the error log files (dlmmgrn.log (n indicates a file number from 1 to 16)). The specified files size is applied to HDLM manager logs. By specifying both the error log file size and the number of error log files, you can collect up to 32,000,000 KB (approximately 30 GB) of error logs in total.
7. Utility Reference Executed command Files Explanation /sbin/lvs lvs.txt Logical volume information (when using Red Hat Enterprise Linux 6 or SUSE LINUX Enterprise Server) /sbin/o2cb_ctl -V o2cb_ctl-V.txt Oracle Cluster File System 2 version /sbin/parted -s HDLM-device print parted-s.txt HDLM device partition information (when using Red Hat Enterprise Linux AS4/ES4(IPF) or Red Hat Enterprise Linux 5(IPF)) /usr/sbin/parted -s HDLM-device print parted-s.
7. Utility Reference Executed command Files Explanation ulimit -a ulimit-a.txt Limit values of the available system resources (data segment, stack segment, and file descriptor) for the process /usr/bin/env env.txt Environment variables information /usr/bin/free free.txt Memory information /usr/bin/getconf PAGESIZE getconfPAGESIZE.tx t Memory page size information /usr/bin/ident dlnkmgr dlmmgr DLMgetras libdlm.so libhdlmhcc-* libhdlmhccmp-* dlmcfgmgr sddlmadrv.ko sddlmfdrv.ko whatlist.
7. Utility Reference Executed command Files Explanation /usr/sbin/raw -qa raw-qa.txt Character-type device information (when using SUSE LINUX Enterprise Server 9 or SUSE LINUX Enterprise Server 10) /usr/bin/uptime uptime.txt System's operating time information /usr/bin/udevinfo -d udevinfo-d.
7. Utility Reference Executed command Files Explanation /usr/sbin/lvmdiskscan lvmdiskscan.txt lvm disk information (when using Red Hat Enterprise Linux AS4/ ES4 or Red Hat Enterprise Linux 5) /usr/sbin/lvs lvs.txt Logical volume information (when using Red Hat Enterprise Linux AS4/ES4 or Red Hat Enterprise Linux 5) /usr/sbin/pvs pvs.txt Physical volume information (when using Red Hat Enterprise Linux AS4/ES4 or Red Hat Enterprise Linux 5) /usr/sbin/sestatus -v sestatus-v.
7. Utility Reference 7.3 dlmcfgmgr Utility for Managing the HDLM Configuration For management by HDLM, the HDLM-configuration definition utility obtains the SCSI device information stored by Linux by detecting the information on the path between the host and storage system to register in HDLM, and then creates, updates, or deletes the HDLM devices. Also, this utility sets an HDLM device as a management target or excludes it from being managed.
7. Utility Reference Parameter Functionality Changes the size of the dlmcfgmgr utility log file (dlmcfgmgr[1-2].log). -logfs -s Specify this parameter when you do not want to display the confirmation messages during execution of the dlmcfgmgr utility. When you execute this utility with this parameter specified, the confirmation message for each HDLM device is not displayed. Use this parameter when you want to skip a response to the confirmation message (to eliminate the manual intervention).
7.
7. Utility Reference HDLM device that is not managed by HDLM, that HDLM device will not be managed by HDLM. -o {logical-device-file-name-of-the-HDLM-device ...|all} Use this parameter to exclude the management-target HDLM device from being managed. You can specify one or more logical device file names of an HDLM device (/ dev/sddlm[aa-pap]) as a parameter value. For details on logical device files for HDLM devices, see 2.6 Logical Device Files for HDLM Devices.
7. Utility Reference immediately after execution of the utility. You can use this parameter to reset an HDLM device that must be managed again to a management target. The HDLM devices reset to a management target are displayed with the dlnkmgr command's view operation, and the HDLM device files for the devices are created. Therefore, these devices become available to the user again.
7. Utility Reference time once it is recognized. Even if the recognized HDLM device is not available because this path is disconnected or the LU is deallocated, the path information for the unavailable HDLM device will not be deleted automatically. Because the unused HDLM device path information is preserved, newly defined LUs and added paths cannot be used in some cases. This parameter is useful to eliminate such a problem.
7. Utility Reference To exclude the HDLM device sddlmaa from being managed without confirming the execution of the utility: Example 3: To delete the information for all the unavailable paths and unregister the path information from HDLM after confirming the execution of the utility: In response to the confirmation message, enter y to execute the utility and n not to execute the utility.
7. Utility Reference Table 7-7: Information for the Management Status and Configuration Information of an HDLM Device Item Description HDevName Indicates the logical device file name of the HDLM device, using an absolute path. This is indicated only for the first path for the relevant LU. Management Indicates the current management status of the HDLM device. configured: indicates that the HDLM device is to be managed. unconfigured: indicates that the HDLM device is excluded from being managed.
7. Utility Reference #dlmcfgmgr -logfs KAPL10938-I dlmcfgmgr Log File Size(KB) : 10240 # Reference information If you do not specify a parameter, the syntax of the dlmcfgmgr utility is displayed. # /sbin/dlmcfgmgr KAPL10319-W usage: /sbin/dlmcfgmgr [-s] { -r | -o {special-file-name ... | all} | -i {special-file-name ... | all} | -v [-udev] | -u {special-file-name ...
7. Utility Reference device is executed. For example, when this utility executes an operation specified with the -o parameter for /dev/sddlmaa, /dev/sddlmab, and /dev/ sddlmac, the confirmation message KAPL10339-I is not displayed for the processing of each device. This message is displayed once at the beginning of the operation. If you enter y, the processing for all the specified HDLM devices (/ dev/sddlmaa, /dev/sddlmab, and /dev/sddlmac) is executed continuously.
7. Utility Reference cannot be used might increase. 1. Update the HDLM device with information about unavailable SCSI devices by executing the dlmcfgmgr utility with the -r parameter specified. 2. Delete the HDLM device by executing the dlmcfgmgr utility with all specified in the -u parameter. If you execute the dlmcfgmgr utility with the -r parameter after dynamically deleting an SCSI device, the HDLM device will become unavailable.
7. Utility Reference 7.4 dlmmkinitrd Utility for Supporting a Boot Disk This utility creates an initial RAM disk image file for using an HDLM device as a boot disk. 7.4.1 Format (1) For Red Hat Enterprise Linux /opt/DynamicLinkManager/bin/dlmmkinitrd [-v] [-f] [-fstab fstab-name] initrd-image kernel-version (2) For SUSE LINUX Enterprise Server 10 or SUSE LINUX Enterprise Server 11 /opt/DynamicLinkManager/bin/dlmmkinitrd [-i initrd-image] [-b boot-directory] [-h] 7.4.
7. Utility Reference kernel-version Specify the kernel used for creating an initial RAM disk image file. Example The following shows an execution example for Red Hat Enterprise Linux 5: /opt/DynamicLinkManager/bin/dlmmkinitrd /boot/initrd2.6.18-194.el5-hdlm.
7. Utility Reference parameter. -b boot-directory Specify the path for the location in which the initial RAM disk image file is to be created. This parameter is used to create an initial RAM disk image file in a directory other than the default directory (/boot). -h Displays the format of the dlmmkinitrd utility.
7. Utility Reference 7.5 dlmpr Utility for Clearing HDLM Persistent Reservation If the persistent reservation of the LU is not canceled for some reason, this utility clears the reservation key to cancel the persistent reservation. This utility can be used when the host OS is Red Hat Enterprise Linux 6. 7.5.1 Format /opt/DynamicLinkManager/bin/dlmpr {{-k | -c} [sdn] [sdn] ... [-a] | -h} 7.5.2 Parameters -k Specify this parameter to display the reservation key.
7. Utility Reference Example To check the reservation keys, and then clear a reservation key: 1. Execute the dlmpr utility to display the reservation keys for sda, sdb, sdc, sdd, sde, and sdf.
7. Utility Reference - A persistent reservation has been set by the cluster software. Operation 1. Clear persistent reservation, specifying the SCSI device. 2. Execute the dlmpr utility with the -k parameter specified to display the PersistentReserve information for a SCSI device associated with a different path. If the above display error occurs, re-execute the dlmpr utility with the -k parameter specified.
7. Utility Reference 7.6 dlmsetopt Utility for Setting HDLM Driver Options This utility changes the settings for the HDLM filter driver. Restart the host machine to apply the changed settings. Note that you do not need to restart the host machine every time you execute the dlmsetopt utility. If you execute the dlmsetopt utility more than once, restart the host after you have finished specifying all settings. Restarting the host enables all the changed settings. 7.6.
7. Utility Reference command executed from another application. InquiryTimeout Specify a numeric value of -1 or in the range from 1 to 3,600. -1: This sets the timeout value to 30 seconds, which is HDLM's default value. 1 to 3,600: Timeout value (in seconds) If the following values are specified, the message KAPL12553-W is displayed and then the processing ends: • 0 • Value of -1 or less • Value more than 3,600 • Non-numeric value. -inqr Specify the number of retries of the SCSI INQUIRY command.
7. Utility Reference # /opt/DynamicLinkManager/bin/dlmsetopt -r 100000 KAPL12554-I The utility for setting HDLM driver option has started. KAPL12555-I The utility for setting HDLM driver option completed normally. KAPL12558-I Please restart the computer so that the option settings take effect. Example 2: In this example, the utility displays Help: Notes: • The contents specified in the dlmsetopt utility are written to the options sddlmfdrv line of the conf files.
7. Utility Reference Table 7-9: Setting file names for boot loaders Boot loader LILO GRUB ELILO File Name /etc/lilo.conf For Red Hat Enterprise Linux /etc/grub.conf For SUSE LINUX Enterprise Server 10 or SUSE LINUX Enterprise Server 11 /boot/grub/menu.lst /etc/elilo.
7. Utility Reference 7.7 dlmstart Utility for Starting HDLM You must perform the following operations after installing HDLM: • Load an HDLM alert driver and a filter driver. • Configure an HDLM device. • Start the HDLM manager. The dlmstart utility performs the above operations as a batch operation. If an HDLM alert driver and a filter driver have already been loaded or the HDLM manager is already running, the relevant operation is not performed. 7.7.
7. Utility Reference 7.8 dlmupdatesysinit Utility for Updating System Scripts In an environment that uses Red Hat Enterprise Linux, if you update the initscripts package after installing HDLM, HDLM information in the /etc/ rc.d/rc.sysinit file. In an environment that uses SUSE LINUX Enterprise Server, if you update the aaa_base, raidtools, mdadm, or lvm2 package after installing HDLM, HDLM information in the /etc/init.d/boot.localfs file, the /etc/init.d/boot.md file, or the /etc/init.d/boot.
7. Utility Reference 7.9 installgetras Utility for Collecting HDLM Installation Error Information This utility collects the error log information needed to analyze errors that occurred during HDLM installation. The collected information is compiled in a file and output to a specified directory. The following file is output: • installgetras.tar.gz This is a compressed file that contains information related to HDLM installation processing. For details on the information included in this output file, see 7.9.
7. Utility Reference Output directory# /var/tmp/hdlminstlog File All subdirectories and files Description Log information created during HDLM installation # This directory is created in directory-to-which-collected-information-is-output specified when the installgetras utility was executed.
7. Utility Reference 7.10 installhdlm Utility for Installing HDLM You can use this utility to perform a new installation, upgrade installation, or re-installation of HDLM. The utility can also be used to perform an unattended installation. An unattended installation enables a user to install HDLM without entering information. Before you perform an unattended installation, you must define the information required for installation in the installation-information settings file.
7. Utility Reference KAPL09228-W message is output. (2) Items To Be Defined in an Installation-Information Settings File The following describes the information defined in the installation information settings file. [INSTALLATION_SETTINGS] section This section defines information that is used when the installhdlm utility is executed.
7. Utility Reference Key name Description Specify whether to restart the host after installation. Specify either of the following values: y: Restart. n: Do not restart (default). When installing HDLM in an IP-SAN environment, specify n. restart Necessity of definition New installatio n Upgrade installatio n or re-install ation Optional Optional Maxim um numbe r of charac ters 1 Legend: Optional: If a key and its setting are not specified, the default value will be used.
7. Utility Reference [ENVIRONMENT_SETTINGS] section This section defines HDLM operation information. If this section is omitted, the installer will use the following values: • For a new installation, the installer uses the default values of the keys that are listed in the following Table 7-12: Keys in the [ENVIRONMENT_SETTINGS] Section. • For an upgrade installation or re-installation, the installer uses the old HDLM setting values.
7. Utility Reference Key name#1 Description#2 Necessity of definition New installat ion Upgrad e installat ion or re-insta llation Maxim um numbe r of charac ters error_log_level Set the level of error information that is collected as error logs. You can set a level from 0 to 4. The default is 3. Optional Optional 1 error_log_size Set the size of the error log files (dlmmgr[1-16].log) in kilobytes. You can set a size from 100 to 2000000. The default is 9900.
7.
7. Utility Reference You can specify this key only in the following cases: • For a new installation: When on is specified for the auto_failback key in the installation information settings file • For an upgrade installation or re-installation: When on is specified for the auto_failback key in the installation information settings file, or when automatic failback is enabled in the installation pre-settings The following shows an example of an edited installation information settings file.
7. Utility Reference 7.11 installux.sh Utility for HDLM Common Installer This utility determines what OS HDLM will be installed on, and installs the corresponding version of HDLM from the DVD-ROM. This utility can also perform unattended installations via a parameter specification. For details about how to use this utility to install HDLM, see 3.6 Installing HDLM. 7.11.1 Format HDLM-installation-media-mount-point/installux.sh [-v | -h | [-f installation-information-settings-file] 7.11.
Chapter 8. Messages This chapter describes the format and meaning of the message IDs, and also the terms used in the messages and message explanations. For details on the meaning of the return codes output by HDLM when it receives a request from Global Link Manager and measures to take for them, see 8.15 Return Codes for Hitachi Command Suite Common Agent Component. 8.1 Before Viewing the List of Messages 8.2 KAPL01001 to KAPL02000 8.3 KAPL03001 to KAPL04000 8.4 KAPL04001 to KAPL05000 8.
8. Messages 8.1 Before Viewing the List of Messages This section explains the following information that is needed to locate messages and understand the explanations in the sections from 8.2 KAPL01001 to KAPL02000. • Format and meaning of the message IDs • Terms used in the messages and message explanations The information is explained below. 8.1.1 Format and Meaning of Message IDs Each message has a message ID. The following shows the format and meaning of message IDs.
8.
8. Messages 8.2 KAPL01001 to KAPL02000 KAPL01001-I The HDLM command completed normally. Operation name = aa...aa, completion time = bb...bb Details The HDLM command completed successfully. aa...aa: clear, help, offline, online, set, or view bb...bb: Year/month/day hour:minute:second Action None. KAPL01002-I The HDLM command started. Operation name = aa...aa Details The HDLM command was executed. aa...aa: clear, offline, online, set, or view Action None. KAPL01003-W No operation name is specified.
8. Messages KAPL01005-W A parameter is invalid. Operation name = aa...aa, parameter = bb...bb Details aa...aa: clear, set, online, offline, or view bb...bb: Specified parameter Action Execute help operation-name of the HDLM command (dlnkmgr) to check the parameter, and then retry. For details on the help operation, see 6.3 help (Displays the Operation Format). KAPL01006-W A necessary parameter is not specified. Operation name = aa...
8. Messages Specify the parameter value, and then retry. KAPL01009-W A parameter value is invalid. Operation name = aa...aa, parameter = bb...bb, parameter value = cc...cc, Valid value = dd...dd Details aa...aa: offline, online, set, or view bb...bb: Parameter name cc...cc: Specified parameter value dd...dd: Specifiable parameter value range Action Specify a correct value for the parameter, and then retry. KAPL01012-E Could not connect the HDLM manager. Operation name = aa...
8. Messages KAPL01014-W No authority to execute the HDLM command. Operation name = aa...aa Details You do not have the administrator permissions necessary to execute the HDLM command. aa...aa: clear, offline, online, set, or view Action Execute the command as a user with root permissions. KAPL01015-W The target HBA was not found. Operation name = aa...aa Details The path having the host port number and bath number specified in the -hba parameter could not be found. aa...
8. Messages aa...aa: view Action Execute the view operation of the HDLM command (dlnkmgr view -path) and check the value displayed in PathName. Specify the two leftmost digits of PathName for the relevant HBA port, and then retry. For details on the view operation, see 6.7 view (Displays Information). KAPL01019-W The target path was not found. Operation name = aa...aa Details aa...aa: offline, online, or view • offline/online operation The specified path does not exist.
8. Messages Stop unnecessary applications, increase the amount of free memory, and then re-execute the HDLM command. KAPL01023-W The last Online path for the device cannot be placed Offline(C). Details The path specified for the offline operation cannot be set to Offline(C) because that is the last, available path to the LU from the host. Action Use the view operation of the HDLM command (dlnkmgr) to check the status of the paths. For details on the view operation, see 6.7 view (Displays Information).
8. Messages To ignore this path and perform online processing for the next path, enter y. To cancel processing, enter n. aa...aa: Path ID (decimal (base-10) number) Action If you want to continue processing of the online operation of the HDLM command for other paths, enter y. If you want to terminate processing, enter n. For details on the online operation, see 6.5 online (Places Paths Online). KAPL01040-W The entered value is invalid. Re-enter [y/n]: Details A value other than y and n was entered.
8. Messages Details aa...aa: offline, online, set, or view bb...bb: Parameter name cc...cc: Parameter value Action Execute help operation-name of the HDLM command (dlnkmgr) to check the parameter value, and then retry. For details on the help operation, see 6.3 help (Displays the Operation Format). KAPL01048-W Help information cannot be found. Operation name = aa...aa. Details The specified operation is not an operation of the HDLM command. aa...
8. Messages Action If you want to execute online processing, enter y. If you want to terminate processing, enter n. For details on the online operation, see 6.5 online (Places Paths Online). KAPL01051-I Because no path has been selected among the currently displayed paths, the paths in the Offline(C), Offline(E), and Online(E) statuses will be changed to the Online status.
8. Messages processing, enter n. For details on the offline operation, see 6.4 offline (Places Paths Offline). KAPL01054-W During the offline operation processing of the HDLM command, a path that cannot be placed in the Offline(C) status was detected. PathID = aa...aa Would you like to continue the processing of the offline operation? [y/n]: Details A path that cannot be set to Offline(C) was detected during multi-path offline processing.
8. Messages If you want to execute offline processing for the paths that meet the specified requirements, enter y. If you want to terminate processing, enter n. KAPL01057-I All the paths which pass the specified aa...aa will be changed to the Online status. Is this OK? [y/n]: Details All multiple paths will place online status because the -hba or -cha parameter was specified. To continue this operation, enter y. To discontinue this operation, enter n. aa...
8. Messages dd...dd: view or set Action Execute help operation-name of the HDLM command (dlnkmgr) to check the parameter and parameter value, and then retry. For details on the help operation, see 6.3 help (Displays the Operation Format). KAPL01060-I The user terminated the operation. Operation name = aa...aa Details Command processing will be aborted because n was entered for a required confirmation. aa...aa: online, offline, set, or clear Action None. KAPL01061-I aa...
8. Messages Action Use the view operation of the HDLM command (dlnkmgr) to check the status of the path. For details on the view operation, see 6.7 view (Displays Information). For details on the online operation, see 6.5 online (Places Paths Online). For details on the offline operation, see 6.4 offline (Places Paths Offline). KAPL01068-I Enter a license key: Details The license key will now be renewed. Enter a license key. Action None. KAPL01069-W The entered license key is invalid.
8. Messages KAPL01072-I The emergency license was installed. The license expires on aa...aa. Details A license was renewed and is registered as an emergency license. aa...aa: Year (4 digits)/month (01-12)/day (01-31) Action Install a permanent license by the expiration day. KAPL01073-E The temporary license expired. Details The temporary license has expired. Register a permanent license. Action Register a permanent license. KAPL01074-E The emergency license expired.
8. Messages None. KAPL01079-W The intermittent error monitoring function cannot be set up because automatic failback is disabled. Details The intermittent error monitoring function cannot be set up because automatic failbacks are disabled. Action Enable automatic failbacks, and then re-execute. KAPL01080-W The error monitoring interval and the number of times that the error is to occur conflict with the automatic failback checking interval.
8. Messages Action Make sure that the license key file is correct, and then re-execute. /var/tmp/hdlm_license KAPL01083-I There is no license key file. File name = aa...aa Details There is no license key file in the designated directory: aa...aa: /var/tmp/hdlm_license Action When the message that prompts you to enter the license key is displayed, enter the license key.
8. Messages KAPL01089-E One of the following was executed at the same time as an HDLM command set -lic operation: another set -lic operation, or an update of the license for an update installation. Action Check the license by using the HDLM command's view -sys -lic operation. If necessary, re-execute the HDLM command's set -lic operation. If the same error message is output again, contact your HDLM vendor or the maintenance company if there is a maintenance contract for HDLM.
8. Messages If you set a value that is less than the current value of the trace file size or number of trace files, all the current trace files will be deleted. To continue the operation, enter y. To cancel the operation, enter n. Action If you want to execute the operation of the HDLM command, enter y. If you want to terminate processing, enter n. KAPL01100-I aa...aa Details This message indicates the executed command line. aa...aa: Name of the executed command. Action None.
8. Messages aa...aa: clear, offline, online, set, or view Action If you did not perform HDLM configuration, Perform HDLM configuration. When performing neither of the above, or if the same error continues to occur even after one of the above procedures is performed, execute the utility for collecting HDLM error information (DLMgetras) to collect the error information, and then contact your HDLM vendor or maintenance company if there is a maintenance contract for HDLM.
8. Messages result, contact your HDLM vendor or maintenance company if there is a maintenance contract for HDLM. KAPL01116-W The audit log configuration file is invalid. Restart the HDLM Manager, and execute the "dlnkmgr view -sys -audlog" command and check the setting. Details The audit log configuration file is invalid.
8. Messages contract for HDLM. KAPL01120-W A storage subsystem model ID could not be displayed. Details = aa...aa, bb...bb Details A storage system model ID could not be displayed. aa...aa: Storage recognition information bb...bb: Error code Action Execute the DLMgetras utility for collecting HDLM error information, and then contact your HDLM vendor or the maintenance company if there is a maintenance contract for HDLM. For details on the DLMgetras utility, see 7.
8. Messages KAPL01125-E The directory does not exist. Directory name = aa...aa Details aa...aa: /HDLM installation path, /HDLM installation path/lib Action Reinstall HDLM. KAPL01126-E The execution file does not exist. File name = aa...aa Details aa...aa: /HDLM installation path/bin/.dlnkmgr_exe Action Reinstall HDLM. KAPL01127-E You do not have execute permission for the file. File name = aa...aa Details aa...aa: /HDLM installation path/bin/.
8. Messages 8.3 KAPL03001 to KAPL04000 KAPL03001-I HDLM API information - aa...aa Details This information is required for resolving problems. aa...aa: Trace information Action None. KAPL03003-E HDLM API Error information - aa...aa Details This information is required for resolving problems. aa...
8. Messages aa...aa: API trace error information Action Execute the DLMgetras utility for collecting HDLM error information, and then contact your HDLM vendor or the maintenance company if there is a maintenance contract for HDLM. For details on the DLMgetras utility, see 7.2 DLMgetras Utility for Collecting HDLM Error Information. KAPL03007-E An error occurred during communication with the HDLM manager. (aa...aa) Details This information is required for resolving problems. aa...
8. Messages contract for HDLM. For details on the DLMgetras utility, see 7.2 DLMgetras Utility for Collecting HDLM Error Information.
8. Messages 8.4 KAPL04001 to KAPL05000 KAPL04001-I HDLM manager started. Action None. KAPL04002-E Could not start the HDLM manager. Details The HDLM manager failed to start because the current environment is unsuitable for the HDLM manager to run in. Action Execute the DLMgetras utility for collecting HDLM error information, and then contact your HDLM vendor or the maintenance company if there is a maintenance contract for HDLM. For details on the DLMgetras utility, see 7.
8. Messages aa...aa: Option definition file name Action Check whether another program is currently using this file (for example, the file is being opened in a text editor), or whether the file has been inadvertently deleted. KAPL04009-E The option definition is invalid. Details HDLM manager could not start normally because some of the definitions in the option definition file were invalid.
8. Messages KAPL04012-E Could not create a communication pipe. RC = aa...aa Details HDLM manager could not start normally because it was unable to create a pipe file, which is used in communication with HDLM commands. aa...aa: OS error code(decimal (base-10) number) Action Execute the DLMgetras utility for collecting HDLM error information, and then contact your HDLM vendor or the maintenance company if there is a maintenance contract for HDLM. For details on the DLMgetras utility, see 7.
8. Messages Details An attempt to read the log information from the alert driver failed. aa...aa: API return code (decimal (base-10) number) Action Execute the DLMgetras utility for collecting HDLM error information, and then contact your HDLM vendor or the maintenance company if there is a maintenance contract for HDLM. For details on the DLMgetras utility, see 7.2 DLMgetras Utility for Collecting HDLM Error Information. KAPL04021-I HDLM manager information - aa...
8. Messages Utility for Collecting HDLM Error Information. KAPL04024-C A critical error occurred in the HDLM manager. (aa...aa) Details This information is required for resolving problems. aa...aa: HDLM manager trace error information Action Execute the DLMgetras utility for collecting HDLM error information, and then contact your HDLM vendor or the maintenance company if there is a maintenance contract for HDLM. For details on the DLMgetras utility, see 7.
8. Messages Install a permanent license by the expiration day. KAPL04028-E The temporary license expired. Action Install a permanent license. KAPL04029-E The emergency license expired. Action Install a permanent license. KAPL04030-E The temporary license has already expired. Action Install a permanent license. KAPL04031-E The emergency license has already expired. Action Install a permanent license. KAPL04032-C A fatal error occurred in HDLM.
8. Messages KAPL04034-E An attempt to create the option definition file has failed. Details An attempt to re-create an option definition file (/etc/opt/ DynamicLinkManager/dlmmgr.xml) using the default values has failed. Action Remove unnecessary files to secure unused capacity on the file system, or check the write permissions for the directory and file. KAPL04035-I The path health check will now start. Total number of paths = aa...aa Details aa...aa: Total number of paths Action None.
8. Messages aa...aa: Trap ID bb...bb: Destination IP address of the trap cc...cc: Destination port number of the trap dd...dd: Community name given to the trap ee...ee: Transmission data Action None. KAPL04047-W The file does not exist. File name = aa...aa Details aa...aa: /etc/.DynamicLinkManager/Path00 Action Reinstall HDLM. KAPL04048-W You do not have read permission for the file. File name = aa...aa Details aa...aa: /etc/.
8. Messages Action Reinstall HDLM. KAPL04051-E The execution file does not exist. File name = aa...aa Details aa...aa: /HDLM installation path/bin/.dlnkmgr_exe Action Reinstall HDLM. KAPL04052-E You do not have execute permission for the file. File name = aa...aa Details aa...aa: /HDLM installation path/bin/.dlnkmgr_exe Action Execute the DLMgetras utility for collecting HDLM error information, and then contact your HDLM vendor or the maintenance company if there is a maintenance contract for HDLM.
8. Messages 8.5 KAPL05001 to KAPL06000 KAPL05003-I The HDLM driver (filter component) was successfully attached to Disk (aa...aa), Partition (bb...bb). Details The path corresponding to disk aa...aa and partition bb...bb was successfully registered in the core logic. aa...aa: Disk sequence number (decimal number) bb...bb: Fixed at 0 (decimal number) Action None. KAPL05008-E Could not allocate memory. (aa...aa:bb...
8. Messages The path corresponding to the disk aa...aa and partition bb...bb could not be registered in the core logic. aa...aa: Disk sequence number (decimal number) bb...bb: Partition number (decimal number) cc...cc: Error code (hexadecimal number) dd...dd: Filter driver management table address (hexadecimal number) Action Check whether the HDLM driver has started normally.
8. Messages of the path, execute the DLMgetras utility for collecting error information, and then contact the HDLM vendor or the maintenance company if you have a maintenance contract for HDLM. KAPL05019-I The FO processing in the path (aa...aa) finished. The I/O request was processed in the path (bb...bb). Details FO processing for the path aa...aa was successful. I/O requests was processed in the path bb...bb. aa...aa: Path ID (hexadecimal number) bb...bb: Path ID (hexadecimal number) Action None.
8. Messages Details An attempt to process the requested IOCTL call has failed. aa...aa: IOCTL code (hexadecimal number) bb...bb: Error code (hexadecimal number) cc...cc: Thread ID of the process that issued the I/O Action Check the following. After the check, if the problem is not solved, execute the DLMgetras utility for collecting HDLM error information, and then contact your HDLM vendor or the maintenance company if there is a maintenance contract for HDLM, and then report the error and detail code.
8. Messages separated by period) aa...aa: Host ID (host port number) (decimal number) bb...bb: Channel number (bus number) (decimal number) cc...cc: Target ID (target ID) (decimal number) dd...dd: LUN (host LU number) (decimal number) Action Please perform the following steps. 1. Note down the HCTL values of the SCSI device as shown in the error messages. 2. Obtain the corresponding HDLM device name for the HCTL value noted in step 1 by using the following command: # dlmcfgmgr -v 3.
8. Messages Details aa...aa: Memory allocation retry count (decimal number) Action None. KAPL05711-I The timeout value and retry count of SCSI INQUIRY has been set. (timeout value = aa...aa, retry count = bb...bb) Details aa...aa: SCSI INQUIRY timeout value bb...bb: SCSI INQUIRY retry count Action None. KAPL05712-I The path was skipped for usage because it is currently being initialized. HCTL value = aa...aa bb...bb cc...cc dd...
8. Messages dd...dd: Maintenance information (hexadecimal number) Action None.
8. Messages 8.6 KAPL06001 to KAPL07000 KAPL06004-E Could not allocate memory. (aa...aa:bb...bb) Details An attempt to reserve memory to save alert information has failed. aa...aa: Program line (hexadecimal number) bb...bb: Target memory size (hexadecimal number) Action Check whether the HDLM driver has started normally.
8. Messages aa...aa: IOCTL code (hexadecimal number) Action None. KAPL06010-E Could not process the IOCTL(aa...aa). (bb...bb:cc...cc) Details An IOCTL request was not processed normally. aa...aa: IOCTL code (hexadecimal number) bb...bb: Error number (hexadecimal number) cc...cc: 0 (fixed) Action Check the message of the HDLM command (dlnkmgr) or HDLM manager, and then take the appropriate action.
8. Messages Information. KAPL06014-E Could not write emergency information into the emergency information buffer. (aa...aa:bb...bb) Details Urgent information from the filter driver was destroyed without being written to the urgent information buffer because the attempt to reserve memory for the information failed. aa...aa: Message code (hexadecimal number) bb...bb: Buffer size (hexadecimal number) Action Check whether any other error occurred. The information that could not be written is discarded.
8. Messages aa...aa: Name of file where error was detected. Action Reinstall an HDLM.
8. Messages 8.7 KAPL07001 to KAPL08000 KAPL07819-I Data for maintenance: aa...aa bb...bb cc...cc dd...dd. Details This message is generated by the core logic for maintenance. aa...aa: Detailed information 1 (decimal (base-10) number) bb...bb: Internal function number of the core logic (decimal (base-10) number) cc...cc: Detailed information 2 (decimal (base-10) number) dd...dd: Detailed information 3 (decimal (base-10) number) Action None.
8. Messages 8.8 KAPL08001 to KAPL09000 KAPL08019-E The path (aa...aa) detected an error (bb...bb). (cc...cc) Details An error occurred in the path. The error is most likely due to a disconnected cable. aa...aa: Path identifier (hexadecimal number) bb...bb: Error code (hexadecimal number) • When a path error is detected by a path health checking or the online operation Displays 0x000F0000 (Fixed). • When a path error is detected through an I/O error Displays the OS error code. cc...
8. Messages ee...ee: Target ID (same as PathName of view -path) (hexadecimal number) ff...ff: HLU number (same as PathName of view -path) (hexadecimal number) gg...gg: Dev number (same as DNum of view -path) (decimal (base-10) number) hh...hh: Host device name (same as HDevName of view -path) Action There could be an error in the path. See 5.3 What To Do for a Path Error and restore the path displayed in the message to running status. KAPL08023-I A path was recovered. PathID = aa...aa, PathName = bb...bb.
8. Messages KAPL08027-E A path was excluded from the items subject to automatic failback. PathID = aa...aa Details A path was excluded from being subject to automatic failbacks because the system judged that an intermittent error was occurring in that path. aa...aa: Path ID (same as PathID of view -path) (decimal (base-10) number) Action An intermittent error has occurred. Check the path for any possible problems. For details on what to do, see 5.
8. Messages 8.9 KAPL09001 to KAPL10000 KAPL09001-E There is no system management permission. Login with root permission and re-install HDLM. Details The current user does not have the necessary administrator permission to install HDLM. Action Login with root permission and re-install HDLM. KAPL09003-E Cannot install in this system. Install HDLM on a supported OS. Details HDLM cannot be installed on this system. Action See 3.1.1 Hosts and OSs Supported by HDLM and install HDLM in a supported OS system.
8. Messages KAPL09013-E Some HDLM drivers could not be removed. Details Deleting several HDLM drivers failed because these HDLM drivers were being used for HDLM upgrade installation, re-installation, or uninstallation. Action Check whether an HDLM device is mounted. If an HDLM device has been mounted, unmount the device, and then remove the HDLM drivers again. For details on the dlmcfgmgr utility, see 7.3 dlmcfgmgr Utility for Managing the HDLM Configuration.
8. Messages maintenance contact of HDLM. KAPL09023-E A file or directory related to HDLM could not be found. Re-install HDLM. Details A target file to copy to the directory of Hitachi Command Suite products other than HDLM could not be found among the files related to HDLM. Action Re-install HDLM. KAPL09024-E An attempt to copy a file or directory related to HDLM has failed. Refer to the Messages section of the HDLM User's Guide for instructions to correct this problem.
8. Messages KAPL09035-E The HDLM driver could not be loaded. Execute the dlmstart utility. For details on the dlmstart utility, refer to the HDLM User's Guide section "dlmstart (Utility for Starting HDLM)". Details The HDLM driver could not be loaded. Action Execute the dlmstart utility. For details on the dlmstart utility, refer to 7.7 dlmstart Utility for Starting HDLM. KAPL09036-E The HDLM manager could not be started. Execute the /etc/init.
8. Messages KAPL09039-E The HDLM devices could not be configured. Execute the HDLM-configuration definition utility (dlmcfgmgr) with the -r parameter specified. For details on the dlmcfgmgr utility, refer to the HDLM User's Guide section "dlmcfgmgr (HDLM-Configuration Definition Utility)". Details The HDLM devices could not be configured. Action Execute the HDLM-configuration definition utility (dlmcfgmgr) with the -r parameter specified. For details on the dlmcfgmgr utility, see 7.
8. Messages KAPL09045-E An attempt to create a file or directory related to HDLM has failed. Make sure that sufficient disk space exists, and then re-install HDLM. Details Installation could not be executed because an attempt to create an HDLM-related file or directory failed. Action Make sure that sufficient disk capacity exists, and then re-install HDLM. KAPL09046-E The RPM file is not in the correct path. Confirm that the installation medium is correct, and then re-install HDLM.
8. Messages KAPL09050-E The driver module dependencies could not be updated. Contact your HDLM vendor or the maintenance company if there is a maintenance contract of HDLM. Details Installation or uninstallation failed because the dependency information for a driver module could not be updated. Action Contact your HDLM vendor or the maintenance company if there is a maintenance contact of HDLM. KAPL09051-E You do not have permission to execute the file. File name = aa...
8. Messages KAPL09078-I The emergency license was installed. The license expires on aa...aa. Details An emergency license was installed. aa...aa: Year (4 digits)/month (01-12)/day (01-31) Action Install a permanent license by the expiration day. KAPL09079-I The permanent license has been installed. Action None. KAPL09080-I The temporary license has been installed. The license expires on aa...aa. Details The temporary license has been installed. aa...
8. Messages KAPL09083-W The emergency license expired. Action Install a permanent license. KAPL09087-E The entered license key is invalid. Renewal of the license key will now stop. Obtain a valid license key, and then re-install HDLM. Details License renewal will now stop because an invalid license key was entered. Action Obtain a valid license key, and then re-install HDLM. KAPL09088-E The entered license key is invalid. The HDLM installation will now terminate.
8. Messages KAPL09092-I The installation was stopped because a stop request was received. Details The installation was aborted, because a stop request was received. Action Installation was terminated before all processing could be completed. If the HDLM RPM has been installed, then use the rpm command to perform uninstallation. KAPL09093-I aa...aa will be installed. Is this OK? [y/n]: Details The message checks whether you want to install aa...aa. aa...
8. Messages Action None. KAPL09097-E A package installable on this system was not found. Please check whether HDLM is supported for this system. For details about installing the package on a supported OS, refer to the HDLM User's Guide section "Hosts and OSs Supported by HDLM". Details A suitable package for installation on this system could not be found. Action Please check whether HDLM is supported for this system. For details about installing the package on a supported OS, see 3.1.
8. Messages Details There is no license key file in the designated directory. aa...aa: /var/tmp/hdlm_license Action Save the correct license key file in the designated directory, and then re-execute installation. /var/tmp/hdlm_license KAPL09115-W An attempt to delete the license key file has failed. File name = aa...aa Details An attempt to delete the license key file has failed. aa...aa: /var/tmp/hdlm_license Action If a license key file exists, delete it.
8. Messages DVD-ROM was copied, make sure that all the contents of the DVD-ROM have been copied to that directory, and then retry the installation. KAPL09135-E One of the following was executed at the same time as an HDLM command set -lic operation: another set -lic operation, or an update of the license for an update installation. Action Check the license by using the HDLM command's view -sys -lic operation.
8. Messages Details aa...aa: Referenced directory name Action Check the directory displayed in the message. Re-install HDLM after creating the directory displayed in the message. KAPL09147-E An attempt to create a file related to HDLM has failed. File name = aa...aa. Remove unnecessary files and secure free space on the file system. Check the write permissions for the directory. Re-install HDLM. Details aa...
8. Messages /media/cdrom • For SUSE LINUX Enterprise Server 9: /media/cdrom /media/cdrecorder /media/dvd /media/dvdrecorder /media/dvdram • For SUSE LINUX Enterprise Server 10 or SUSE LINUX Enterprise Server 11: /media/media-volume-ID Action Check the HDLM installation media, or check the current kernel. KAPL09177-I HDLM version: aa...aa Details aa...aa: The version of HDLM to be installed. Action None. KAPL09191-W The installation information settings file does not exist.
8. Messages Linux 6 Kernels Supported by HDLM, Table 3-5: SUSE LINUX Enterprise Server 9 Kernels Supported by HDLM, Table 3-6: SUSE LINUX Enterprise Server 10 Kernels Supported by HDLM, Table 3-7: SUSE LINUX Enterprise Server 11 Kernels Supported by HDLM, Table 3-8: Oracle Enterprise Linux 4 Kernels Supported by HDLM, or Table 3-9: Oracle Enterprise Linux 5 Kernels Supported by HDLM. Action Make sure that the currently running OS is supported. KAPL09210-I aa...aa will now start. Details aa...
8. Messages Details Although the aa...aa processing has ended, an error occurred during the processing. aa...aa: ENVIRONMENT_SETTINGS, driver_config_settings, or installhdlm Action Review the contents of installation information settings file when KAPL01008-W or KAPL01009-W is outputted before this message. For details, see 7.10.3 Editing an Installation-Information Settings File. When a message except for the above was outputted, perform the action indicated in that error message.
8. Messages An error occurred during I/O of a file that installhdlm uses. aa...aa: Error number that indicates the executed processing (decimal (base-10) number) bb...bb: Return value of the executed processing (decimal (base-10) number) Action Make sure that sufficient unused capacity exists for the /tmp directory. If the capacity is insufficient, allocate the required amount of capacity, and then retry the operation. For details about the required unused capacity.
8. Messages permission, re-execute installhdlm. If aa...aa is installhdlm_analysis: The correct location of installhdlm_analysis is /DVD-ROM/ HDLM_Linux/bin. Make sure that the utility you want to execute is in the correct location and that you have the required permissions. If a utility is not in the correct location, copy the required files to the correct location, and then retry the operation. If you do not have a required permission, grant required permissions to yourself, and then retry the operation.
8. Messages KAPL09221-W The definition of the installation information settings file includes an unusable character. Error Code = aa...aa,bb...bb, line = cc...cc Details A character that cannot be used in a non-comment line was used. aa...aa: Error number (decimal number) that specifies the executed processing bb...bb: Return value (decimal number) of the executed processing cc...cc: Line number (decimal number) of an installation information settings file.
8. Messages operation. KAPL09229-W The definition of the installation information settings file includes an invalid section name. Error Code = aa...aa,bb...bb, line = cc...cc Details A section that does not exist is included. aa...aa: Error number (decimal number) that specifies the executed processing bb...bb: Return value (decimal number) of the executed processing cc...cc: Line number (decimal number) of an installation information settings file.
8. Messages Specify the revised installation information settings file and then retry the operation. KAPL09232-W The composition of the definition of the installation information settings file is invalid. Error Code = aa...aa,bb...bb, line = cc...cc Details A key, key value, or equal sign (=) is missing. aa...aa: Error number (decimal number) that specifies the executed processing bb...bb: Return value (decimal number) of the executed processing cc...
8. Messages operation. KAPL09238-W The specified file is not a normal one. Fail name = aa...aa Details A file other than a normal one (for example, a directory file or a special file.) is specified. aa...aa: Specified file name (character string) Action Specify the correct file, and then retry the operation. KAPL09239-I The system will now restart. Details The host will restart because restart was specified in the installation information settings file. Action None.
8. Messages KAPL09245-E Could not delete file supporting driver update. Details Could not delete file supporting driver update. Action Contact your HDLM vendor or the maintenance company if there is a maintenance contact of HDLM. KAPL09267-W The file does not exist. File name = aa...aa Details aa...aa: /etc/.DynamicLinkManager/Path00, /etc/.HBaseAgent/ Path00 Action Reinstall HDLM. KAPL09268-W You do not have read permission for the file. File name = aa...aa Details aa...aa: /etc/.
8. Messages aa...aa: /HDLM installation directory, /HBsA installation directory Action Reinstall HDLM. KAPL09501-E HDLM is not installed on this system. Details An SP cannot be applied because HDLM is not installed on the system. Action Check whether HDLM has been correctly installed. KAPL09505-E aa...aa cannot be applied to the installed bb...bb. Details This HDLM or SP (aa...aa) cannot be used for an upgrade installation or re-installation on the already installed HDLM or installed SP (bb...bb). aa..
8. Messages KAPL09510-E Service Pack aa...aa cannot be installed. A newer version has already been installed. Details A newer version is already installed. Installation of SP (aa...aa) is stopped. aa...aa: Version of SP to be installed Action You do not have to install the SP. Keep using the already installed HDLM. KAPL09511-E The RPM file for the service pack was not found.(directory = aa...
8. Messages all of the DVD-ROM files. KAPL09603-E The installation will now stop because a command or utility cannot be executed. Confirm that the command or utility (aa...aa) exists, and that you have the proper permission. Details aa...aa: Name of the command or utility that cannot be executed. Action • When the output information is an HDLM utility: If an installation is performed from the DVD-ROM, confirm that the DVD-ROM is not damaged.
8. Messages 8.10 KAPL10001 to KAPL11000 KAPL10001-W No parameter has been specified. Details No directory to which the collected information will be output has been specified. Action Check the parameters of the DLMgetras utility for collecting HDLM error information, and then retry. For details on the DLMgetras utility, see 7.2 DLMgetras Utility for Collecting HDLM Error Information. KAPL10002-W Too many parameters have been specified. Details Four or more parameters have been specified.
8. Messages Action Check the parameters of the DLMgetras utility for collecting HDLM error information, and then retry. For details on the DLMgetras utility, see 7.2 DLMgetras Utility for Collecting HDLM Error Information. KAPL10005-W The number of parameters is insufficient. Details The -f parameter exists but the file for defining the information to be collected does not exist. The number of parameters is insufficient.
8. Messages Details You do not have write permission for the specified directory, or the creation of a subdirectory of the specified directory failed. aa...aa: first parameter Action Check the following. 1. Check whether you have access permission for the specified directory. 2. Check whether the specified directory name is correct. 3. Check that the disk has sufficient unused capacity. KAPL10009-W The specified directory already exists.
8. Messages Details Two or more file names or directory names exist in the file for defining the information to be collected. aa...aa: Line number of the file for defining information to be collected (decimal number) bb...bb: Indicated contents in a line Action After the DLMgetras utility for collecting HDLM error information terminates, check the contents of the file for defining the information to be collected. This file is shown in the message.
8. Messages bb...bb: Indicated contents in a line Action After the DLMgetras utility for collecting HDLM error information terminates, check the contents of the file for defining the information to be collected. This file is shown in the message. If the contents of the file are incorrect, correct them and then try to collect error information again. The DLMgetras will ignore the specified file and continue processing. For details on the DLMgetras utility, see 7.
8. Messages Details The root directory has been specified in the first parameter. A root "/" cannot be specified in a directory to which collected information is output. Action Check the parameters of the DLMgetras utility for collecting HDLM error information, and then re-execute. For details on the DLMgetras utility, see 7.2 DLMgetras Utility for Collecting HDLM Error Information. KAPL10017-W You lack privileges for executing the utility for collecting HDLM error information.
8. Messages KAPL10022-I The utility for collecting HDLM error information completed normally. Details Error information has been collected. Action None. For details on the DLMgetras utility, see 7.2 DLMgetras Utility for Collecting HDLM Error Information. KAPL10030-I A user terminated the utility for collecting HDLM error information. Details Processing of the DLMgetras utility for collecting HDLM error information has been terminated because the user replied to the confirmation with an n response.
8. Messages The file to collect does not exist. aa...aa: Name of file to collect Action None. KAPL10034-E The file could not be copied. Filename = aa...aa, Details = bb...bb Details Execution of the cp command failed. aa...aa: Name of the file you tried to copy bb...bb: cp command output message Action An error occurred while the collected files were being copied. The environment, in which a user executed the command, might be wrong. Check the system configuration.
8. Messages the time of execution, and then contact your HDLM vendor or the maintenance company if you have a maintenance contract for HDLM. KAPL10037-W The file does not exist or does not have executable permissions. Filename = aa...aa Details There is no output file, or the user does not have execution permission. aa...aa: file name Action Make sure the specified file exists and the user has execution permission. KAPL10049-I Error information collection command = aa...aa, Return value = bb...
8. Messages Managing the HDLM Configuration. KAPL10302-I /sbin/dlmcfgmgr completed normally. Details The HDLM-configuration definition utility (dlmcfgmgr) has completed successfully. Action None. For details on the dlmcfgmgr utility, see 7.3 dlmcfgmgr Utility for Managing the HDLM Configuration. KAPL10305-E A special file could not be created. Filename = aa...aa. Execute the DLMgetras utility to collect error information, and then contact your vendor or maintenance company.
8. Messages Details The configuration definition file (/etc/opt/DynamicLinkManager/ .dlmfdrv.conf) could not be created. Action Execute the DLMgetras utility for collecting HDLM error information, and then contact your HDLM vendor or the maintenance company if there is a maintenance contract for HDLM. For details on the DLMgetras utility, see 7.2 DLMgetras Utility for Collecting HDLM Error Information. KAPL10309-W The HDLM management-target disk does not exist. Check the system configuration.
8. Messages aa...aa: Logical device file name of HDLM device Action None. KAPL10316-E Could not allocate memory. Size = aa...aa. Execute the DLMgetras utility to collect error information, and then contact your vendor or maintenance company. Details Securing of memory failed. aa...aa: Target memory size (decimal number) Action Execute the DLMgetras utility for collecting HDLM error information, and then contact your HDLM vendor or the maintenance company if there is a maintenance contract for HDLM.
8. Messages | -u {special-file-name ... | all} |-logfs [log-file-size]} Details Since the parameter of the HDLM-configuration definition utility (dlmcfgmgr) was inaccurate, execution of the dlmcfgmgr utility failed. For details on the dlmcfgmgr utility, see 7.3 dlmcfgmgr Utility for Managing the HDLM Configuration. Action Specify the correct options, and then re-execute the dlmcfgmgr utility. KAPL10320-E The file format is invalid. File name = aa...aa.
8. Messages KAPL10322-E A file that defines HDLM-unmanaged disks could not be created. File name = aa...aa, Errno = bb...bb. Execute the DLMgetras utility to collect error information, and then contact your vendor or maintenance company. Details Execution of the HDLM-configuration definition utility (dlmcfgmgr) failed because an exclusion disk definition file (aa...aa) could not be created. aa...aa: File name bb...
8. Messages None. KAPL10325-E A regular expression cannot be established. The files will not be deleted. Errno = aa...aa. Execute the DLMgetras utility to collect error information, and then contact your vendor or maintenance company. Details An HDLM device could not be deleted because the device could not be found by using a regular expression. aa...
8. Messages KAPL10328-E The entered value is invalid. The HDLM-configuration definition utility processing will now stop. Execute the HDLM-configuration definition utility again. Details An invalid value was entered 3 or more times for the message confirming the execution of the HDLM-configuration definition utility (dlmcfgmgr). Processing is interrupted. Action Re-execute the dlmcfgmgr utility. For details on the dlmcfgmgr utility, see 7.3 dlmcfgmgr Utility for Managing the HDLM Configuration.
8. Messages Execute the DLMgetras utility for collecting HDLM error information, and then contact your HDLM vendor or the maintenance company if there is a maintenance contract for HDLM. For details on the DLMgetras utility, see 7.2 DLMgetras Utility for Collecting HDLM Error Information. KAPL10331-E The registering of the block device driver for HDLM failed. Errno = aa...aa. Execute the DLMgetras utility to collect error information, and then contact your vendor or maintenance company.
8. Messages information, and then contact your vendor or maintenance company. Details An internal error occurred during file operation. aa...aa: File name Action Execute the DLMgetras utility for collecting HDLM error information, and then contact your HDLM vendor or the maintenance company if there is a maintenance contract for HDLM. For details on the DLMgetras utility, see 7.2 DLMgetras Utility for Collecting HDLM Error Information. KAPL10334-E Ioctl aa...aa failed with errno = bb...bb.
8. Messages Execute the DLMgetras utility for collecting HDLM error information, and then contact your HDLM vendor or the maintenance company if there is a maintenance contract for HDLM. For details on the DLMgetras utility, see 7.2 DLMgetras Utility for Collecting HDLM Error Information. KAPL10336-W A file cannot be deleted. File name = aa...aa. Manually delete the file aa...aa Details An attempt to delete a file has failed. aa...aa: File name Action Delete the file shown in File name.
8. Messages This message checks whether you want to change the configuration definition of an HDLM device. Action Enter y to continue. Enter n to cancel. KAPL10340-E Several processes failed. See the aa...aa file. Check the message output before this message. Details Some processes in the execution of the HDLM-configuration definition utility (dlmcfgmgr) have failed. Check the file aa...aa. aa...aa: File name Action See the /var/opt/DynamicLinkManager/log/dlmcfgmgr1.
8. Messages KAPL10344-I HDLM has detected and registered a new path to an already registered HDLM device. HDLM device = aa...aa, Device = bb...bb (Host: cc...cc Channel: 0 ID: dd...dd Lun: ee...ee) Details By executing the HDLM-configuration definition utility (dlmcfgmgr), a newly detected path has been added to the registered HDLM device. aa...aa: HDLM device name bb...bb: SCSI device name cc...cc: Host ID (decimal number) Channel: Channel ID (fixed value: 0) (decimal number) dd...
8. Messages KAPL10346-I HDLM has unregistered an existing HDLM device. HDLM device = aa...aa Details By executing the HDLM-configuration definition utility (dlmcfgmgr), the registered HDLM device has been unregistered. aa...aa: Logical device file name of HDLM device Action None. For details on the dlmcfgmgr utility, see 7.3 dlmcfgmgr Utility for Managing the HDLM Configuration. KAPL10347-I The HDLM device is no longer under management. HDLM device = aa...
8. Messages aa...aa: Logical device file name of HDLM device Action None. For details on the dlmcfgmgr utility, see 7.3 dlmcfgmgr Utility for Managing the HDLM Configuration. KAPL10350-E The HDLM driver(s) is not loaded. Refer to the Messages section of the HDLM User's Guide for instructions to correct this problem. Details An attempt to execute the HDLM-configuration definition utility (dlmcfgmgr) failed because the HDLM driver was not loaded. Action Carry out the following process: 1.
8. Messages KAPL10352-W The HDLM device is in use. HDLM device = aa...aa. Stop the application using the HDLM device, unmount the HDLM device being mounted, and then execute the dlmcfgmgr utility again. Details An attempt to execute the HDLM-configuration definition utility (dlmcfgmgr) failed because the specified HDLM device (aa...aa) was using it. aa...
8. Messages device, and re-execute the dlmcfgmgr utility. For details on the dlmcfgmgr utility, see 7.3 dlmcfgmgr Utility for Managing the HDLM Configuration. KAPL10355-E An attempt to unregister partition information for the HDLM device(s) failed. Stop the application using the HDLM device, and unmount the mounting HDLM device, and then execute the dlmcfgmgr utility again.
8. Messages (decimal number) Action Revise the configuration of the HDLM device to reduce the number of HDLM devices used, and then re-execute the dlmcfgmgr utility. For details on the dlmcfgmgr utility, see 7.3 dlmcfgmgr Utility for Managing the HDLM Configuration. KAPL10358-E The device name is too long. Maximum length = aa...aa. Check that the logical device file name of the HDLM device is correct, and then execute the dlmcfgmgr utility again.
8. Messages aa...aa: HDLM device name bb...bb: SCSI device name cc...cc: Host ID (decimal number) Channel: Channel ID (fixed value: 0) (decimal number) dd...dd: Target ID (decimal number) ee...ee: LUN (decimal number) Action None. For details on the dlmcfgmgr utility, see 7.3 dlmcfgmgr Utility for Managing the HDLM Configuration. KAPL10361-I HDLM has deactivated a path for the HDLM device. HDLM device = aa...aa, Device = bb...bb (Host: cc...cc Channel: 0 ID: dd...dd Lun: ee...
8. Messages bb...bb: SCSI device name cc...cc: Host ID (decimal number) Channel: Channel ID (fixed value: 0) (decimal number) dd...dd: Target ID (decimal number) ee...ee: LUN (decimal number) Action Stop the application that uses the HDLM device, unmount the HDLM device being mounted, and then re-execute the dlmcfgmgr utility. For details on the dlmcfgmgr utility, see 7.3 dlmcfgmgr Utility for Managing the HDLM Configuration. KAPL10363-W A data mismatch was found. HDLM device = aa...aa.
8. Messages KAPL10365-W The LDEV for an HDLM device has changed. The processing for that HDLM device will be cancelled. HDLM device = aa...aa. Execute the HDLM-configuration definition utility (dlmcfgmgr) with the -v option, and then check the configuration of the HDLM device. Details The processing for the HDLM device was interrupted because an LDEV corresponding to an HDLM device was changed. aa...
8. Messages KAPL10643-W A necessary parameter is not specified. Details A parameter is not specified for the dlmpr utility. Action Execute the dlmpr -h utility to check the parameter, and then retry execution. For details on the dlmpr utility, see 7.5 dlmpr Utility for Clearing HDLM Persistent Reservation. KAPL10644-W The specified parameters cannot be specified at the same time. parameter = aa...aa Details The specified parameters cannot be specified for the dlmpr utility at the same time. aa...
8. Messages and then retry. For details on the dlmpr utility, see 7.5 dlmpr Utility for Clearing HDLM Persistent Reservation. KAPL10648-E An internal error occurred in the dlmpr utility. Error Code = aa...aa Details An error not caused by the user has occurred in the dlmpr utility. aa...aa: Error number (character string) Action When the error code is 1: Make sure that there is sufficient memory.
8. Messages Details The dlmpr utility has been terminated because n was sent to a request. Action None. For details on the dlmpr utility, see 7.5 dlmpr Utility for Clearing HDLM Persistent Reservation. KAPL10652-E The entered value is invalid. The operation stops. Details An invalid response was sent three times consecutively to a request. Action Re-execute the dlmpr utility. For details on the dlmpr utility, see 7.5 dlmpr Utility for Clearing HDLM Persistent Reservation.
8. Messages For details on the dlmcfgmgr utility, see 7.3 dlmcfgmgr Utility for Managing the HDLM Configuration. KAPL10922-E The version of the kernel supported by the installed HDLM does not match the currently running kernel version. Install the HDLM software that supports this kernel version. Details The version of the kernel to which installed HDLM has adjusted and the kernel that is running now is not corresponding.
8. Messages For details on the DLMgetras utility, see 7.2 DLMgetras Utility for Collecting HDLM Error Information. KAPL10935-W An internal error occurred in the file operation. File name = / etc/opt/DynamicLinkManager/hdlm_utillog.conf. Execute the DLMgetras utility to collect error information, and then contact your vendor or maintenance company. Details An internal error occurred during operations of the settings file for the HDLM utility log (/etc/opt/DynamicLinkManager/hdlm_utillog.conf).
8. Messages same as, the maximum number. Refer to the Messages section of the HDLM User's Guide for instructions to correct this problem. Details The number of paths in the entire system exceeded the maximum number of paths supported in HDLM. Review and, if necessary, revise the configuration. Action The maximum number of paths supported in HDLM has been exceeded. Review and, if necessary, revise the number of paths in the entire system. For details on the number of paths supported in HDLM, see 3.1.
8. Messages If it is not correct, execute the DLMgetras utility for collecting HDLM error information, and then contact your HDLM vendor or the maintenance company if there is a maintenance contract for HDLM. For details on the DLMgetras utility, see 7.2 DLMgetras Utility for Collecting HDLM Error Information. KAPL10941-W The file could not be opened. File name = aa...aa, Errno = bb...bb Details The file could not be opened. aa...aa: File name bb...
8. Messages Details An error occurred during processing to read a file in the (aa...aa) function. bb...bb: File name cc...cc: Errno Action Confirm that the configuration for HDLM devices is correct. If it is not correct, execute the DLMgetras utility for collecting HDLM error information, and then contact your HDLM vendor or the maintenance company if there is a maintenance contract for HDLM. For details on the DLMgetras utility, see 7.2 DLMgetras Utility for Collecting HDLM Error Information.
8. Messages iscsi_boot=y KAPL10949-E A necessary file was not found. File name = aa...aa Details A necessary file was not found. aa...aa: File name Action Reinstall an HDLM.
8. Messages 8.11 KAPL11001 to KAPL12000 KAPL11901-I aa...aa has started. Details The operation has started on the host. aa...aa: Operation (character string) • Get Path Information • Get Option Information • Set Option Information • Clear Data • Get HDLM Manager Status • Get HDLM Driver Status • Get HDLM Alert Driver Status • Get SNMP Trap Information • Set SNMP Trap Information • Set LU Load Balance • Get Path Status Log Information • Get Local Time Action None. KAPL11902-I aa...aa has started.
8. Messages None. KAPL11903-I aa...aa has completed normally. Details The operation has completed normally on the host. aa...aa: Any of the following operations (character string) • Get Path Information • Get Option Information • Set Option Information • Clear Data • Get HDLM Driver Status • Get HDLM Manager Status • Get HDLM Alert Driver Status • Online • Offline • Get SNMP Trap Information • Set SNMP Trap Information • Set LU Load Balance • Get Path Status Log Information • Get Local Time Action None.
8. Messages • Clear Data • Get HDLM Driver Status • Get HDLM Manager Status • Get HDLM Alert Driver Status • Online • Offline • Get SNMP Trap Information • Set SNMP Trap Information • Set LU Load Balance • Get Path Status Log Information bb...bb: Error status returned from the API (character string) Action Execute the DLMgetras utility for collecting HDLM error information, and then contact your HDLM vendor or the maintenance company if you have a maintenance contract for HDLM.
8. Messages KAPL11907-I XML reception - aa...aa Details This information is required for resolving problems. aa...aa: XML information (character string) Action None. KAPL11908-I XML transmission - aa...aa Details This information is required for resolving problems. aa...aa: XML information (character string) Action None.
8. Messages 8.12 KAPL12001 to KAPL13000 KAPL12035-E The version of the kernel supported by the installed HDLM does not match the currently running kernel version. Details The version of the kernel to which installed HDLM has adjusted and the kernel that is running now is not corresponding. There is a possibility of installing the package of the kernel after installing HDLM. Action Install HDLM that adjusts to the kernel that is running now. KAPL12036-E The HDLM file is invalid. File name = aa...
8. Messages Action If the file name displayed in the message is the file name specified in the fstab parameter of the Boot Disk Support Utility (dlmmkinitrd) Check the specified file name, specify the file name of the existing fstab file, and then re-execute the utility. If the file name displayed in the message is the HDLM file name shown below, HDLM may not be installed correctly. In this situation, re-install HDLM.
8. Messages KAPL12306-I The list of files required in the initial ramdisk image is being created. Action None. KAPL12307-I The initial ramdisk file system is being created. Action None. KAPL12308-I The initial ramdisk file system is being mounted. Mount point = aa...aa Details aa...aa: Mount point to be used Action None. KAPL12309-I Required files are being copied to the initial ramdisk. Action None. KAPL12310-I The linuxrc executable is being created. Action None.
8. Messages Action None. KAPL12314-I The compressed initial ramdisk image is being created. Action None. KAPL12315-I A compressed initial ramdisk image aa...aa was created with the ramdisk size = bb...bb KB. Details aa...aa: The created initial ramdisk image bb...bb: The ramdisk size required for the created initrd image (decimal number) Action None. KAPL12316-I The SCSI root partition is aa...aa Details aa...aa: The SCSI device partition on which the root is mounted Action None.
8. Messages This message is always preceded by some other specific error message. KAPL12320-E A file or directory already exists. File name = aa...aa Details aa...aa: The name of the already existing file Action To the file name of the initial RAM disk image file specified in the parameter of the Boot Disk Support Utility (dlmmkinitrd), do not specify an existing file name. However, if overwriting the existing file, specify the -f parameter.
8. Messages aa...aa: The name of the module whose insertion has failed Action Confirm that the system environments are not changed after creating the initial ramdisk image file. Check whether there is a mistake in the initial ramdisk image file specified in the config file of the boot loader. KAPL12325-I The command started. Command name = aa...aa Details aa...aa: The started command Action None. KAPL12326-E The command could not execute. Command name = aa...aa Details aa...
8. Messages dlmcfgmgr utility. • Confirm that the user has write permission in the root directory (/). dlnkmgr: • Confirm that HDLM has been configured. • Take action according to the contents output in the log of the dlmcfgmgr utility. • Confirm that the user has write permission in the root directory (/). gzip: Confirm that that the unused capacity is sufficient at the creation destination of the initial ramdisk image file.
8. Messages KAPL12327-E An invalid entry is registered in the file. File name = aa...aa Details aa...aa: The name of the file containing the invalid entry Action Take the following actions depending on the file name output, and then re-execute the dlmmkinitrd utility. In the case of /etc/lvm/lvm.conf file Edit the following lines as described in 3.7.5 Settings for Using a Logical Volume (LVM2) on an HDLM Device as a Boot Disk or 3.7.
8. Messages None. KAPL12331-E A directory with the specified kernel version does not exist. Directory name = aa...aa Details aa...aa: The directory where the kernel module is stored For Red Hat Enterprise Linux: The name following /lib/modules/ directory is the kernel version specified with the parameter. For SUSE LINUX Enterprise Server: The name following /lib/modules/ directory is a kernel version which the dlmmkinitrd utility for supporting the boot disk has recognized.
8. Messages KAPL12333-E An HBA that HDLM can support as a boot disk was not found in the file. File name = aa...aa Details aa...aa: The name of the file referenced by the dlmmkinitrd utility for supporting the boot disk Action Make sure that an HBA driver that can be used when the boot disk is an HDLM device is in the following file: • When Red Hat Enterprise Linux AS4/ES4 or Red Hat Enterprise Linux 5 is used: /etc/modprobe.conf • When Red Hat Enterprise Linux 6 is used: /etc/modprobe.d/dlmdrvopt.
8. Messages Modify the fstab file specified in the fstab parameter of the boot disk support utility (dlmmkinitrd), or the file system of the /etc/fstab file root partition, to a file system that can be applied when the HDLM device is used as a boot disk (ext2 or ext3). Also, make sure that the kernel package has been installed correctly. KAPL12336-E The user does not have permission to execute the utility for supporting the boot disk. Action Retry as a user with root permission.
8. Messages Action None. KAPL12344-I A compressed initial ramdisk image (aa...aa) was created. Details aa...aa: The created initial ramdisk image Action None. KAPL12345-E The version of the kernel supported by the installed HDLM does not match the currently running kernel version. Details The version of the kernel to which installed HDLM has adjusted and the kernel that is running now is not corresponding. There is a possibility of installing the package of the kernel after installing HDLM.
8. Messages Wait until the executing utility finishes, and then re-execute dlmsetopt. If two or more utilities are not executing simultaneously, delete the following files, and then re-execute the utility: /etc/opt/DynamicLinkManager/.dlm_modules.conf.lock KAPL12553-W Usage: /opt/DynamicLinkManager/bin/dlmsetopt {-r retrycount | -inqt InquiryTimeout | -inqr InquiryRetry | -h} Action Refer to 7.6 dlmsetopt Utility for Setting HDLM Driver Options, and then specifying the correct argument.
8. Messages Action Restart the computer. KAPL12559-E An invalid value was specified in the parameter. Option = aa...aa, Parameter = bb...bb Details aa...aa: Option bb...bb: Specified parameter(Maximum 10 characters. If there are more than 10 characters, only 10 characters will be output followed by ...) Action Refer to 7.6 dlmsetopt Utility for Setting HDLM Driver Options, and then specifying the correct argument. Then, re-execute the dlmsetopt utility. KAPL12560-E An option is not specified.
8. Messages KAPL12563-E An attempt to create a directory has failed. Directory = aa...aa Details aa...aa: Directory that an attempt was made to create Action Make sure there is enough free disk capacity, and then re-execute the utility for setting HDLM driver option (dlmsetopt). Delete any unnecessary files in the file system, and then re-execute the dlmsetopt utility. KAPL12564-E An attempt to back up a file has failed. File name = aa...aa Details aa...
8. Messages dlmdrvopt.conf. • When the file contents match: Delete the /etc/opt/DynamicLinkManager/DLMSETOPT/ modprobe.conf file. Then, re-execute the dlmsetopt utility to make sure that an error does not occur. • When the file contents do not match: Overwrite the /etc/modprobe.conf file with the /etc/opt/ DynamicLinkManager/DLMSETOPT/modprobe.conf file, and then re-configure the content that was configured in the /etc/modprobe.conf file according to the user's environment.
8. Messages Action Install HDLM that adjusts to the kernel that is running now. KAPL12802-E The HDLM file is invalid. File name = aa...aa Details A file necessary for processing HDLM cannot be found. Alternatively, the content of a file is invalid. aa...aa: Name of file where error was detected. Action Reinstall an HDLM. KAPL12851-E The version of the kernel supported by the installed HDLM does not match the currently running kernel version.
8. Messages Action Install HDLM that adjusts to the kernel that is running now. KAPL12902-E The HDLM file is invalid. File name = aa...aa Details A file necessary for processing HDLM cannot be found. Alternatively, the content of a file is invalid. aa...aa: Name of file where error was detected. Action Reinstall an HDLM.
8. Messages 8.13 KAPL13001 to KAPL14000 KAPL13204-W The file does not exist. File name = aa...aa Details aa...aa: /etc/.DynamicLinkManager/Path00, /etc/.HBaseAgent/ Path00 Action Reinstall HDLM. KAPL13205-W You do not have read permission for the file. File name = aa...aa Details aa...aa: /etc/.DynamicLinkManager/Path00, /etc/.
8. Messages KAPL13401-E No parameter has been specified. Details No parameter (directory to which collected information is output) has been specified. Action Check the parameters of the utility for collecting HDLM install error information, and then retry. KAPL13402-E The first parameter has not been set to a directory. Value= aa...aa Details The first directory must be set to a directory to which collected information is output. aa...
8. Messages Action The specified directory already exists. Enter y to overwrite the existing file. Enter n or press any other key to terminate the utility for collecting HDLM install error information without executing it. KAPL13405-E The root directory has been specified in the first parameter. Details A root "/" cannot be specified in a directory to which collected information is output. Action Check the parameters of the utility for collecting HDLM install error information, and then retry.
8. Messages The process has been terminated by an operation such as Ctrl + c. Action The utility for collecting HDLM install error information terminated before completion. If the directory is unnecessary, delete directory. KAPL13409-I The utility for collecting HDLM install error information completed normally. Details The processing of the utility for collecting HDLM install error information has been terminated as n was sent to a confirmation. Action None.
8. Messages Action Re-execute the utility for collecting HDLM install error information. KAPL13413-W The file does not exist. File = aa...aa Details The file subject to collecting does not exist. aa...aa: Name of file to collect Action None. KAPL13414-E The file could not be copied. File = aa...aa, Details = bb...bb Details Execution of the cp command failed. aa...aa: file name you tried to copy bb...bb: cp output message Action Check the system configuration.
8. Messages aa...aa: gzip command output message Action See the details in the message, and then remove the cause of the error. For information about the error, collect the archive in the output directory specified at the time of execution, and then contact your HDLM vendor or the maintenance company if you have a maintenance contract for HDLM. KAPL13417-E The install error information does not exist. Details The install error information does not exist.
8. Messages KAPL13504-I A symbolic link has been modified. Symbolic link name = aa...aa Details aa...aa: Name of the modified symbolic link Action None. KAPL13505-E A system script cannot be modified. File name = aa...aa Details aa...aa: File name of the system script that cannot be modified Action Contact your HDLM vendor or the maintenance company if there is a maintenance contact of HDLM. KAPL13506-E Modification of a system script has failed. File name = aa...aa Details aa...
8. Messages Re-execute dlmupdatesysinit utility as a user with root permission. Refer to 7.8 dlmupdatesysinit Utility for Updating System Scripts. KAPL13509-E The utility for update system scripts can be executed with the name dlmupdatesysinit only. Action Change the utility name back to dlmupdatesysinit, and then execute it. Refer to 7.8 dlmupdatesysinit Utility for Updating System Scripts. KAPL13510-E Multiple instances of the utility for update system scripts cannot be executed concurrently.
8. Messages KAPL13514-W Usage: /opt/DynamicLinkManager/bin/dlmupdatesysinit Action Check for parameters, and then re-execute the dlmupdatesysinit utility. Refer to 7.8 dlmupdatesysinit Utility for Updating System Scripts. KAPL13515-E A command required by HDLM not found. Command = aa...aa Details aa...aa: File name of command Action Install a package that includes the command indicated in the message. Next, execute the dlmupdatesysinit utility. Refer to 7.
8. Messages Check for and, if necessary, restore the system file indicated in the message. Next, execute the dlmupdatesysinit utility. Refer to 7.8 dlmupdatesysinit Utility for Updating System Scripts. KAPL13519-E An HDLM file required for the dlmupdatesysinit utility was not found. File name = aa...aa Details aa...aa: File name Action Reinstall an HDLM. KAPL13520-E An HDLM directory required for the dlmupdatesysinit utility was not found. Directory name = aa...aa Details aa...
8. Messages Reinstall an HDLM. KAPL13601-W The audit log configuration file does not exist. Restart the HDLM Manager, and execute the "dlnkmgr view -sys -audlog" command and check the setting. Details The audit log configuration file does not exist. Action Restart the HDLM manager, execute the "dlnkmgr view -sys -audlog" command, and then specify any desired settings by using the "dlnkmgr set -audlog" command or the "dlnkmgr set -audfac" command as necessary.
8. Messages file. Action Contact your HDLM vendor or the maintenance company if there is a maintenance contract for HDLM. KAPL13605-W An error occurred during processing to output the audit log configuration file. Details An internal parameter error occurred during output of the audit log data. Action Contact your HDLM vendor or the maintenance company if there is a maintenance contract for HDLM. KAPL13606-W An error occurred during processing to output the audit log configuration file.
8. Messages KAPL13904-I Filter driver had been loaded. Filter driver's loading was skipped. Action None. KAPL13905-I HDLM manager had started. HDLM manager's start processing was skipped. Action None. KAPL13906-I aa...aa will now start. Details aa...aa: Alert driver's loading, The process related to Alert driver, Filter driver's loading, dlmcfgmgr, or DLMManager Action None. KAPL13907-I aa...aa completed successfully. Details aa...
8. Messages /opt/DynamicLinkManager/bin/dlmmgr file does not exist or does not have executable permissions. Reinstall an HDLM. KAPL13909-W Usage: /opt/DynamicLinkManager/bin/dlmstart Action Re-execute the utility for HDLM start if necessary. Refer to 7.7 dlmstart Utility for Starting HDLM. KAPL13910-W The error occurred while processing the utility for HDLM start. Action Resolve the problem according to the message KAPL13908-W, which was output before this message.
8. Messages KAPL13913-E A command has failed. Command = aa...aa, details = bb...bb Details aa...aa: Command that failed bb...bb: Message that the command output Action When the command is /sbin/modprobe: Reinstall an HDLM When the command is /bin/mknod: Remove the error cause described in the message output by the command indicated in the message KAPL13913-E. Next, re-execute the utility for HDLM start if necessary. Refer to 7.7 dlmstart Utility for Starting HDLM.
8. Messages 8.14 KAPL15001 to KAPL16000 KAPL15001-I The registered value of ReserveKey was successfully displayed. Command Line = aa...aa Details aa...aa: Name of the utility that the user executed KAPL15002-E An attempt to display the registered value of ReserveKey has failed. Command Line = aa...aa Details aa...aa: Name of the utility that the user executed KAPL15010-W The HDLM utility was executed by the user who does not have the authority. Command Line = aa...aa Details aa...
8. Messages Details aa...aa: Name of the utility that the user executed KAPL15044-I Processing to add devices to HDLM management succeeded. Command Line = aa...aa Details aa...aa: Name of the utility that the user executed KAPL15045-E Processing to add devices to HDLM management has failed. Command Line = aa...aa Details aa...aa: Name of the utility that the user executed KAPL15046-I The management status and configuration information of HDLM devices was successfully displayed. Command Line = aa...
8. Messages Details aa...aa: Name of the utility that the user executed KAPL15051-E An attempt to create an initial RAM disk image file for using an HDLM device as a boot disk has failed. Command Line = aa...aa Details aa...aa: Name of the utility that the user executed KAPL15052-I The number of retries to allocate memory was successfully set. Command Line = aa...aa Details aa...
8. Messages Details aa...aa: Name of the utility that the user executed KAPL15058-I Processing to re-register the HDLM information was successful. Command Line = aa...aa Details aa...aa: Name of the utility that the user executed KAPL15059-E Processing to re-register the HDLM information failed. Command Line = aa...aa Details aa...aa: Name of the utility that the user executed KAPL15060-I DLMgetras was invoked. Command Line = aa...aa Details aa...
8. Messages cc...cc: Name of the utility that the user executed KAPL15065-E An attempt to clear ReserveKey has failed on aa...aa SCSI device(s). Command Line = bb...bb Details aa...aa: Number of SCSI devices for which ReserveKey was not cleared. bb...bb: Name of the utility that the user executed KAPL15101-I Clear operation was completed successfully. Command Line = aa...aa Details aa...aa: Command that the user executed KAPL15102-E Clear operation has failed. Command Line = aa...aa Details aa...
8. Messages aa...aa: Command that the user executed KAPL15106-E Setting up the operating environment failed. Command Line = aa...aa Details aa...aa: Command that the user executed KAPL15107-I Program information was successfully displayed. Command Line = aa...aa Details aa...aa: Command that the user executed KAPL15108-E An attempt to display program information has failed. Command Line = aa...aa Details aa...
8. Messages KAPL15404-W The HDLM Manager was executed by the user who does not have the authority.
8. Messages 8.15 Return Codes for Hitachi Command Suite Common Agent Component When an operation requested of HDLM from Global Link Manager terminates abnormally, or terminates normally with a warning, HDLM outputs one of the return codes described below. 1002 Details There is no path on which the operation can be performed. Action Refresh the host information, check the path status, and then perform the operation again. 1003 Details No path was detected.
8. Messages Action Click Refresh to update the host information, check the path status, and then retry the offline operation. 1015 Details The Offline path cannot be placed Online. Action Remove the error in the path, and then retry. 1016 Details The target path(s) are already Online. Action Update the host information, and then check the path status. 1017 Details The target path(s) are already Offline(C). Action Update the host information, and then check the path status.
8. Messages maintenance contract for HDLM. For details on the DLMgetras utility, see 7.2 DLMgetras Utility for Collecting HDLM Error Information. 1025 Details A parameter value is invalid. Action Refresh the host information, and then perform the operation again. If the same error occurs again, execute the DLMgetras utility for collecting HDLM error information, and then contact your HDLM vendor or maintenance company if you have a maintenance contract for HDLM.
8. Messages HDLM Error Information. 1034 Details An attempt to acquire information about the HDLM version or SP version has failed. Action Re-execute the command. If the same error occurs again, execute the DLMgetras utility for collecting HDLM error information, and then contact your HDLM vendor or maintenance company if there is a maintenance contract for HDLM. For details on the DLMgetras utility, see 7.2 DLMgetras Utility for Collecting HDLM Error Information.
8. Messages Refresh the host information, and then perform the operation again. If the same error occurs again, execute the DLMgetras utility for collecting HDLM error information, and then contact your HDLM vendor or maintenance company if you have a maintenance contract for HDLM. For details on the DLMgetras utility, see 7.2 DLMgetras Utility for Collecting HDLM Error Information. 1041 Details An attempt to communicate with the HDLM manager has failed.
8. Messages utility, see 7.2 DLMgetras Utility for Collecting HDLM Error Information.
Appendixes A. B. C. D.
A. Notes on Linux Commands and Files A. Notes on Linux Commands and Files This section provides notes on Linux commands and files. A.1 Notes on the /proc/partitions File The HDLM device and each partition of the HDLM device that is recognized by Linux and can be used are recorded in the /proc/partitions file. The /proc/ partitions file records the I/O statistics per device; however, it does not record the I/O statistics of the HDLM device. The I/O statistics are always 0.
A. Notes on Linux Commands and Files commands show little difference before and after HDLM installation. Table A-1: Examples of Linux Command Execution Times Linux commands Time Example 1#1 Before HDLM installation After HDLM installation Example 2#2 Before HDLM installation After HDLM installation lvmdiskscan 6.1 sec 19.6 sec 3.8 sec 10.6 sec pvscan 2.6 sec 12.6 sec 1.5 sec 5.2 sec #1 CPU: Pentium III 1.
A. Notes on Linux Commands and Files Figure A-2: Example of Executing the iostat Command A.4 Notes on the mkfs Command If you are going to create a file system for an HDLM device, specify the name of a logical device file of the HDLM device for the mkfs command. However, if a file system is created for a SCSI device that is already in use, the applicable HDLM device will be created with a file system even without creating a new file system by using the mkfs command.
A. Notes on Linux Commands and Files A.6 Notes on the sar Command Executing the sar command with the -d or -A option does not display HDLM devices. To obtain statistics about an HDLM device, perform calculations by using the value of the SCSI device that conforms to the HDLM device. The following is an example of executing the sar command. Figure A-3: Example of Executing the sar Command A.
A. Notes on Linux Commands and Files SCSI device 1..n: The SCSI device names which are being managed by the above HDLM device (for example, /dev/sda) A.9 Notes on the vgrename and lvrename Commands If a logical volume is created on an md device, you can rename a volume group or a logical volume by using the vgrename or lvrename command. After renaming, if the vgdisplay -v -D command, vgscan, or lvscan command is executed, the information from the previous volume group or logical volume might be displayed.
B. Troubleshooting Products That Use the Weak-Modules Script B.
B.
B. Troubleshooting Products That Use the Weak-Modules Script For device, enter the device you determined in step 1. In each of the following examples, the underlined part indicates the kernel parameter added in this step: Example when the boot loader is elilo and LVM is not used: : : image=vmlinuz-2.6.18-92.el5 label=linux-HDLM initrd=initrd-2.6.18-92.el5.img.
B. Troubleshooting Products That Use the Weak-Modules Script used. 6. Delete the kernel parameter you added in step 2 from the boot loader configuration file. If the boot loader configuration file contains any entries other than the entry for using HDLM as a boot disk, make sure that root=HDLM device is not specified as a kernel parameter, and then go to step 9. If root=HDLM device is specified as a kernel parameter, go to step 7. 7.
B. Troubleshooting Products That Use the Weak-Modules Script Example when LVM is not used: The underlined portion is the device that indicates the root directory (/).
B. Troubleshooting Products That Use the Weak-Modules Script The underlined portion is a device of the volume group that indicates the root directory (/). # vgdisplay -v --- Volume group --VG Name VolGroup00 System ID : --- Logical volume --LV Name /dev/VolGroup00/LogVol00 VG Name VolGroup00 : --- Physical volumes --PV Name /dev/sddlmaa2 : # B.2 Uninstalling Products That Use the Weak-Modules Script To uninstall a product that uses the weak-modules script: 1.
C. Functional Differences Between Versions of HDLM C. Functional Differences Between Versions of HDLM This section explains the functional differences between newer and older versions of HDLM. C.1 Functional Differences Between Version 6.2.1 and Versions Earlier Than 6.2.1 The output destination of the HDLM command operation log data has been changed from Hitachi Network Objectplaza Trace Library (HNTRLib2) integrated trace information files (/var/opt/hitachi/HNTRLib2/spool/ hntr2n.
C. Functional Differences Between Versions of HDLM using the dlmcfgmgr utility. C.5 Functional Differences Between Version 5.9.1 or Later and Versions Earlier Than 5.9.1 In versions earlier than 5.9.1, the timeout value of SCSI INQUIRY is fixed. Therefore, depending on the connected storage system, a timeout occurs when the response for SCSI INQUIRY is delayed. In versions 5.9.1 or later, you can use the dlmsetopt utility to customize the timeout value according to the storage system in use.
C. Functional Differences Between Versions of HDLM Table C-1: JRE/JDK Version Required for HDLM GUI OS Required version of JRE or JDK Earlier than HDLM 5.7.1 HDLM 5.8 or later Red Hat Enterprise Linux AS3/ES3 (IA32) Red Hat Enterprise Linux AS4/ES4 (IA32) SUSE LINUX Enterprise Server 9 (IA32) JRE v1.4.2_08 JRE v1.4.2_09 Red Hat Enterprise Linux AS3/ES3 (IPF) Red Hat Enterprise Linux AS4/ES4 (IPF) JDK v1.4.2_08 JDK v1.4.
C. Functional Differences Between Versions of HDLM C.11 Functional Differences Between Version 5.6.3 or Later and Versions Earlier Than 5.6.3 Table C-2: JRE/JDK Version Required for HDLM GUI describes the version of the JRE or JDK required to use the HDLM GUI on a host. Table C-2: JRE/JDK Version Required for HDLM GUI OS Required version of JRE or JDK Earlier than HDLM 5.4.2 HDLM 5.6 5.6.2 HDLM 5.6.3 Red Hat Enterprise Linux AS2.1 (IA32) SUSE LINUX Enterprise Server 8 (IA32) JRE v1.3.1_08 JRE v1.3.
D. Glossary D. Glossary This glossary explains the terms used in this manual. A automatic failback A function for checking the status of paths at regular intervals, and automatically placing the status of a path recovered from an error into the Online status. If a path with an Offline(E) or Online(E) status recovers from an error, an automatic failback will place the path Online.
D. Glossary D Dev (Device) A logical division of an LU that HDLM controls and operates. A Dev is equivalent to a partition in Linux. In Linux, each LU can be divided into more than one Dev. Each Dev has a Dev number. Depending on the access method, Devs are classified into two types: block devices and character devices. (See also: Dev number) Dev number A Dev number (the DNum column) in the configuration list in HDLM. This number is assigned to each Dev within an LU.
D. Glossary failover A function for switching to another normal path if there is an error in the current access path, thereby enabling the system to continue to operate. FC-SAN (Fibre Channel - Storage Area Network) A SAN using Fibre Channel. H HBA (Host Bus Adapter) Device that functions as an interface connecting a host with external devices. In this manual, the term HBA refers to an interface card installed in a host, in configurations where the host and storage units are connected via a FC connection.
D. Glossary host LU number A number assigned to a host LU. The host LU number is part of a path name. (See also: host LU, path name) hypervisor Software that enables host virtualization. I intermittent error An error that occurs irregularly due to, for example, a loose cable connection. IP-SAN (Internet Protocol - Storage Area Network) A data transfer network that connects hosts and storage systems by using the iSCSI standard.
D. Glossary logical device file A device file in the /dev directory. Note that the term logical device here is different from LDEV. LU (Logical Unit) A logical unit that is a logical volume defined in the storage system, and with which the host can perform input or output operations. (See also: host LU) N node A server in a cluster. non-owner controller A controller other than an owner controller. Non-owner controllers exist only in the Thunder 9500V series, or Hitachi AMS/WMS series.
D. Glossary owner controller is called a non-owner path. When using the Lightning 9900 series, Lightning 9900V series, Hitachi USP, Universal Storage Platform V/VM, Virtual Storage Platform, Hitachi AMS2000 series, or Hitachi SMS, all paths are owner paths. (See also: owner controller, non-owner path) P path An access path from a host to a storage system. Access to an area within an LU in a storage system is made via a cable connecting the HBA on the host and the CHA on the storage system.
D. Glossary physical path An access path from a host to an LU. A path name is used to identify a physical path. Q QEMU A virtual emulator available for the entire host system. (See also: KVM) R reservation The reservation function enables a host to declare that it has exclusive rights to use a particular LU, and prevents other hosts from accessing that LU.
Index Symbols /proc/partitions files 692 A abbreviations defined iii active host 56 adding new LU 371 adding path to existing LU 374 audit log categories and audit events that HDLM can output 45 collecting data 44 data format 51 automatic failback 27, 419, 707 automatic failover 25 automatic path switching 25 AutoPATH_ID 7, 9, 707 B BladeSymphony environment when using Red Hat Enterprise Linux 5 106, 108 when using Red Hat Enterprise Linux AS4/ ES4 91, 92, 95 when using SUSE LINUX Enterprise Server 10 115
Index collecting error info.
Index errors detected by HDLM 42 management 39 examining message 392, 394 F failback 25, 708 failover 25, 709 FC-SAN 7, 709, 8 fdisk commands 694, 695 features of HDLM 4 fiber cable replacing 364 Fibre Channel switch replacing 367 file for defining information to be collected 467 file system creating 284 when using Oracle Enterprise Linux 4 121 when using Oracle Enterprise Linux 5 123 when using Red Hat Enterprise Linux 5 104 when using Red Hat Enterprise Linux 6 109 when using Red Hat Enterprise Linux AS
Index HDLM resident processes 355 HDLM utility 15 HDLM-configuration definition utility 489 HDLM-managed device operations on 290 Heartbeat canceling settings 292 setting 262 help 402 Hitachi Network Objectplaza Trace Library Notes 281 Hitachi Network Objectplaza Trace Library (HNTRLib2) Uninstalling 326 HLU 13 host 58, 709 host bus adapter 7 host device 12, 709 host device name 709 host LU 12, 709 host LU number 449, 710 host port number 449 how to edit installation-information settings file 514 hyperviso
Index Linux commands and files 692 load balancing 19, 415, 710 load balancing algorithms 23 log collection level values 416 log filter 42 logical device file 711 logical device files for HDLM devices 17 logical unit 7, 9 logs types collected 41 LU 8, 10 configuration 12 LU (Logical Unit) 711 LU components recognized by host 13 LU configuration recognized by the host 13 LUKS notes 229 LVM2 notes on using LVM2 246 setting LVM2 246 lvrename commands 696 M manual path switching 28 MB meaning xi md device crea
Index cluster software 121 file system 123 kernel 70 volume manager 122 organization of this manual i OS 58 update packages 339 overview command 398 HDLM 1 owner controller 21, 711 owner path 21, 711 P P 8, 10 parted commands 695 path 7, 9, 712 checking the configuration 269 restoring paths (when restart is not required) 380 restoring paths (when restart is required) 379 path error handling 391 path health checking 38, 418, 712 path information obtaining 392 path name 712 path status transition 29 path sw
Index RHCM notes 266 S SAN (Storage Area Network) 713 sar commands 695 SCSI device 713 set 414 setting automatic mounting 286 setting Heartbeat 262 setting KVM 260 setting LUKS RAC 229 setting Oracle RAC 263 setting RHCM 266 setting VCS 268 setting Xen 258 settings md device 232 settings for LVM2 246 setup HDLM 271 SLPR(Storage Logical Partition) 713 starting HDLM manager 352 statistics 400 clearing to the initial value 400 status transitions 30 stopping HDLM manager 353 storage systems 2 SUSE LINUX Enter
Index utility for starting HDLM 510 V vendor ID 446 vgrename commands 696 view 431 virtual environment 127 volume manager when using Oracle Enterprise Linux 4 120 when using Oracle Enterprise Linux 5 122 when using Red Hat Enterprise Linux 5 103 when using Red Hat Enterprise Linux 6 109 when using Red Hat Enterprise Linux AS4/ ES4 89 when using SUSE LINUX Enterprise Serve 9 111 when using SUSE LINUX Enterprise Server 10 113 when using SUSE LINUX Enterprise Server 11 118 W Warning-level errors 42 what to