
- Hewlett-Packard All in One Printer User Manual


Fuser Assembly Removal
Caution
The Fuser Assembly may be hot. Allow plenty of
time for the fuser to cool before beginning the
fuser removal procedure.
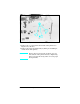
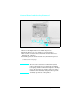
1 Open the rear door.
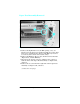
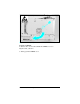
2 Remove the (2) screws that hold the Fuser to the printer
frame (see Figure 6-20, callout 1).
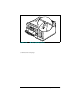
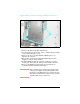
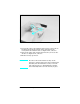
3 Slightly lift the Fuser by both the right and left sides to clear
the locator points.
4 Pull the Fuser from the printer.
Note
The Fuser Assembly from the LaserJet 4 cannot
be interchanged with the Fuser Assembly from
the LaserJet 4 Plus or 5 printers.
Figure 6-20 Fuser Assembly Screws
6-22 Removal and Replacement