
User's Manual


Use the HP sp400 Series Configuration Software
4 Use the HP sp400 Series Configuration
Software
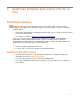
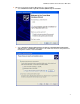
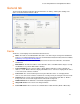
Make sure the All-in-One has been connected successfully and open the HP sp400 Series
Configuration Software.
The connection status of the device is displayed in the top-left corner of the window. If the device status
reads “Not connected,” make sure you followed the instructions for connecting the All-in-One in
“
Connect the All-in-One” or refer to “Troubleshoot problems.”
If the All-in-One is not connected, some buttons will be disabled.
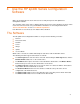
The Software
The HP sp400 Series Configuration Software is composed of the following seven tabs:
• General
• Timeouts & Limits
• Network
• Server
• Imager
• Update
• User Feedback
When a tab is selected, the software will attempt to read values from the All-in-One device.
The following six buttons appear at the bottom of each tab:
• The Clear Page button clears the values on the tab. After clicking the Clear Page button, click the
Read from Device button to see the current values.
• The Defaults button replaces the values on the tab with the default values. The Write to Device
button must be pressed to save the default values on the device.
• The Write to File button allows the user to save the values on a tab to an HHP file. This button is
only available when the Network tab is selected.
• The Read from Device button refreshes all values on that tab so they reflect the current
configuration of the All-in-One device.
• The Write to Device button saves to the All-in-One device any edits you have made on that tab.
The
Write to Device button is never enabled on the General tab.
9