HP sp400 Series Configuration Software User Guide For use with the HP Handheld All-in-One
Copyright information Trademark credits (c) Copyright 2008 Hewlett-Packard Development Company, L.P. Wi-Fi is a registered trademark of the Wi-Fi Alliance. The information contained herein is subject to change without notice. The only warranties for HP products and services are set forth in the express warranty statements accompanying such products and services. Nothing herein should be construed as constituting an additional warranty.
Contents Contents 1 About this document Intended audience................................................................................................................................................ 4 Additional HP sp400 series documents................................................................................................................ 4 System requirements .......................................................................................................................................
Error! No text of specified style in document. 1 About this document Intended audience This document is intended to be used by system administrators and others experienced in working with server applications. This document will be used in concert with the HP sp400 Series Configuration Software to configure your organization’s server to communicate with the HP Handheld All-in-One. The configuration software is available for download at www.hp.com/support/handheldsp400aio.
Overview 2 Overview Overview of the HP sp400 Series Configuration Software The HP sp400 Series Configuration Software is used to configure device settings so that the All-in-One can communicate with the server application. In addition to configuring the All-in-One, the software also allows you to perform diagnostic and maintenance functions on the All-in-One. The software connects to an All-in-One device using a USB cable.
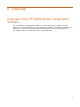
Download software and connect the All-in-One 3 Download software and connect the All-inOne Download software IMPORTANT: Do not connect an All-in-One device to your computer with a USB cable before installing the HP sp400 Series Configuration Software. If this does happen, cancel the Found New Hardware Wizard. 1. Download the HP sp400 Series Configuration Software and save it in a location you will remember or select the default location. The software is available at www.hp.com/support/handheldsp400aio.
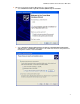
Download software and connect the All-in-One 4. When the Found New Hardware Wizard appears, do the following: a. Select Install from a list or specific location (Advanced) and click Next. b. Select Search for the best driver in these locations and Include this location in the search and then click Browse and navigate to the FTDI folder inside the HP sp400 Series Configuration Software folder. Click Next.
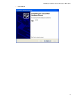
Download software and connect the All-in-One c. Click Finish.
Use the HP sp400 Series Configuration Software 4 Use the HP sp400 Series Configuration Software Make sure the All-in-One has been connected successfully and open the HP sp400 Series Configuration Software. The connection status of the device is displayed in the top-left corner of the window. If the device status reads “Not connected,” make sure you followed the instructions for connecting the All-in-One in “Connect the All-in-One” or refer to “Troubleshoot problems.
Use the HP sp400 Series Configuration Software General tab The General tab displays information about the All-in-One, the battery, and the print cartridge. The values on the General tab cannot be edited. Device The Device section displays basic information about the device. • Name: The name of the individual All-in-One device. The name may be changed for identification purposes. For further information, refer to the Communication Protocols manual, which is available at www.hp.
Use the HP sp400 Series Configuration Software Battery The Battery section displays information about the battery that is currently connected to the All-in-One. • • • Voltage (volts): The voltage of the battery that is connected to the All-in-One. Relative Capacity (%): The percentage of battery life that is still available. Remaining Capacity (mAh): Battery life still available in milliamp hours.
Use the HP sp400 Series Configuration Software Timeouts & Limits tab The Timeouts & Limits tab allows you to set various timeouts and limits that affect the function of the Allin-One. Device Timeouts The Device Timeouts section allows you to change the length of eight different timeouts and intervals. • Registration Retry Interval (s): The number of seconds that the All-in-One pauses between registration messages. These messages are sent from the All-in-One device to the server.
Use the HP sp400 Series Configuration Software Ink Level The Ink Level section allows you to adjust the point at which the ink level low (LED and audio) warnings are activated. IMPORTANT: A value of 0 in any of the ink level boxes will disable the corresponding warning or the cut-off condition. • Ink Level Low Warning (%): The percentage of ink that is still available when the All-in-One activates the Ink Level Low warning.
Use the HP sp400 Series Configuration Software Network tab The Network tab allows you to configure the All-in-One so it can gain access to a wireless network. IP Address The IP Address section is where you make choices about how the All-in-One will connect wirelessly. • Enable DHCP check box: Select this box to enable the Dynamic Host Configuration Protocol (DHCP). A DHCP server on your network is required to use this option.
Use the HP sp400 Series Configuration Software Access Point Density The Access Point Density section allows you to select the density of access points in your installation and controls the rate at which the All-in-One will switch to a different access point. A high setting causes the All-in-One to more readily switch to another access point. The values associated with the different settings are as follows: • • • Low: 2 megabits per second (mbps) cannot be sustained (default) Medium: 5.
Use the HP sp400 Series Configuration Software Server tab The Server tab allows you to enter the IP address or host names of the file servers used. Server Information NOTE: A fully-qualified computer domain name or an IP address in dot notation can be used for the first three addresses: the Primary Registration Server Address, the Primary Registration Server Port, and the Alternate Registration Server Address. Do not leave spaces between numbers and dots if dot notation is used.
Use the HP sp400 Series Configuration Software Device Information • Application Name: A name that can be used by the server application to identify the All-in-One device that is requesting data. Refer to the Communication Protocols document, which is available at www.hp.com/support/handheldsp400aio. • • UDP Listen Port: The UDP port that the All-in-One listens on. Catalog File Name: The name of the catalog file that the All-in-One will request when starting the wireless update process.
Use the HP sp400 Series Configuration Software Imager tab The Imager tab allows you to configure factors that affect the operation of the All-in-One imager module. The All-in-One uses the Hand Held Products 5X80 imager module. For additional information about configuring the imager, see the HandHeld Products 5X80 User’s Guide available for download at www.handheld.com. • Initialization String: A string of commands that are sent to the imager when the All-in-One is turned on.
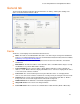
Use the HP sp400 Series Configuration Software Update tab The Update tab allows you to update the All-in-One firmware and FPGA configuration through the use of HHP files. 1 File stamps of files currently installed on the All-in-One 2 Click the File column header to select or clear all file stamps in the list 3 Browse button 4 File stamps of files that will be installed on the All-in-One 5 Force update check box HHP files HHP files are files that hold the information needed by the All-in-One.
Use the HP sp400 Series Configuration Software Installed File Stamps The list of installed file stamps provides information about which HHP files are currently installed on your All-in-One device. To put it simply, the installed file stamp is the sum of the HHP file stamps that were used to update the All-in-One. Update Files The Update Files section is used to update the firmware and configuration of the All-in-One using HHP files.
Use the HP sp400 Series Configuration Software User Feedback tab The User Feedback tab allows you to make changes to the audio feedback for selected situations (conditions), such as “Wireless Not Connected,” and “Successful Scan.” Additionally, there are six Server Feedback conditions that can be programmed to emit specific feedback. To turn off the audio feedback for a particular condition, select a condition from the drop-down box and select the Disable audio check box.
How do I …. 5 How do I …. Check the level of ink See the Print cartridge section of the General tab. Change when the battery low warning sounds Make changes in the Battery section of the Timeouts and Limits tab. Change the volume of audio feedback Adjust the audio feedback on the User Feedback tab. Set up the wireless network and configure the server 1. Connect the All-in-One to a computer with a USB cable. 2. Select the Network tab and configure the All-in-One to connect to your 802.11 network.
How do I …. Update firmware through USB 1. Place all of the HHP files that you wish to apply to the device in a single folder or download the HP sp400 Series Update Pack on your computer. The update pack is available at www.hp.com/support/handheldsp400aio. 2. In the HP sp400 Series Configuration Software, click Update to open the Update tab. 3. Open the folder that contains the HHP files by selecting the Browse button on the Update tab and navigating to the folder that contains the HHP files.
Troubleshoot problems 6 Troubleshoot problems General problems Table 6-1 General problems Problem Cause Device status reads “Not The USB cable is not securely connected.” connected to the computer or the Allin-One. Solution • Press the plug into the All-in-One to make sure it is connected. • Unplug the cable from the USB port and plug it in again. The All-in-One is not turned on. Turn the All-in-One on by pressing the green Power button for three seconds. The FTDI drivers are not installed.