
HP Smart Zero Core 4.4 Administrator Guide


8 使用 Automatic Intelligence(自動
Intelligence)
本節包含下列主題:
●
檢視自動更新網站
●
建立 Automatic Update(自動更新)設定檔
●
更新用戶端
●
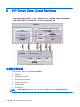
使用 HP Intelligent Delivery Service(HP 智慧型傳送服務)
●
使用 HP Device Manager
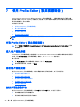
檢視自動更新網站
1. 在伺服器桌面上,選取開始 > 控制台,然後按一下系統管理工具。
2. 按一下 Internet Information Services (IIS) 管理員。
3. 在 IIS 管理員的左窗格中,展開下列項目:
「伺服器名稱」> 網站 > HP Automatic Update(HP 自動更新)> 自動更新
附註: 儲存 Automatic Update(自動更新)檔案的實際位置如下:
C:\Program Files (x86)\Hewlett-Packard\HP Smart Client Service\auto-update
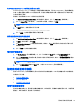
建立 Automatic Update(自動更新)設定檔
本節說明如何建立單一 MAC 位址的 Automatic Update(自動更新)設定檔。
1. 使用系統資訊取得用戶端的 MAC 位址。例如,下列步驟使用 MAC 位址 00fcab8522ac。
2. 使用 Profile Editor(設定檔編輯器)建立或修改用戶端設定檔(請參閱
位於第 34 頁的使用 Profile
Editor(設定檔編輯器)),直到您準備好要儲存用戶端設定檔為止。
3. 在 Profile Editor(設定檔編輯器)中,按一下左窗格中的完成連結,存取目前的設定檔窗格。
4. 按一下將設定檔另存為,儲存用戶端設定檔如下:
C:\Program Files (x86) Hewlett-Packard\HP Smart Client Service\auto-
update\PersistentProfile\MAC\00fcab8522ac.xml
5. 按一下目前的設定檔窗格中的完成按鈕,以結束 Profile Editor(設定檔編輯器)。
6. 重新啟動使用指定的 MAC 位址的的用戶端以起始自動更新程序。
更新用戶端
●
使用廣播更新方法
●
使用 DHCP 標記更新方法
40 第 8 章 使用 Automatic Intelligence(自動 Intelligence)