
HP StorageWorks 9100 Extreme Data Storage System administration guide V1.0.2 (AN540-96018, February 2010)


replacing a failed disk, one LUN will be rebuilding while the others wait until the rebuild finishes.
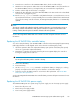
The following output from the exds_diag command shows an example
lun status problems
* RECOVERY_INPROGRESS on 1GB ADG lun 01 of SGA742000T
* DEGRADED on 1GB ADG lun 02 of SGA742000T
* DEGRADED on 23GB ADG lun 03 of SGA742000T
* DEGRADED on 2210GB ADG lun 04 of SGA742000T
For other data LUNs, only one LUN is affected by a disk failure, so you should see then go to
recovery in progress immediately. The rebuild process takes several hours and up to 24 hours
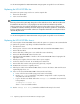
on a heavily loaded system. The following example shows output from the exds_diag for a
LUN rebuilding:
lun status problems
* RECOVERY_INPROGRESS(47%=505533M/953869M) on 7452GB ADG lun 11 on
box 3 drive [26-35] of SGA9120072
5. Run the exds_diag command to verify that the replacement disk drive firmware is correct (if
there are no errors reported, then the firmware is correct).
6. If the disk drive firmware is not correct, contact HP Support.
See the HP StorageWorks 600 Modular Disk System Maintenance and Service Guide for more
information.
Replacing the HP ExDS9100cc controller
You can replace the HP ExDS9100cc controller without interrupting filesystem activity (however,
performance could degrade because all activity must go through the remaining controller). Do not
remove both HP ExDS9100cc controllers at once because this causes I/O failures on an active system.
IMPORTANT:
Do not remove an HP ExDS9100cc controller that is reported as online. Only replace an HP
ExDS9100cc controller that has failed.
CAUTION:
If you need to replace both controllers at the same time, contact HP Support for instructions.
1. Remove the SAS cable in port 1 that connects the HP ExDS9100cc to the SAS switch in the c-
Class blade enclosure. Do not remove the two SAS expansion cables that connect the HP
ExDS9100cc to the I/O controllers on the HP ExDS9100cx enclosure.
2. Slide the HP ExDS9100cc controller partially out of the chassiss:
a. Squeeze the controller thumb latch and rotate the latch handle down.
b. Pull the controller straight out of the chassis until it has clearly disengaged.
3. Remove the two SAS expansion cables that connect the HP ExDS9100cc to the I/O controllers
on the HP ExDS9100cx enclosure, keeping track of which cable was attached to which port.
4. Pull the controller straight out of the chassis.
5. Ensure the new controller has batteries. If not, use the batteries from the old controller.
Replacing components in the HP ExDS9100 Storage System114