
HP StorageWorks 9100 Extreme Data Storage System administration guide V1.0.2 (AN540-96018, February 2010)


e. Select Serial Number.
f. Enter a serial number.
CAUTION:
Do not use the original server blade serial number. Use the serial number of the system
board or any other serial number. If you use the original serial number, the HP ExDS9100
system software does not detect that the system board has been replaced and does not
configure the server blade appropriately.
g. This is a convenient time to set the product ID. Contact HP technical support for the appro-
priate product ID.
8. Run the discover server command as follows:
# exdsmgr discover server 3
9. Boot the server:
# exdsmgr boot server 3
10. Check that firmware versions are correct using the syscheck command:
# exdsmgr syscheck
Replacing a server blade disk drive
The “system disk” on an HP ExDS9100 server blade comprises a logical RAID 1disk that is mirrored
over two physical SFF disk drives in the server blade. If one drive continues to operate, the server
blade can operate.
You do not need to shut down the server blade; disk drives can be hot swapped. However, you must
replace the removed drive with a drive of the same size.
To replace a disk drive in the server blade:
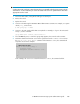
1. Check the state of the internal logical disk drive using the show server <number> command.
For example:
2. If the state is failed, use the procedure in Replacing both disk drives.
3. Remove one drive. Make sure you remove the failed drive. If you accidentally remove the wrong
drive, you will break the mirror set and the server could crash. If so, reinsert the good drive and
reboot the server.
4. Insert a replacement drive.
5. (Optional) Use the show server command to verify that the RAID 1mirror set is rebuilding to
the new drive.
NOTE:
Normally, you do not need to perform any action to cause the rebuild to the new drive.
Replacing components in the HP ExDS9100 Storage System106