HP StorageWorks Secure Key Manager Installation and replacement guide, for connecting to ETLA libraries AJ087-96013 Part number: AJ087–96013 1st edition: November 2008
Legal and notice information © Copyright 2007-2008 Hewlett-Packard Development Company, I.E. Confidential computer software. Valid license from HP required for possession, use or copying. Consistent with FAR 12.211 and 12.212, Commercial Computer Software, Computer Software Documentation, and Technical Data for Commercial Items are licensed to the U.S. Government under vendor's standard commercial license. The information contained herein is subject to change without notice.
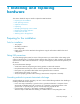
Contents 1 Installing and replacing hardware . . . . . . . . . . . . . . . . . . Preparing for the installation . . . . . . . . . . . . . Tools for installation . . . . . . . . . . . . . . Taking ESD precautions . . . . . . . . . . . . . Grounding methods to prevent electrostatic discharge Rack planning resources . . . . . . . . . . . . . . Rack requirements . . . . . . . . . . . . . . . Rack warnings . . . . . . . . . . . . . . . . Optimum environment . . . . . . . . . . . . . . .
Obtaining a static IP address for the SKM . . . . . . . . . . . . . . . . . Identifying the ETLA libraries and number of LTO4 drives to be used for encryption Addressing physical installation and security requirements for the SKM . . . . . Designing a backup strategy for keys and audit logs . . . . . . . . . . . . Determining the appropriate key generation policies . . . . . . . . . . . . Meeting minimum ETLA hardware and firmware requirements . . . . . . . . Configuring accounts for each ETLA library . . .
Figures 1 Identify the contents of the shipping carton . . . . . . . . . . . . . . . . . . . . . 12 2 Connect the power supplies to AC power sources . . . . . . . . . . . . . . . . . .
Tables 1 Security officer (SO) information 6 . . . . . . . . . . . . . . . . . . . . . . . . . 40 2 Cluster design . . . . . . . . . . . . . . . . . . . . . . . . . . . . . . . . . 40 3 ETLA Tape Library 1 device information . . . . . . . . . . . . . . . . . . . . . . 41 4 ETLA Tape Library 2 device information . . . . . . . . . . . . . . . . . . . . . . 42 5 ETLA Tape Library 3 device information . . . . . . . . . . . . . . . . . . . . . . 43 6 SKM data . . . . . . . . . . . . . . . . . . .
1 Installing and replacing hardware This section details the steps to install or replace the SKM hardware: • • • • • • • • Preparing for the installation Rack planning resources Optimum environment Unpacking Identifying the shipping carton contents Removing the existing appliance Install rails in the rack Attaching rails to the appliance Preparing for the installation Tools for installation • • • • Two people #2 Phillips screwdriver Box cutting knife Laptop or PC that can be attached to the appliance usi
• Use conductive field service tools. • Use a portable field service kit with a folding static-dissipating work mat. If you do not have any of the suggested equipment for proper grounding, have an authorized reseller install the part. For more information on static electricity or assistance with product installation, contact your authorized reseller. Rack planning resources The rack resource kit ships with all HP or Compaq branded 9000, 10000, and H9 series racks.
WARNING! To reduce the risk of personal injury or equipment damage when unloading a rack: • At least two people are needed to safely unload a rack from a pallet. An empty 42U rack can weigh as much as 115 kg (253 lb), can stand more than 2.1 m (7 ft) tall, and may become unstable when being moved on its casters. • Never stand in front of a rack when it is rolling down the ramp from the pallet. Always handle a rack from both sides.
The maximum recommended ambient operating temperature (TMRA) for the SKM system is 35° C (95° F). The temperature in the room where the rack is located must not exceed 35° C (95° F). CAUTION: To reduce the risk of damage to the equipment when installing third-party options: • Do not permit optional equipment to impede airflow around the SKM or to increase the internal rack temperature beyond the maximum allowable limits. • Do not exceed the TMRA.
Unpacking Place the shipping carton as close to the installation site as possible. Before unpacking the SKM, inspect the shipping carton for damage that may have occurred during shipment. If you detect any damage, notify the carrier and HP before unpacking the unit. To unpack the SKM: 1. Open the top of the shipping cartons. 2. Carefully lift the units out of the boxes and remove the packing materials. 3. Place the units on a stable work surface.
Figure 1 Identify the contents of the shipping carton Item Description 1 Appliance 2 Power cords (2 — 1 black, 1 gray) 3 Null modem cable 4 1U rack mounting hardware kit and documentation 5 Keys to the bezel (2 sets of 2 keys) 6 Documentation CD 7 1U spacer 8 USB key 9 Completed appliance information sheet, Pre-installation survey and checklist, and Installation poster NOTE: If this is a replacement appliance, note how the unit is packed in the shipping carton.
Removing an existing SKM (appliance) from the system Skip this step if you are installing a new appliance. 1. Zeroize the original appliance. To do so, sign into the command line interface and enter the following commands: hostname# configure hostname# reset factory settings zeroize Confirm that you wish to perform the zeroize operation. Allow the system to zeroize the contents of the appliance. During this process the appliance reboots automatically several times. The process may take several minutes. 2.
11776 5. Repeat these steps with the other side rail. Attaching rails to the appliance 1. Align one of the rails with the left side of the appliance (as you face the front of the appliance) so that the word “FRONT” on the rail is seen right-side-up and at the front of the node. 11184 2. Align the holes in the rail with the round tabs on the side of the appliance. 3.
2. Connect the appliance power supplies' AC power connectors to two separate AC power sources using the power cables provided (see Figure 2). Figure 2 Connect the power supplies to AC power sources 3. Use the strain relief clip from the hardware kit to secure the power cord to the rack. 4. If this is a replacement appliance, pack the old appliance in the shipping materials for the replacement appliance. You may need to remove the slide rails and null modem cable from the old appliance to fit it in the box.
Installing and replacing hardware
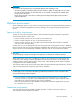
2 Configuring the system Starting the SKM appliance NOTE: To prepare to configure the system, have ready all information listed on the pre-install survey. This information was gathered by your site Security Officer and the HP installation team before the system was shipped; if it has been lost, obtain the form from www.hp.com (on the SKM product page, under Support for your Product, Manuals) and complete it now.
c. Date d. Time. The time is based on a 24–hour clock. There is no a.m. or p.m. designation. For example, 1:20 p.m. is 13:20:00. e. IP address of the SKM appliance. The appliance must have a static network address, it cannot obtain an IP address through DHCP. f. Subnet mask g. Default gateway h. Hostname, including the domain. For example, skm.example.com. The screen displays the information you entered and the message "Is this correct? (y/n): i.
6. Configure the default settings for the key replication interval and retry attempts. NOTE: These commands require firmware version 1.1 or greater. a. Log in to the appliance as admin using the password specified during configuration. b. Type configure to enter configuration mode. #config (config)# c. Type the following commands to set both the key replication and key replication retry intervals.
Where • is the hostname or IP address you provided in Starting the SKM appliance, step 4. • is 9443 by default. If you changed the port number in Starting the SKM appliance, step 4, use that number instead. Setting up the local Certificate Authority (CA) To create and install local CAs, perform the following steps: 1. Logon to the SKM management web console using the admin password you supplied in Starting the SKM appliance. 2. Select the Security tab. 3.
6. Add the Local CA to the Trusted CAs list. a. In Certificates & CAs, click Trusted CA Lists to display the Trusted Certificate Authority List Profiles. b. Click on the Default Profile Name (not the radio button). c. In the Trusted Certificate Authority List, click Edit. d. From the list of Available CAs in the right panel, select the CA you created in step 4. For example, SKM Local CA. e. Click Add. f. Click Save. 7. If appropriate, add known, third-party CAs to the Trusted CAs list. a.
4. Click Create Certificate Request. 5. Click on the newly created certificate from Certificate List, for example SKM Server. 6. Copy the certificate data, from -----BEGIN CERTIFICATE REQUEST----- to -----END CERTIFICATE REQUEST--––– lines. Be careful to exclude extra carriage returns or spaces after the data. This information will be used in step 10 of this section. 7. In the Certificates & CAs menu, click Local CAs. 8.
11. Click Sign Request. 12. Copy the signed certificate data, from -----BEGIN to END…----- lines. Be careful to exclude extra carriage returns or spaces after the data. This information will be used in step 16 of this section. 13. In the Certificates & CAs menu, click on Certificates. 14. Click on the certificate name created in steps 3 – 4 of this section. For example, SKM Server. 15. Click Install Certificate. 16. Paste the signed certificate data from step 12 and click Save.
• In Creating the cluster, the cluster is created on one SKM appliance. Skip this section if you already have an SKM cluster. • In Copying the Local CA certificate, the Local CA certificate from an existing cluster member is copied into the copy buffer in preparation for pasting it into the management console of each of the SKM appliances that will be added to the cluster in Adding SKM appliances to the cluster. Start here if you are replacing an SKM or expanding an existing cluster.
5. Copy the certificate data from the CA Certificate Information, from -----BEGIN CERTIFICATE REQUEST----- to -----END CERTIFICATE REQUEST--–––. Be careful to exclude extra carriage returns or spaces after the data. This certificate data will be transferred to the other SKM appliances in Copying the Local CA certificate. 6. Keep this browser window open while adding appliances to the cluster in the next section.
5. Add the first member's CA to the Trusted CAs list. a. In the Certificates & CA menu, click Trusted CA Lists. b. Click on the Default Profile Name. c. Click Edit. d. Select the name of the CA from the list of Available CAs in the right panel. For example, SKM Local CA. e. Click Add. f. Click Save. 6. Join the appliance to the cluster. a. Select the Device tab. b. In the Device Configuration menu, click on Cluster. c. In the Cluster, click on Join Cluster. d.
4. Click Create Certificate Request. 5. Click on the newly created certificate SKM Server from Certificate List. 6. Copy the certificate data, from lines -----BEGIN CERTIFICATE REQUEST----- to -----END CERTIFICATE REQUEST-----. Be careful to exclude extra carriage returns or spaces after the data. 7. In the Certificates & CAs menu, click Local CAs. 8. Click on the SKM Local CA. 9. Click Sign Request. 10. Enter information required in the Sign Certificate Request section of the window as shown: a.
3. Click Select None. 4. Select Certificates then Choose from list and select SKM Server. 5. Click Continue. 6. Click Select None. 7. Click Continue. 8. In the Create Backup screen, type a name, description, and password for the certificate backup. 9. Select Download to Browser. 10. Click Backup and save the backup to your desktop. Installing the certificates To install the certificates, perform the following steps on each of the additional cluster members: 1.
Setting up SKM client accounts for each tape library NOTE: An Advanced Secure Manager license is required on each ETLA library to be enrolled with the SKM. Ensure that all ETLA libraries which will use the SKM are in green status before setting up their client accounts. The HP ETLA tape libraries must have LTO4 tape drives installed, and the library and its components must have firmware versions that support the key management feature.
10. Click Add. 11. In the Attribute Name field, type the word KeyGenPolicy. 12. In the Attribute Value field, enter the key generation policy for the library. If the library is partitioned, enter the key generation policies for each partition on a separate line in the Attribute Value field. All library partitions must have a policy even if the policy is no encryption. a. Type or paste the serial number of the library or partition into the Attribute Value field, followed by a space. b.
3. Enter information in the Create Key section of the window as shown: • Type the desired key name in Key Name. For example, EML_24uMaster. This must exactly match the name entered in the Attribute Value for the KeyGenPolicy field in step 12c of the previous procedure. • Type the library username, from step 5 above, in Owner Username. • Use the default value for Algorithm which is AES-256. • Select Deletable. • Select Exportable. • Use the default Copy Group Permissions From which is [None].
3. Select the Configuration tab. 4. Select Key Management to open the Properties window. 5. Select Actions, then Launch Key Management Setup Wizard to launch the configuration wizard. The configuration wizard establishes communication between the library and the SKM by setting up the CAs and certificates on the library, entering the username and password, and entering the IP addresses of the SKM. The wizard will verify the connectivity to the SKM when all the data has been provided.
3 Verifying that installation and initial configuration is successful It is crucial to verify the installation and initial configuration. The two tests presented in this section will verify that the tape backups are being encrypted, and that all nodes in the SKM cluster are accessible to the ETLA library clients. Verify that tape backups are being encrypted This test encrypts data to a scratch tape, then attempts to read that data in a non-encrypting configuration.
8. Temporarily disable the encryption policy a. In one of the SKM browser windows, select the Security tab. b. In the User and LDAP pane, select Local Users and Groups. c. Select the username of the library client being tested. d. Select the Custom Attributes tab, then click Edit. e. For the partition containing the scratch tape, change the policy to NE (No Encryption). f. Click Save. 9. Demonstrate that the policy change was replicated. a. Return to the Activity Log display. b.
1. Verify that the following prerequisites have been met. • All SKM nodes are successfully installed. • All SKM nodes are successfully added to the cluster. • All ETLA library pre-installation steps are complete: hardware and firmware are updated, partitioning is set-up correctly, Secure Manager is licensed and configured to allow access to the backup hosts. • All ETLA libraries are enrolled with the SKM cluster. • The procedure in Verify that tape backups are being encrypted is successfully completed.
Verifying that installation and initial configuration is successful
A SKM pre-installation survey and checklist, for connecting to ETLAs Use the survey and checklist to establish system-wide information and ensure proper configuration for the SKM and the Enterprise Tape Libraries with Extended Tape Library Architecture (ETLAs) to which the system is attached. This must be done before beginning system installation to ensure success. SKM pre-installation survey The survey identifies critical information HP needs to install and configure the HP Secure Key Manager (SKM).
Obtaining a static IP address for the SKM The SKM will only accept static IP addresses. If you want to use both network ports on each appliance, you will need 2 static IP addresses per appliance. IP addresses are typically provided by your IT department. Planning step: Obtain 1 or 2 static IP addresses per SKM appliance. If you install 2 appliances, you will need at least 2 — and up to 4— static IP addresses. Also obtain the subnet mask and the default gateway for each IP address.
the backup, how often, how often the restore-test is performed, and where the backup files are stored. Institute a method of logging these operations and versioning the backups. Planning step: Identify the server used to store backups. Have a backup schedule and a plan for testing the backups. Determining the appropriate key generation policies Key generation policies allow the SO to centrally control and audit how encryption is performed.
SKM pre-installation checklists, for connecting to ELTAs Prepare to install and use the SKM system by recording the following information. If any information is missing, it will delay or prevent complete installation and functioning of the SKM system.
Table 3 ETLA Tape Library 1 device information Library identifier (for example, asset # or location) Library type (EML or ESL) Advanced Secure Manager License is installed? (y/n) IP address of the library Library client user name Client password defined? (y/n) Library is partitioned, if appropriate? (y/n) Library or Partition 11 key generation policy (KT, KP, or NE) Partition 21 key generation policy Partition 31 key generation policy Partition 41 key generation policy Partition 51 key generation policy Par
Table 4 ETLA Tape Library 2 device information Library identifier (for example, asset # or location) Library type (EML or ESL) Advanced Secure Manager License is installed? (y/n) IP address of the library Library client user name Client password defined? (y/n) Library is partitioned, if appropriate? (y/n) Library or Partition 11 key generation policy (KT, KP, or NE) Partition 21 key generation policy Partition 31 key generation policy Partition 41 key generation policy Partition 51 key generation policy Par
Table 5 ETLA Tape Library 3 device information Library identifier (for example, asset # or location) Library type (EML or ESL) Advanced Secure Manager License is installed? (y/n) IP address of the library Library client user name Client password defined? (y/n) Library is partitioned, if appropriate? (y/n) Library or Partition 11 key generation policy (KT, KP, or NE) Partition 21 key generation policy Partition 31 key generation policy Partition 41 key generation policy Partition 51 key generation policy Par
Table 6 SKM data Secure location is prepared? Rack space has been identified? Rack(s) is/are on the list of supported racks? Rack(s) contain sufficient power outlets (2 per node)? For appliance 1 Admin password defined? Cluster password defined? Local CA and Certificate information: Certificate Authority (CA) name CA common name Server certificate name Organization name Locality name State or province name Country name 44 SKM pre-installation survey and checklist, for connecting to ETLAs
E-mail address of SO Web interface port number for appliance 1 Fully qualified host name for appliance 1 For appliance 1, network port 1 IP address Subnet mask Default gateway For appliance 1, network port 2 (optional) IP address Subnet mask (same as port 1 if blank) Default gateway (same as port 1 if blank) For appliance 2 Admin password defined? Web interface port number Fully qualified hostname For appliance 2, network port 1 IP address Subnet mask Default gateway For appliance 2, network port 2 (optiona
SKM pre-installation survey and checklist, for connecting to ETLAs
B About this guide This guide provides information about: • Installing an HP StorageWorks Secure Key Manager • Configuring an HP StorageWorks Secure Key Manager • Administering security keys Intended audience This guide is intended for system administrators with knowledge of: • Basic computer system rack installation • Data security administration • Network configuration Related documentation The following documents and web sites provide related information: • HP StorageWorks Command View TL getting start
WARNING! Indicates that failure to follow directions could result in bodily harm or death. CAUTION: Indicates that failure to follow directions could result in damage to equipment or data. IMPORTANT: Provides clarifying information or specific instructions. NOTE: Provides additional information. Rack stability Rack stability protects personnel and equipment. WARNING! To • • • • • reduce the risk of personal injury or damage to equipment: Extend leveling jacks to the floor.
parts do not qualify for CSR. Your HP-authorized service provider will determine whether a repair can be accomplished by CSR. For more information about CSR, contact your local service provider. For North America, see the CSR website: http://www.hp.com/go/selfrepair Product warranties For information about HP StorageWorks product warranties, see the warranty information website: http://www.hp.