
Manual
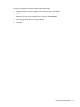
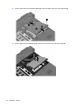
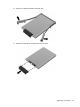
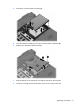
Table Of Contents
- Features
- Networking (select models only)
- Pointing devices and keyboard
- Multimedia
- Power management
- Setting power options
- Using external AC power
- Using battery power
- Displaying the remaining battery charge
- Inserting or removing the battery
- Charging a battery
- Maximizing battery discharge time
- Managing low battery levels
- Calibrating a battery
- Conserving battery power
- Storing a battery
- Disposing of a used battery
- Replacing the battery
- Testing an AC adapter
- Shutting down the computer
- Drives
- External devices
- External media cards
- Memory modules
- Security
- Protecting the computer
- Using passwords
- Using Computer Setup security features
- Using antivirus software
- Using firewall software
- Installing critical security updates
- Using HP ProtectTools Security Manager (select models only)
- Installing a security cable
- Software updates
- MultiBoot
- Management
- Computer Setup
- Backing up and recovering
- Index
Replacing a hard drive
Your computer is equipped with either a 1.8-inch hard drive or a 2.5-inch hard drive, or your computer
may have 2 hard drives (1.8-inch and 2.5-inch). The replacement procedures vary, depending on the
type of hard drive(s) installed on the computer.
CAUTION: To prevent information loss or an unresponsive system:
Shut down the computer before removing the hard drive from the hard drive bay. Do not remove the
hard drive while the computer is on, in Standby, or in Hibernation.
If you are not sure whether the computer is off or in Hibernation, turn the computer on by briefly pressing
the power button. Then shut down the computer through the operating system.
Replacing a 1.8-inch hard drive
To remove a 1.8-inch hard drive:
1. Save your work.
2. Shut down the computer and close the display.
3. Disconnect all external hardware devices connected to the computer.
4. Unplug the power cord from the AC outlet.
5. Turn the computer upside down on a flat surface, with the battery bay toward you.
6. Remove the battery from the computer.
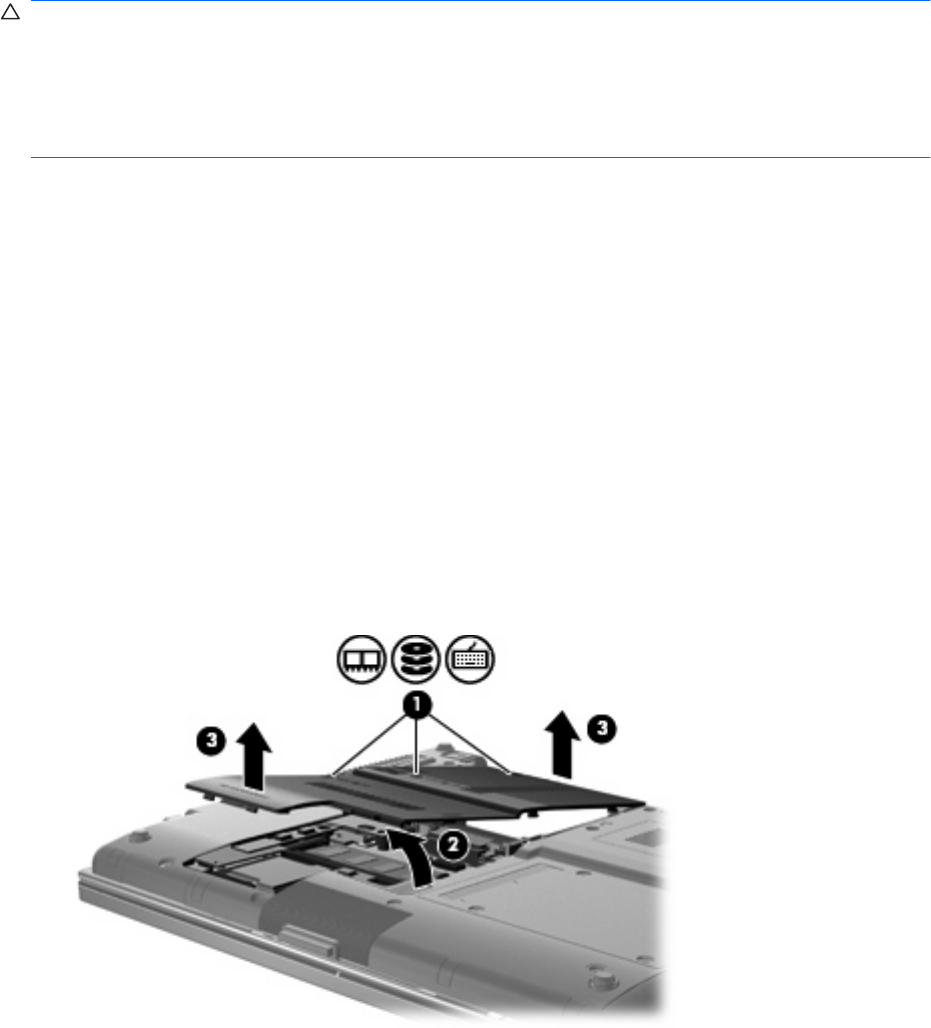
7. Loosen the 3 hard drive cover screws (1).
8. Using your finger or a screwdriver, lift the edge of the hard drive cover (2) to release it, and then
lift it away from the computer (3).
9. Remove the 2 hard drive shield screws (1).
Replacing a hard drive 73