
Administrator's Guide


2 Cloning the active system image
This chapter describes how to use the drd clone command to clone the active system image. It
also describes where the cloned image is saved.
NOTE: You must be logged in as root to use any DRD command.
2.1 The active system image
The drd clone command creates a bootable disk that is a copy of the volume group containing
the root file system (/). The source of the drd clone command is the LVM volume group or VxVM
disk group containing the root (/) and boot (/stand) file systems. For a system with an LVM root,
the source does not need to reside on a single physical disk. For a system with a VxVM root, all
volumes in the root disk group must reside on every physical disk in the root group. Thus, each
disk must be a mirror of every other disk. The target must be a single physical disk large enough
to hold all volumes in the root group. In addition, a mirror for the target may be specified. For
more details, see the Dynamic Root Disk and MirrorDisk/UX white paper, available at http://
www.hp.com/go/drd-docs.
Because the drd clone operation clones a single group, systems with file systems to be patched
must not reside in multiple volume groups. (For example, if /stand resides in vg00 and /var
resides in vg01, the system is not appropriate for DRD.)
For additional information about source and target disks, see the drd-clone (1M) manpage (man
drd-clone) and the Dynamic Root Disk: Quick Start & Best Practices white paper, available at
http://www.hp.com/go/drd-docs.
NOTE:
After creating a DRD clone, your system has two system images—the original and the cloned
image. Throughout this document, the system image that is currently in use is called the active
system image. The image that is not in use is called the inactive system image.
2.2 Locating disks
The target of a drd clone operation must be a single disk or SAN LUN that is write-accessible
to the system and not currently in use. Depending on your HP-UX operating system, refer to one
of the following sections:
• Locating Disks on HP-UX 11i v2
• Locating Disks on HP-UX 11i v3
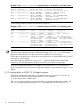
2.2.1 Locating disks on HP-UX 11i v2 systems
To help find and select the target disk on an HP-UX 11i v2 system, you can find out what disks are
on the system with the ioscan command:
# /usr/sbin/ioscan -fnkC disk
The ioscan command displays a list of system disks with identifying information, location, and
size. On a PA-RISC system, the output looks similar to Example 2-1.
2.1 The active system image 9