
Installation Guide

HP VSD Installation Using QCow2 Image 13
mysql -e “update mysql.user set password=PASSWORD <NEW PASSWORD>
WHERE USER=’ROOT’; FLUSH PRIVILEGES;”
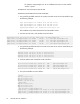
To change the root password, on each node, run:
mysql -uroot -p<current password> -e “update mysql.user set
password=PASSWORD <new password> where user =’root’; flush privileges;”
HP VSD Installation Using QCow2 Image
The following instructions are for a High Availability installation. For a standalone installation,
use the same instructions to install one HP VSD on a single node.
1.
Set Up Appliance VMs
2. Connect to Appliance VMs
3. Configure Networking
4. Configure DNS Server
5. Configure NTP Server
6.
Install HP VSD using qcow2
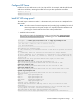
Set Up Appliance VMs
1. Unzip all the HP VSD tar files to a temporary location.
2. If you do not already have virt-install on your hypervisor(s), run this command to put it in:
yum install virt-install
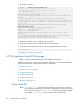
3. Copy the HP VSD qcow2 image to the KVM hypervisor image location <TTY>/var/lib/
libvirt/images/ on each hypervisor.
4. Create appliance VMs.
In the example below, a VM is created for each of four HP VSD nodes. If you are doing a
standalone installation, create only
myh1.
Note: “listen=0.0.0.0” results in KVM responding to VNC connection requests on all IP
interfaces. Depending on your network configuration, this may be a security issue.
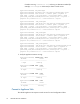
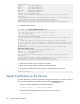
Table1:HPVSDInstallationOverview
qcow2 ISO
Set Up Appliance VMs Set Up VM for ISO
Extract and Mount ISO Image
Connect to Appliance VMs
Configure Networking
Configure DNS Server
Configure NTP Server
Install HP VSD using qcow2 Install HP VSD Using ISO