
User Manual


Table Of Contents
- Product Features
- Setting Up and Using the Monitor
- Installing the Stand
- Rear Components
- Connecting the Cables
- Front Panel Controls
- Adjusting the Monitor
- Turning on the Monitor
- HP Watermark and Image Retention Policy
- Connecting USB Devices
- Removing the Monitor Stand
- Mounting the Monitor
- Locating the Serial Number and Product Number
- Locating the Information Card
- Installing a Cable Lock
- Power Saving Features
- Finding More Information
- Technical Specifications
Connecting the Cables
1. Place the monitor in a convenient, well-ventilated location near the computer.
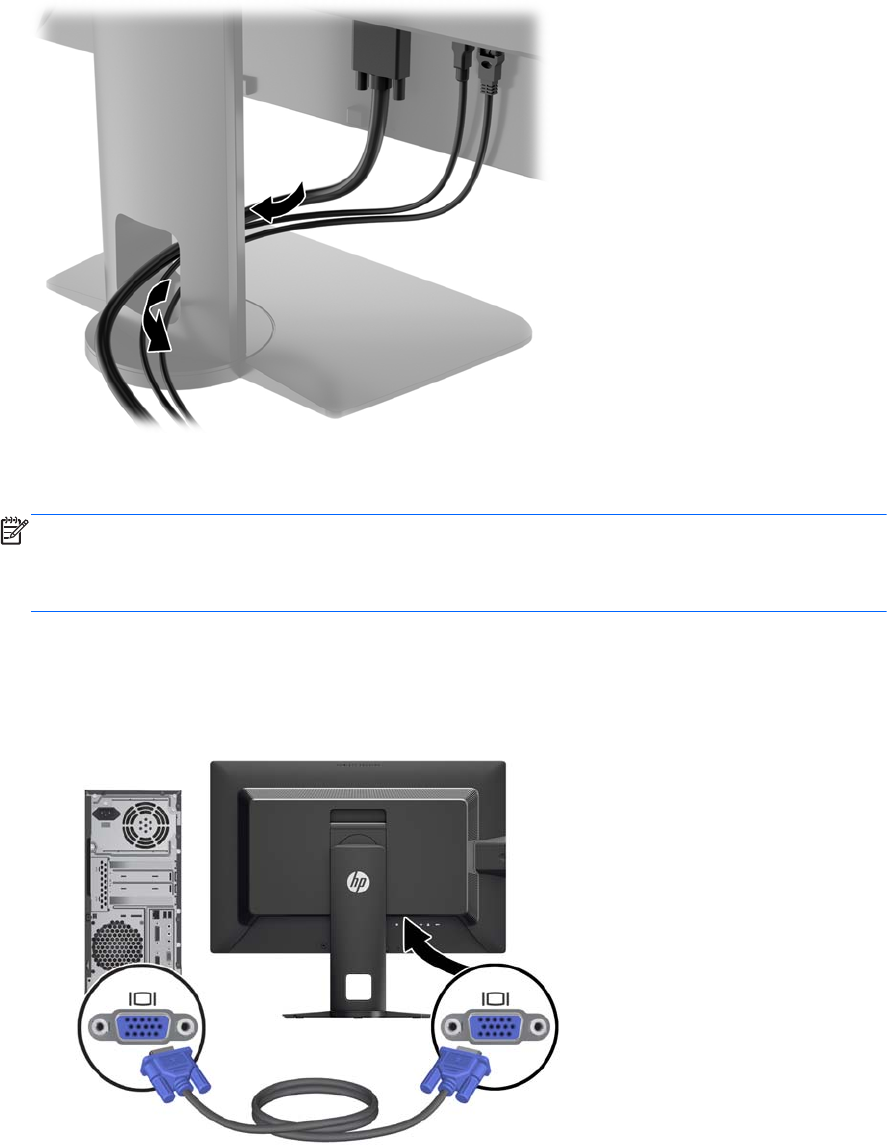
2. Before connecting the cables, route the cables through the cable routing hole in the center of the
stand.
3. Depending on your model and configuration, connect either the DisplayPort, DVI, HDMI, or VGA
video cable between the PC and the monitor.
NOTE: The monitor is capable of supporting either analog or digital input. The video mode is
determined by the video cable used. The monitor will automatically determine which inputs have
valid video signals. The inputs can be selected by pressing the Input button on the front panel or
through the On-Screen Display (OSD) feature by pressing the Menu button.
●
For analog operation, connect the VGA signal cable to the VGA connector on the rear of
the monitor and the other end to the VGA connector on the computer (cable provided with
select models).
6 Chapter 2 Setting Up and Using the Monitor