
HP Designjet T2500 eMFP - Image-quality troubleshooting guide

Actions
1. Clean the original and the scanner’s glass plates, then scan again.
2. If the problem persists, recalibrate the scanner as indicated in
Scanner maintenance on page 39. Make
sure you clean the maintenance sheet before calibrating the scanner, and check that the maintenance
sheet is not damaged (if so, call HP support and ask for a new maintenance sheet). Re-scan your
original after the calibration is completed.
3. If the problem persists, see
Clipping in dark or light areas on page 26.
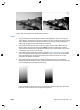
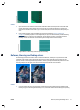
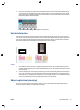
Vertical red and green bands over white or black background
If the scanner has not been calibrated for a long period of time, or if the last calibration failed, you can
sometimes see defects like the following. Please note the black arrow indicating the scanning direction in this
example: original on the left, scanned image on the right.
Actions
1. Clean and calibrate the scanner as indicated in
Scanner maintenance on page 39. If the calibration
failed, proceed as stated in
Calibrate the scanner on page 42. However, if the calibration ended
correctly, scan your original again and check that the colored vertical bands have disappeared.
2. If the problem persists, call HP support and report “vertical red/green bands after calibration”.
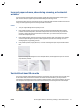
The stop-start effect
Your product is a complex machine, which may be working on several tasks at the same time. If you are trying
to scan while printing or processing a job in the printer queue, you may find that the scanner stops for a while
and then restarts. Although this is normal behavior, in some cases the scanned image may have defects as a
result of this stop-start operation.
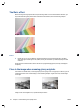
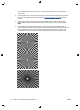
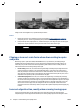
To illustrate this effect, here is an example of an original image.
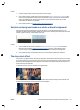
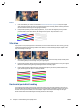
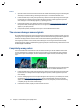
The two images below are examples of the stop-start effect when the above image is scanned. Please note
the black arrow indicating the scanning direction in these examples.
ENWW Vertical red and green bands over white or black background 29