S1922/S1922a and S2022a LCD Monitor User Guide
© 2010 Hewlett-Packard Development Company, L.P. Microsoft, Windows, and Windows Vista are either trademarks or registered trademarks of Microsoft Corporation in the United States and/or other countries. The only warranties for HP products and services are set forth in the express warranty statements accompanying such products and services. Nothing herein should be construed as constituting an additional warranty. HP shall not be liable for technical or editorial errors or omissions contained herein.
About This Guide This guide provides information on setting up the monitor, installing drivers, using the on-screen display menu, troubleshooting and technical specifications. WARNING! Text set off in this manner indicates that failure to follow directions could result in bodily harm or loss of life. CAUTION: Text set off in this manner indicates that failure to follow directions could result in damage to equipment or loss of information.
Table of Contents About This Guide 1. Product Features HP LCD Monitors . . . . . . . . . . . . . . . . . . . . . . . . . . . . . . . . . . . . . . . . . . . . . . . . . . . . . . . . . . . . . . . . . . . . . . . . . . . . . . . . 1 2. Safety and Maintenance Guidelines Important Safety Information . . . . . . . . . . . . . . . . . . . . . . . . . . . . . . . . . . . . . . . . . . . . . . . . . . . . . . . . . . . . . . . . . . . . . . . Safety Precautions . . . . . . . . . . . . . . . . . . . . . . . . . .
A. Troubleshooting Solving Common Problems . . . . . . . . . . . . . . . . . . . . . . . . . . . . . . . . . . . . . . . . . . . . . . . . . . . . . . . . . . . . . . . . . . . . . . . . Getting Support from hp.com . . . . . . . . . . . . . . . . . . . . . . . . . . . . . . . . . . . . . . . . . . . . . . . . . . . . . . . . . . . . . . . . . . . . . . Preparing to Call Technical Support . . . . . . . . . . . . . . . . . . . . . . . . . . . . . . . . . . . . . . . . . . . . . . . . . . . . . . . . . . . . .
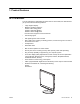
1.
2. Safety and Maintenance Guidelines Important Safety Information A power cord is included with the monitor. If another cord is used, use only a power source and connection appropriate for this monitor. For information on the correct power cord set to use with the monitor, refer to the "Connecting the Power Cable" . WARNING! To reduce the risk of electric shock or damage to the equipment: • Do not disable the power cord grounding feature. The grounding plug is an important safety feature.
• Do not allow anything to rest on the power cord. Do not walk on the cord Maintenance Guidelines To enhance the performance and extend the life of the monitor: • Do not open the monitor cabinet or attempt to service this product yourself. Adjust only those controls that are covered in the operating instructions. If the monitor is not operating properly or has been dropped or damaged, contact an authorized HP dealer, reseller, or service provider.
3. Setting Up the Monitor Unpacking the Monitor 1. Unpack the monitor. Make sure all contents are included. Store the packing box. 2. Turn off the computer and other attached devices. 3. Prepare a flat area to assemble the monitor. You may need a flat, soft, protected area for placing the monitor screen-down while preparing it for installation. Installing the Monitor You can install the monitor on a desktop or wall-mount it. Place the monitor in a convenient, well-ventilated location near your computer.
3. Press the base into the column until it locks in position. Figure 3-2 Attaching the Base 4. Lift the monitor to an upright position and place on a flat, stable surface. Figure 3-3 Monitor in upright position Preparing the monitor for wall-mounting 1. Check the stability of the wall-mounting fixture. WARNING! To reduce the risk of personal injury or of damage to the equipment, check that the wall-mounting fixture is adequately installed and secured before attaching the monitor.
5. Slide the base away from the bottom of the monitor. Figure 3-5 Sliding the base away from the monitor 6. Remove the screws on the back of monitor. Figure 3-6 Removing the screws from the back of the monitor 7. Four threaded holes are exposed. These holes are for screws to attach the swing arm or other mounting fixture to the back of the monitor. 8. Follow the instructions included with the mounting fixture to ensure that the monitor is safely attached.
Connecting Monitor Cables Connecting the VGA (Analog) Cable or DVI-D (Digital) Cable Use a VGA video cable or a DVI-D cable to connect your monitor to your computer. To use DVI, you must have a DVI-compliant graphic card. Connectors are located on the back of the monitor. Be sure the computer and monitor are turned off and unplugged. 1. To connect the VGA cable Connect one end of the VGA video cable to the back of the monitor and the other end to the VGA video connector on the computer. 2.
High-Bandwidth Digital Content Protection (HDCP) (Available on Select Models) Your monitor supports HDCP and can receive high-definition content. High-definition content is available in many sources, such as Blue-ray Disc devices or HDTV air or cable broadcasts. If you do not have an HDCP-enabled monitor, you will see a blank screen or a lower resolution picture when playing high-definition protected content. Your computer graphics card and monitor must both support HDCP to display protected content.
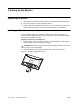
Adjusting the Tilt For optimal viewing, adjust the screen tilt to your own preference, as follows: 1. Face the front of the monitor and hold the base so that you do not topple the monitor while changing the tilt. 2. Adjust the tilt by moving the top edge of the monitor either toward or away from you, without touching the screen.
4. Operating the Monitor CD Software and Utilities The CD that is included with this monitor contains drivers and software that you can install on your computer. Installing Drivers If you determine that you need to update the drivers, you can install the monitor driver INF and ICM files from the CD, or download them from the Internet. Installing the monitor driver software from the CD To install the monitor driver software from the CD: 1. Insert the CD in your computer CD drive. The CD menu appears. 2.
Front-Panel Controls The monitor buttons are located on the bottom of the front panel Figure 4-1 Front-panel control buttons 11 No. Icon Description 1 Power Turns the monitor on or puts it in standby or sleep mode. The Power button is located on the bottom or front of the monitor depending on the model. 2 Menu Opens, selects, or exits the OSD menu. 3 + Navigates forward through the OSD menu and increases adjustment levels.
Using the On-Screen Display (OSD) Main Menu Item Luminance Main Menu Icon 1st Sub Menu Item 2nd Sub Menu Item Contrast N/A Contrast from Digital-register. Each step will increase/ decrease value by 1 0-100 Recall Warm Contrast Value Brightness N/A Backlight Adjustment Each step will increase/ decrease value by 1 0-100 Recall Warm Brightness Value Eco Mode N/A Picture Adjustment, Brightness = 90, Contrast = 50.
Main Menu Item Image Setup Main Menu Icon 1st Sub Menu Item 2nd Sub Menu Item Clock N/A Description Adjust picture Clock to reduce Vertical-Line noise. Adjust Range Reset Value 0-100 Do Auto Configure Each step will increase/ decrease value by 1 13 Phase N/A Adjust Picture Phase to reduce Horizontal-Line noise. 0-100 Do Auto Configure H. Position N/A Adjust the horizontal position of the picture. 0-100 Do Auto Configure V. Position N/A Adjust the vertical position of the picture.
Main Menu Item Color Temp. Main Menu Icon Sub Menu Item Adjust Range Description Warm Recall Warm Color Temperature. N/A Normal Recall Normal Color Temperature. N/A Cool Recall Cool Color Temperature. N/A sRGB (for select models with sRGB function) Recall sRGB Color Temperature. N/A Red Red Gain from Digitalregister. 0-100 Reset Value The Color Temperature will be set to Warm. The User R/G/B value (default is 50) will can be Modified by Reset function in user mode.
Main Menu Item Main Menu Icon OSD Setup Sub Menu Item H. Position Description Adjust the horizontal position of the OSD. Adjust Range Reset Value 0-100 Recall 50 Value 0-100 Recall 50 Value 5-100 Recall 10 Value Each step will increase/ decrease value by 5 V. Position Adjust the vertical position of the OSD. Each step will increase/ decrease value by 5 Timeout Adjust the OSD timeout. Each step will increase/ decrease value by 5 Language Set OSD display language to English.
Main Menu Item Extra Main Menu Icon Sub Menu Item Adjust Range Description Input Select (Available on Select Models) Select video input signal. DDC/CI Select DDC/CI on or off D-SUB DVI Reset Value Note: AnalogOnly Model no "Input Select" item. On Off Reset Information ENWW Clear each old status of Autoconfiguration and set the color temperature to Warm. Yes Do not execute reset, return to main menu. No Show the resolution, H/V frequency and input port of current input timing.
Selecting Video Input Connectors The input connectors are: • VGA connector (analog) • DVI-D connector (digital) (Select Models) The monitor automatically determines which inputs have valid video signals, and displays the image. You can connect the VGA cable, the DVI-D cable, or both. If both cables are installed, the default input selection is DVI.The source of input can be switched using the Input Select option in the OSD menu.
Power-Saver Feature When the monitor is in normal operating mode, the Power light is blue and the monitor uses the normal watts of power. For power usage, refer to "Technical Specification" (Appendix B). The monitor also supports a power-saver mode that is controlled by the computer. When the monitor is in the reduced-power state, the monitor screen is blank, the backlight is off, and the Power light is amber. The monitor uses minimum power.
A. Troubleshooting Solving Common Problems The following table lists possible problems, the possible cause of each problem, and the recommended solutions: Problem Solution Problem & Question 19 Possible Solutions Power LED Is Not ON • Make sure the power button is ON and the Power Cord is properly connected to a grounded power outlet and to the monitor. No Plug & Play • In order for the Plug & Play feature of the monitor to work, you need a Plug & Play compatible computer & video card.
Getting Support from hp.com Before you contact customer service, refer to HP Technical Support at: http://www.hp.com/support Select your country/region, and then follow the links to the support page for your monitor. Preparing to Call Technical Support If you cannot solve a problem by using the troubleshooting tips in this section, you might have to call technical support. For technical support contact information, refer to the printed documentation included with the monitor.
B. Technical Specifications All specifications represent the typical specifications provided by HP's component manufacturers; actual performance may vary either higher or lower. HP LCD Monitors Face treatment: Glare polarizer with hard coating Input terminal: VGA connector DVI-D 24-pin D-type connector (select models) Table B-1 Model S1922 Specifications: Display Type: TFT LCD active matrix Viewable Image Size 47 cm (18.5 in.) diagonal Tilt -4° (+/-2)~+18° (+/-2) Maximum Weight (unpacked) 3.2 kg(7.
Table B-2 Model S1922a Specifications: Display Type: TFT LCD active matrix Viewable Image Size 47 cm (18.5 in.) diagonal Tilt -4° (+/-2)~+18° (+/-2) Maximum Weight (unpacked) 3.2 kg(7.04 lbs) Dimensions (h x w x d) 340.95 mm x 440.3 mm x 180 mm 13.5 x 17.4 x 7 in Maximum Graphics Resolution 1366 x 768 @ 60 Hz Optimum Graphics Resolution 1366 x 768 @ 60 Hz analog mode Text Mode 720 x 400 Dot Pitch 0.3 x 0.3 mm/0.01 x 0.
Table B-3 Model S2022a Specifications: Display Type: TFT LCD active matrix Viewable Image Size 50.8 cm (20 in.) diagonal Tilt -4° (+/-2)~+18° (+/-2) Maximum Weight (unpacked) 3.4 kg(7.48 lbs) Dimensions (h x w x d) 355.7 mm x 472.8 mm x 180 mm 14 x 18.6 x 7 in Maximum Graphics Resolution 1600 x 900 @ 60 Hz Optimum Graphics Resolution 1600 x 900 @ 60 Hz analog mode Text Mode 720 x 400 Dot Pitch 0.2768 x 0.2768 mm/0.01 x 0.
Preset Video Modes The monitor automatically recognizes many preset video input modes that will appear properly sized and centered on the screen. Table B-4 Factory Preset Video Input Modes, S1922/S1922a Item Preset Resolution Horizontal Frequency (kHz) Vertical Frequency (Hz) 1 640 x 480 31.47 59.94 2 720 x 400 31.47 70.09 3 800 x 600 37.88 60.32 4 1024 x 768 48.36 60.00 5 1280 x720 45.00 60.00 6 1280 x 960 60.00 60.00 7 1280 x 1024 63.98 60.02 8 1366 x768 47.71 59.
LCD Monitor Quality and Pixel Policy Your LCD Monitor uses high-precision technology, manufactured according to high standards, to help guarantee trouble-free performance. Nevertheless, the display may have cosmetic imperfections that appear as small bright or dark spots. This is common to all LCD displays used in products supplied by all vendors and is not specific to your LCD Monitor. These imperfections are caused by one or more defective pixels or subpixels.
C. Agency Regulatory Notices Federal Communications Commission Notice This equipment has been tested and found to comply with the limits for a Class B digital device, pursuant to Part 15 of the FCC Rules. These limits are designed to provide reasonable protection against harmful interference in a residential installation.
Declaration of Conformity for Products Marked with the FCC Logo (United States Only) This device complies with Part 15 of the FCC Rules. Operation is subject to the following two conditions: 1. This device may not cause harmful interference. 2. This device must accept any interference received, including interference that may cause undesired operation. For questions regarding the product, contact: Hewlett Packard Company P. O.
Japanese Notice Korean Notice Power Cord Set Requirements The monitor power supply is provided with Automatic Line Switching (ALS). This feature allows the monitor to operate on input voltages between 100−120V~ or 200− 240V. The power cord set (flexible cord or wall plug) received with the monitor meets the requirements for use in the country where you purchased the equipment.
Japanese Power Cord Requirements For use in Japan, use only the power cord received with this product. CAUTION: Do not use the power cord received with this product on any other products. Product Environmental Notices Materials Disposal This HP product contains mercury in the fluorescent lamp in the display LCD that might require special handling at end-of-life. Disposal of this material can be regulated because of environmental considerations.
Restriction of Hazardous Substances (RoHS) A Japanese regulatory requirement, defined by specification JIS C 0950, 2005, mandates that manufacturers provide Material Content Declarations for certain categories of electronic products offered for sale after July 1, 2006. To view the JIS C 0950 material declaration for this product, visit http://www.hp.
Turkey EEE Regulation In Conformity with the EEE Regulation EEE Yönetmeliğine Uygundur ENWW 31