
User's Manual


Table Of Contents
- Product Features
- Safety and Maintenance Guidelines
- Setting Up the Monitor
- Installing the Monitor on the Stand
- Installing an HP Ultra-slim Desktop (USDT) on the Stand
- Installing an HP Thin Client on the Stand
- Adjusting the Monitor
- Turning on the Monitor
- Removing the Computer from the Stand
- Removing the Monitor from the Stand
- Monitor Mounting Alternatives
- Locating the Rating Labels
- Operating the Monitor
- Troubleshooting
- Technical Specifications
- Agency Regulatory Notices
- LCD Monitor Quality and Pixel Policy
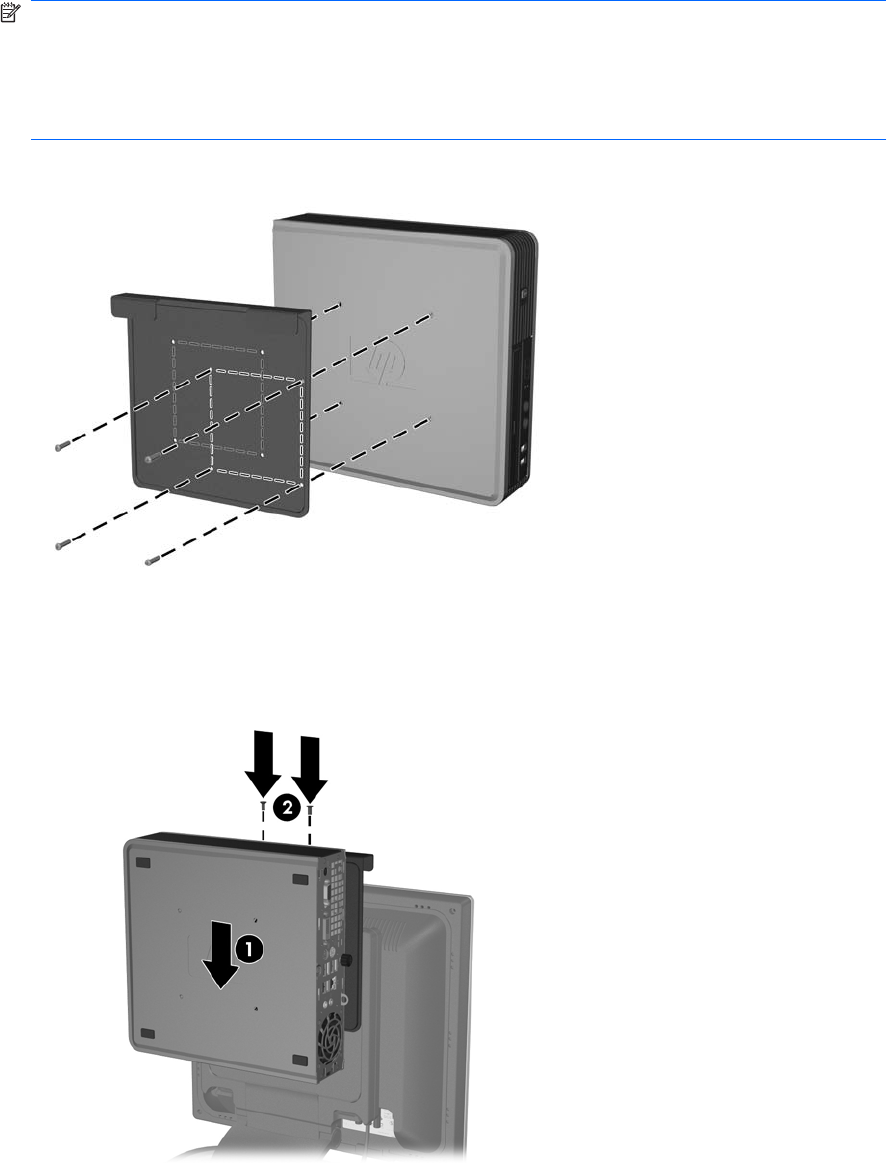
2. Use the four screws provided to install the computer mounting bracket on the USDT computer.
NOTE: There are two sets of screw holes on the computer mounting bracket. Use the four holes
that are offset to install the USDT.
Be sure to install the computer mounting bracket on the USDT so that the rear ports on the USDT
are toward the right when viewed from the rear of the monitor stand. (The rear ports should be
toward the left when viewed from the front of the monitor.)
Figure 3-5 Installing the Computer Mounting Bracket on the USDT
3. Slide the computer mounting bracket/USDT computer onto the stand (1) and reinstall the two
screws on top of the bracket (2).
Figure 3-6 Sliding the USDT onto the Stand
4. Thread the VGA cable from the monitor, along with the circular end of the computer power cable
and any other cables that will connect to the rear of the computer (such as keyboard and mouse
8 Chapter 3 Setting Up the Monitor ENWW